 User Manual Identity Qualification Platform (IQP) - Backoffice Management
GLOSSARY
IQP process: all steps that allow onboarding.
Item: the individual element that can be processed in IQP Backoffice Management; it can be considered a ‘container’ of information related to the process being performed.
Dossier: equivalent to the item.
Job queue: the set of items present in IQP Backoffice Management for the selected IQP processes; the name of the job queue containing the item depends on the IQP process used for onboarding.
The items in each queue are divided into:
IQP Backoffice is an InfoCert application that allows operators to view, accept and manage end-user identification. Operators are typically assigned to work on queues. There are three types of queues:
Within the application, for every case (or item) accepted, the operator can:
The application grants access based on predefined roles. Role-based access control determines which users have access to the product and the tasks they can perform, allowing the company to manage the organization of work more flexibly.
The following are the roles in the IQP backoffice:
To access IQP Backoffice, the user connects to https://iqp.infocert.it/login using login credentials that are granted by InfoCert during project definition.
The InfoCert application supports the following browsers:
When the application is launched, the home page is displayed, containing:
"User management" (User profile; Arrow to the right of the image; Queue selection filter);
"Queue management" (In progress; Inbox; Archive);
"Top section with filters";
"Central section with item queues" (Item list; Accepting an item);
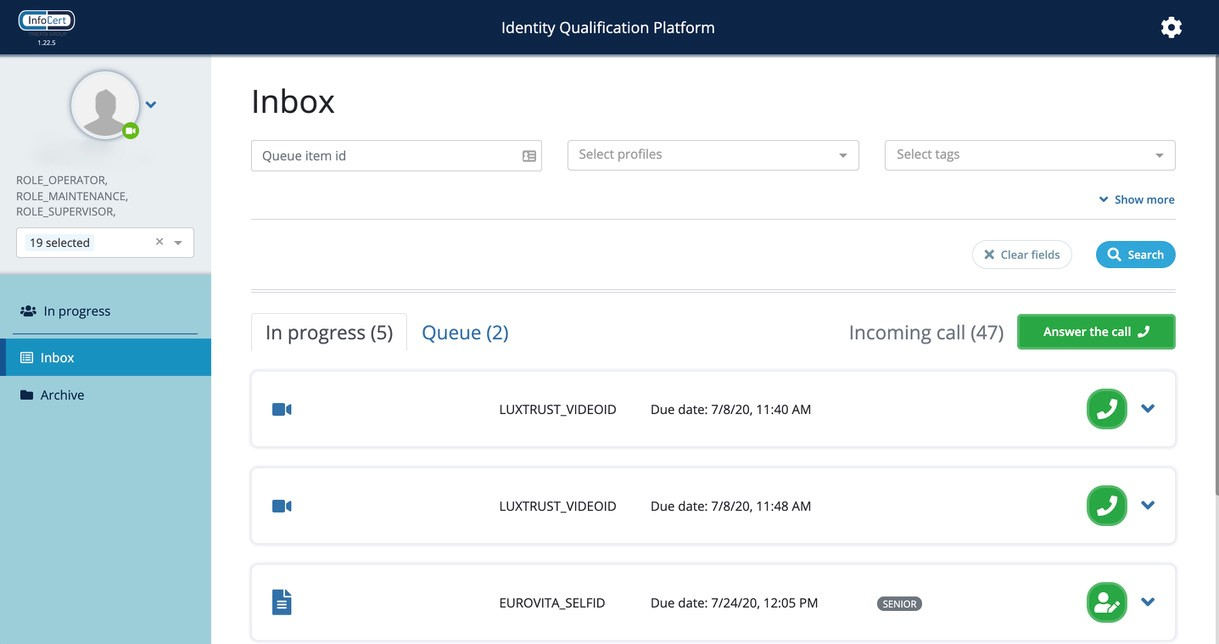
The side menu on the left is divided into “User Management” and “Queue Management”
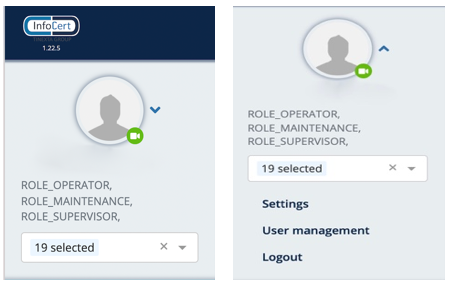
The "User Management" section shows:
the user profile, with the operator’s name, position and image (*)
the arrow to the right of the image, which opens a section containing (User data and language “Settings”; “User management”; “Logout”);
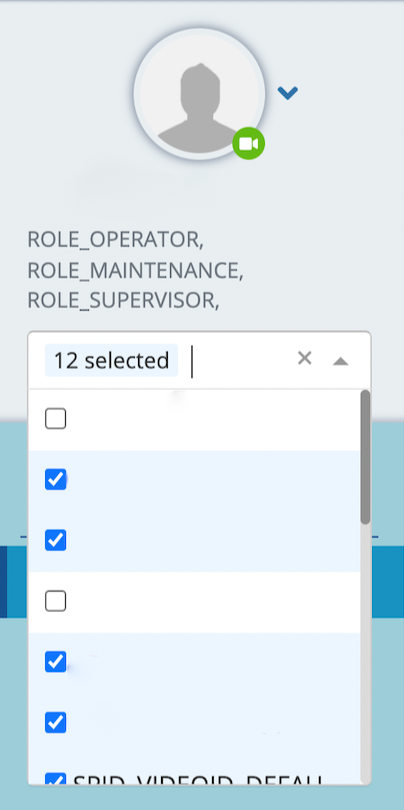
the filter to select the queues the operator wants to process;
(*) image entry is currently unavailable.
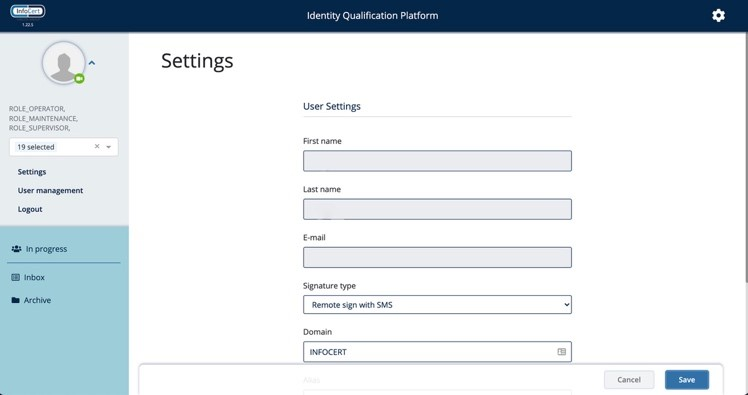
To access the settings, click the arrow to the right of the image and choose “Settings”.
The page includes:
After making changes, click on Save to save the modified values, or click on "Cancel" to cancel the changes and keep the previous values.
Open the Select Profiles drop-down menu below the operator info to select the queues to process.
The “Queue Management” section includes:
The “Inbox” section is displayed by default at login, and contains:
“Queue” displays items requiring offline or in-person identification and that have not yet been assigned to an operator. The total number of “queued” items is also displayed. The items are sorted by creation date (FIFO logic).
“In progress” displays items that have been assigned to an operator and are being processed. The total number of items “In progress” is also displayed. The items are sorted by creation date (FIFO logic).
“Incoming call” displays items requiring video identification that have not yet been assigned to an operator. The total number of items awaiting processing is also displayed.
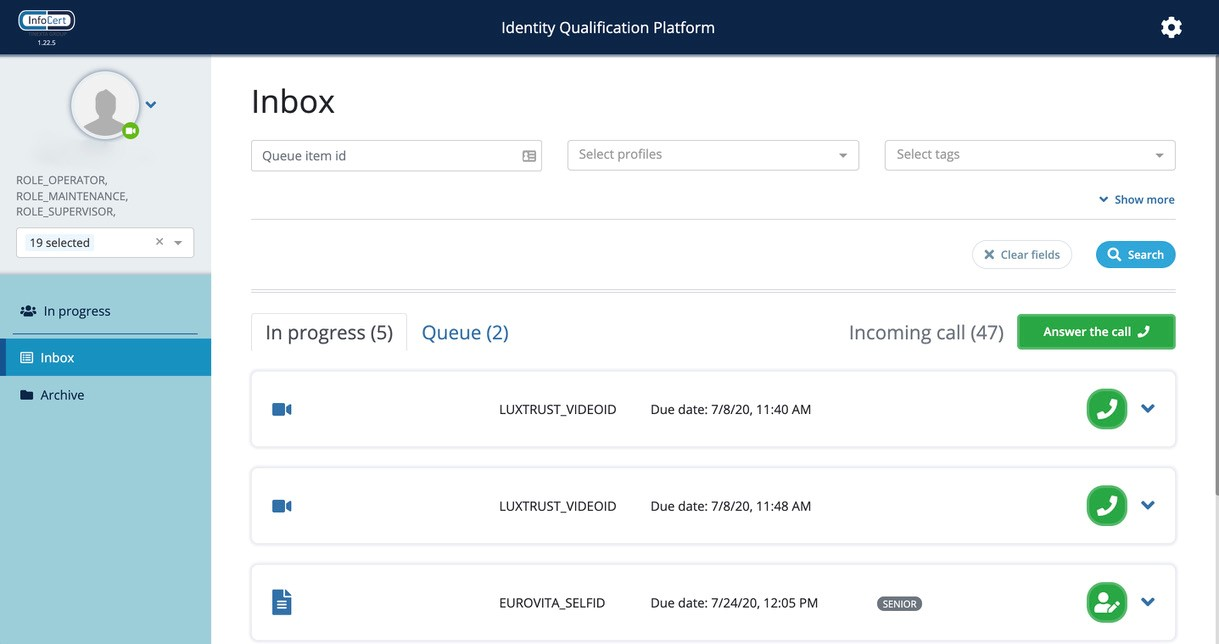
In the “Inbox” section, both operators and the supervisor can use the following filters:
Filters can be used to select items. Several filters can be used at the same time to refine the search.

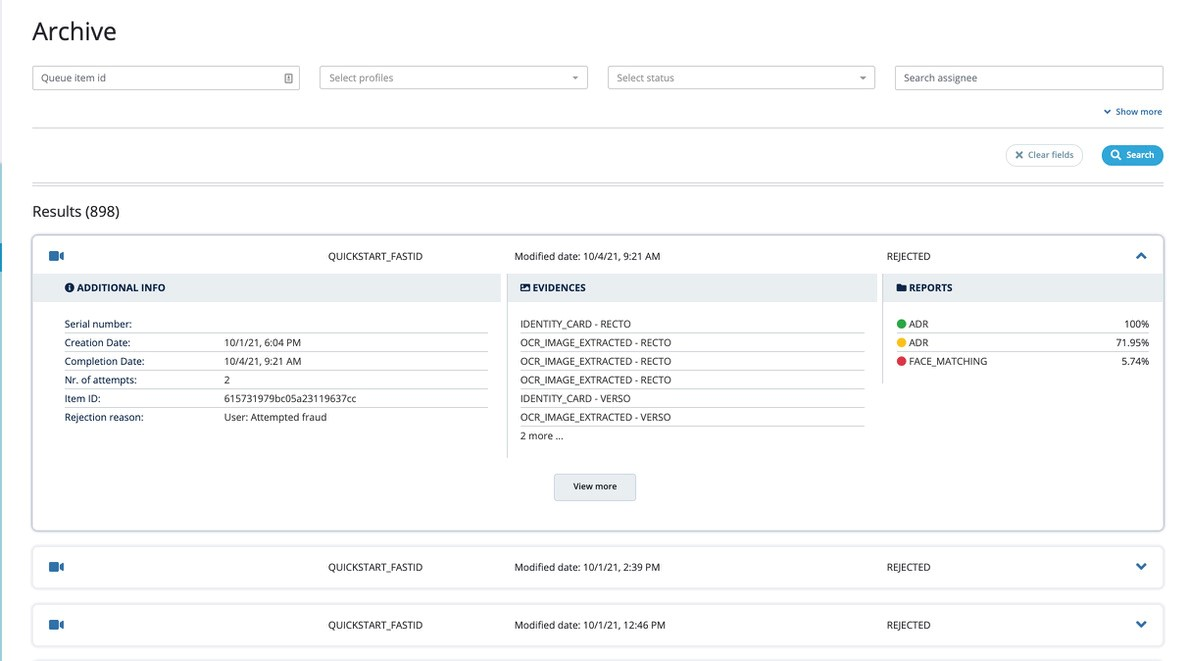
The “Archive” section contains completed items, both those for which identification has been accepted and those rejected by the operator. The “Archive” section will display only items that the operator has closed. The supervisor can view all of the items linked to the queues for which the supervisor is responsible.
Items are sorted by completion date, starting with the most recent.
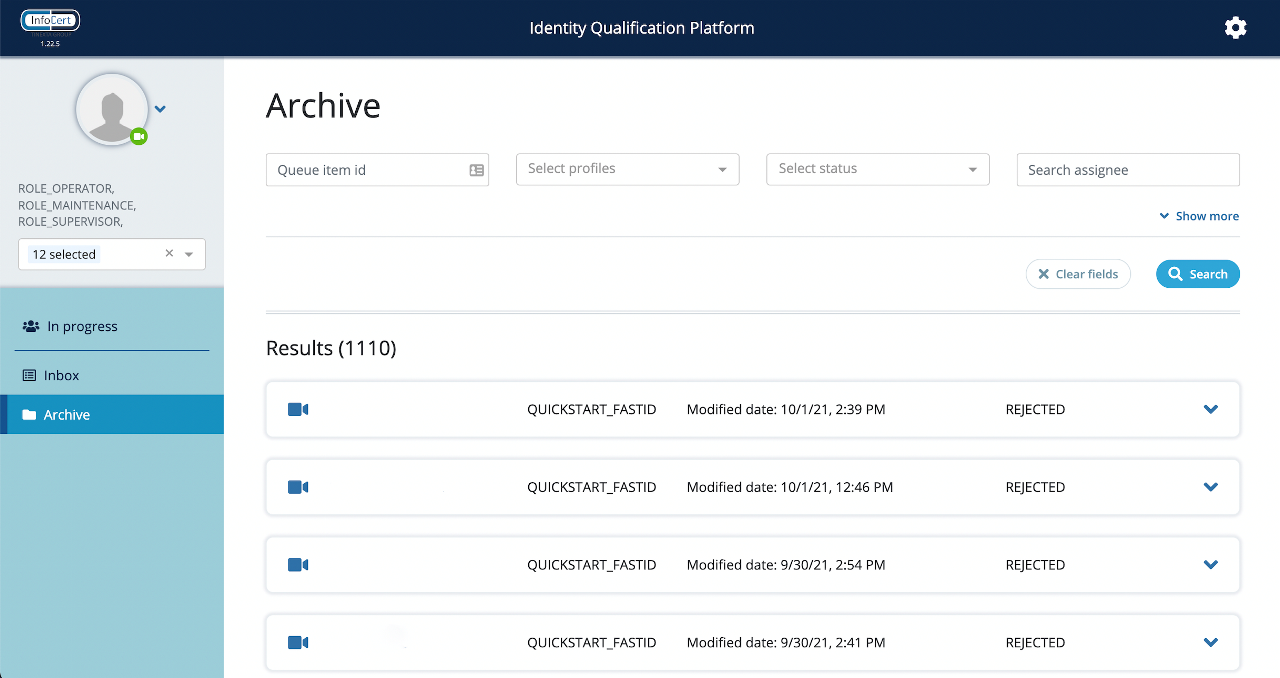
In the “Archive” section, operators can use the following filters:
The supervisor will also see the filter:
The “In progress” section will be visible only to users with a supervisor role. The “In progress” section contains items that have been assigned to operators but have not yet been completed. For each individual item, the supervisor can view details, a summary of the data, available evidence and the reports returned from the IQP process during onboarding. Items are sorted by creation date (from oldest to newest).
In the “In progress” section, the supervisor can use the following filters:
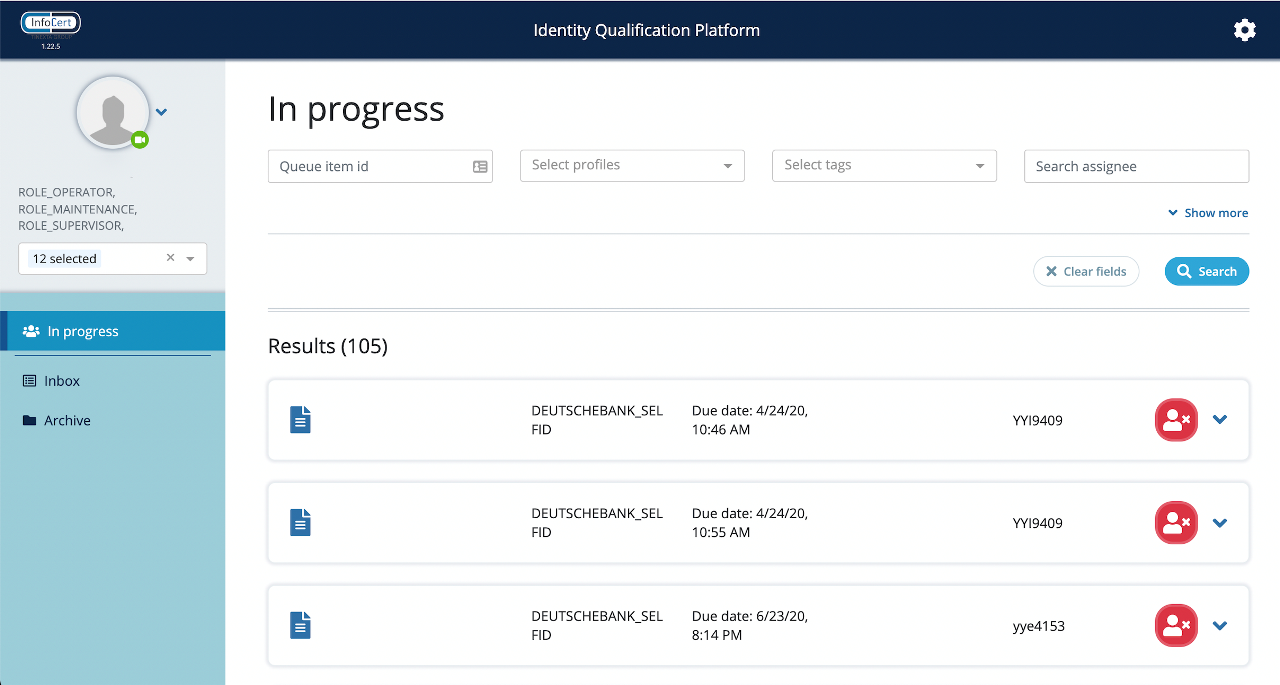
“Queue item id”: to search for items by their id. The operator can search by entering the first few characters of the ID code (starting with the first character) or the entire code. Click on “Search” to start the search.
“Select profiles”: to select a subset of previously selected profiles using the functions present in the menu on the left-hand side. Click on the arrow to display the list of available profiles. To select one profile, click on the profile to highlight it, then click outside the selection box to confirm. To select multiple profiles, click on each; the selected profiles are highlighted. To deselect a profile, click on the highlighted profile so that it turns white, then click outside the selection box to confirm. If you delete all profiles from this filter, the “Inbox” section will show all the profile items selected in the menu on the left-hand side.
“Select tags”: to select items having the indicated tag or tags. Select tags in the same way as you select profiles.
“Select status”: to filter items by completion status. Select statuses in the same way as you select profiles.
“Search assignee”: to search for items by the user who worked on the identification item. The supervisor can search by assignee by entering all or part of their username. Click on “Search” to start the search.
The central part of the page shows items that are queued or in progress, in their respective tabs.
The following is displayed for each item:
There is also an icon identifying items that require offline, in-person or video identification.
Click on the right arrow in the item box to open additional item information, with a summary of the data, available evidence and the reports returned by the IQP process during onboarding.
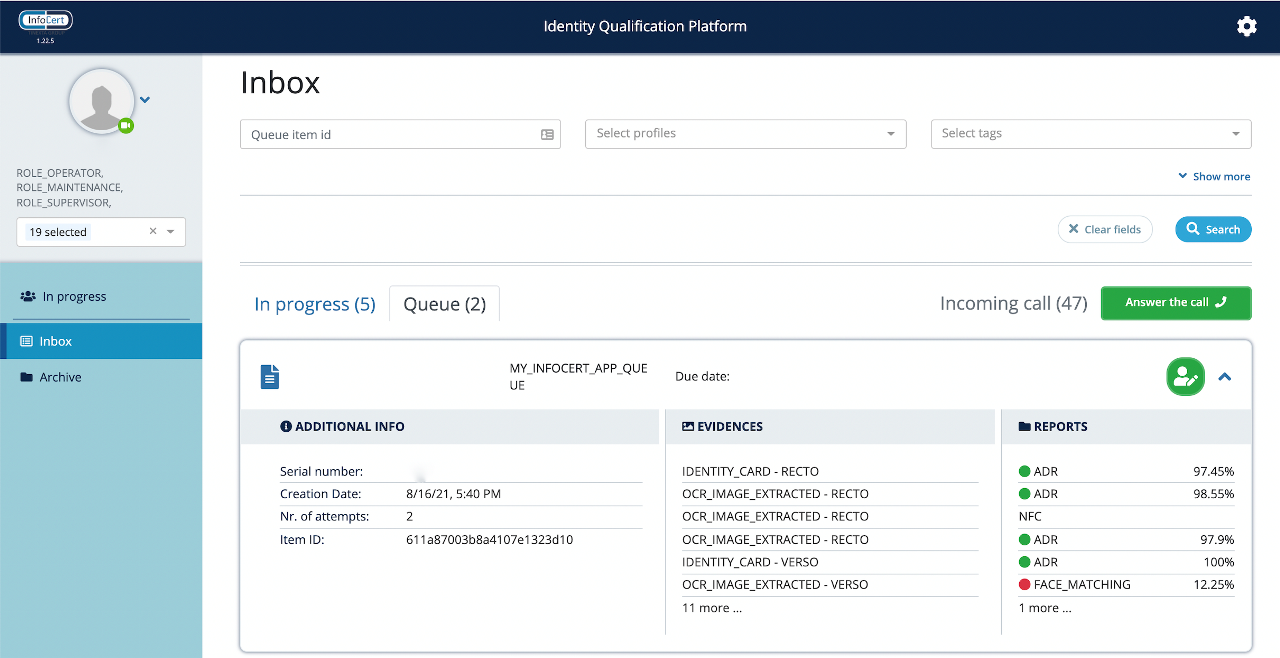
(*) this information is currently not managed by the application, so it can be ignored
In the “Queue” tab in the “Inbox” section, click on for offline or in-person identification. The item is downloaded and processing can begin. The item is moved from “Queue” to “In progress”.
When the operator clicks on the “Answer the call” button in the “Inbox” section for video identification, the video identification item with the highest priority will be opened first. Again, the item is moved to the “In progress” tab.
IQP Backoffice offers several identity verification modules for different scenarios to enable business processes to identify customers and verify their identity with a high level of security and a low level of risk. The identification processes are: Self ID, Video ID and Fast ID.
Self ID uses machine learning and biometric technologies to automate loading data and identification documents. The operator completes the identification offline in the IQP Backoffice using the results of document detection and comparing the person’s photos (face matching) to speed up the identification process.
In the “Inbox”, click on in “Queue” to open an item. The process can be configured, and generally includes the following steps:
Video ID is a remote-assisted identification process in which an Operator verifies the customer’s identity via a live video call during which the person provides their data and ID and the operator validates their identity. In the “Inbox”, click on “Incoming Call” to open an item. The process can be configured, and generally includes the following steps:
Fast ID is a hybrid process that can be performed in the same way as Self ID, with the addition of a brief live video identification session with an operator. The person to be identified attends the identification meeting after providing their data and ID via InfoCert tools that allow the detection of the ID and comparison of photos of the person to be identified (face matching). In the “Inbox”, click on “Incoming Call” to open an item. The process can be configured, and generally includes the following steps:
Unlike Video ID, in the Fast ID process, the operator already has the customer's preloaded data, evidence loaded (possibly using OCR) and face matching, where the system proposes the result of the comparison between the images of the person to be identified.
The item management page contains three sections:
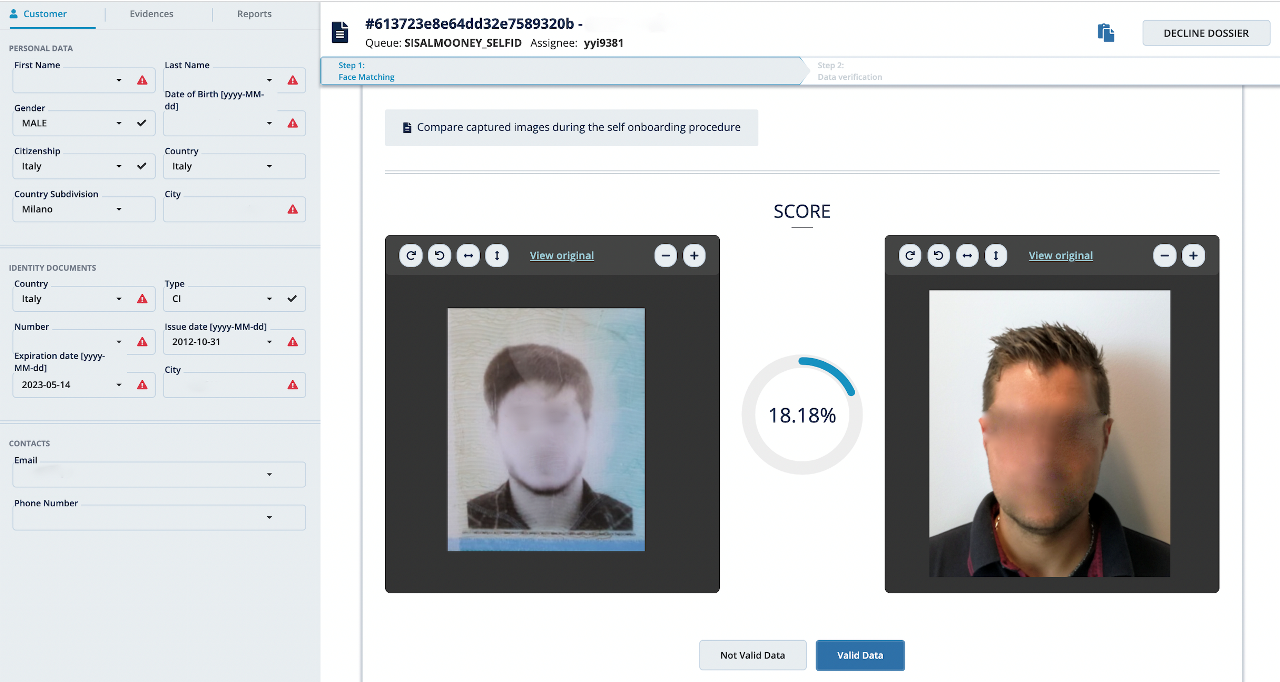
The Customer Data section on the left contains three types of data
Customer:
This section lists customer data. It displays the result of the comparison between the data run through the IQP process and the data extracted by OCR: a check mark is displayed if positive, and a red triangle if negative.
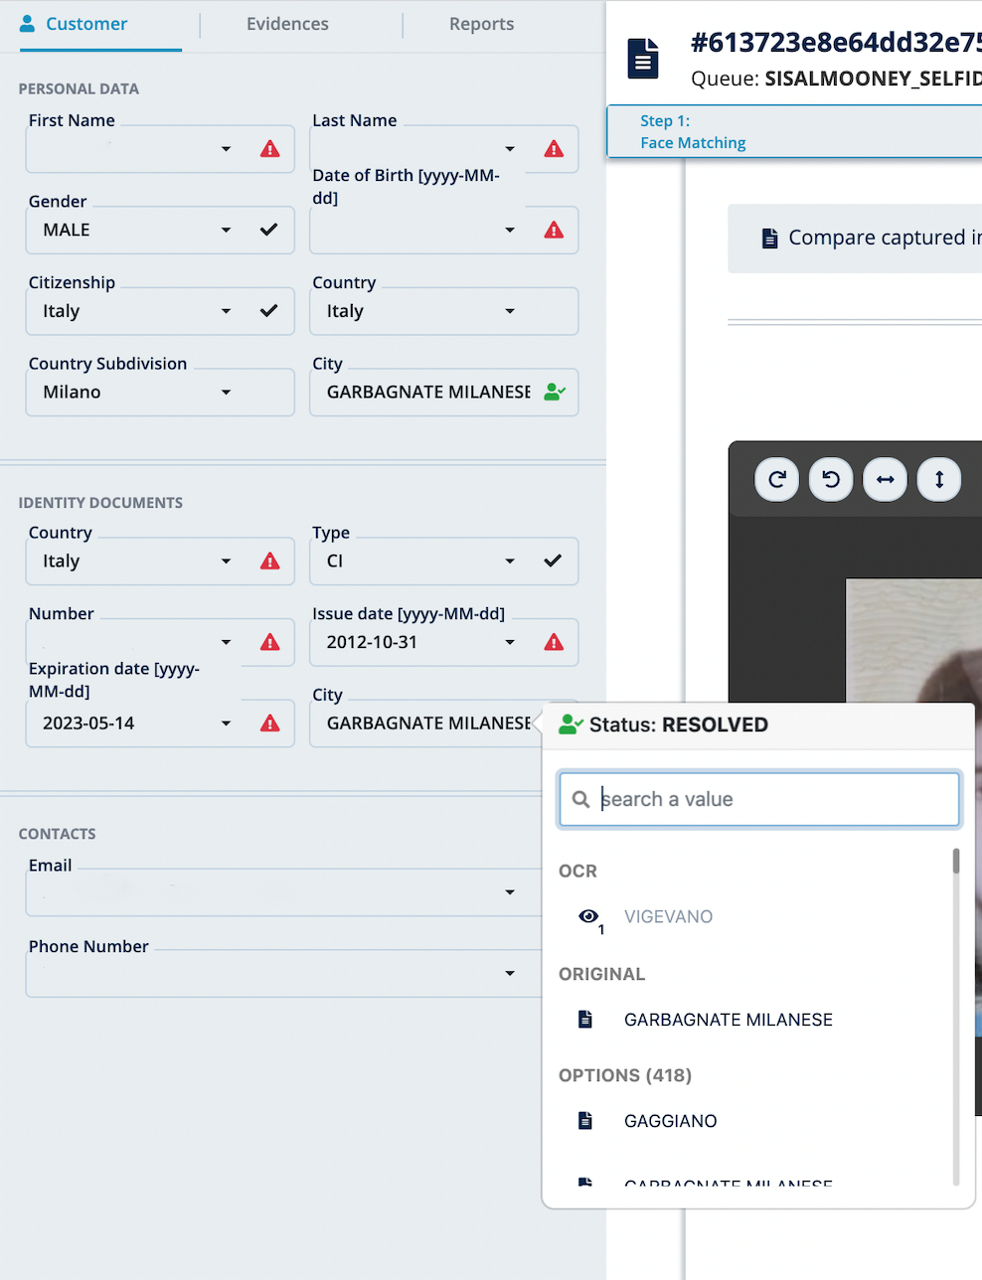
Click on the arrow in a data item box to open the details of that data item’s values: the value run through the IQP process and the list of values extracted for that data item with OCR.
Click on the view icon to open the document from which the value was extracted using OCR. The search box in the details is active only if the data item can be modified. It is used to search for a value to be inserted in place of the current one.
Click on the check mark or triangle to confirm the value in the field manually. When you confirm the value, the check mark or red triangle is replaced with the icon. Data confirmation does not modify the item or the recorded data in any way. It is simply used by the operator to keep track of any data checks during verifications.
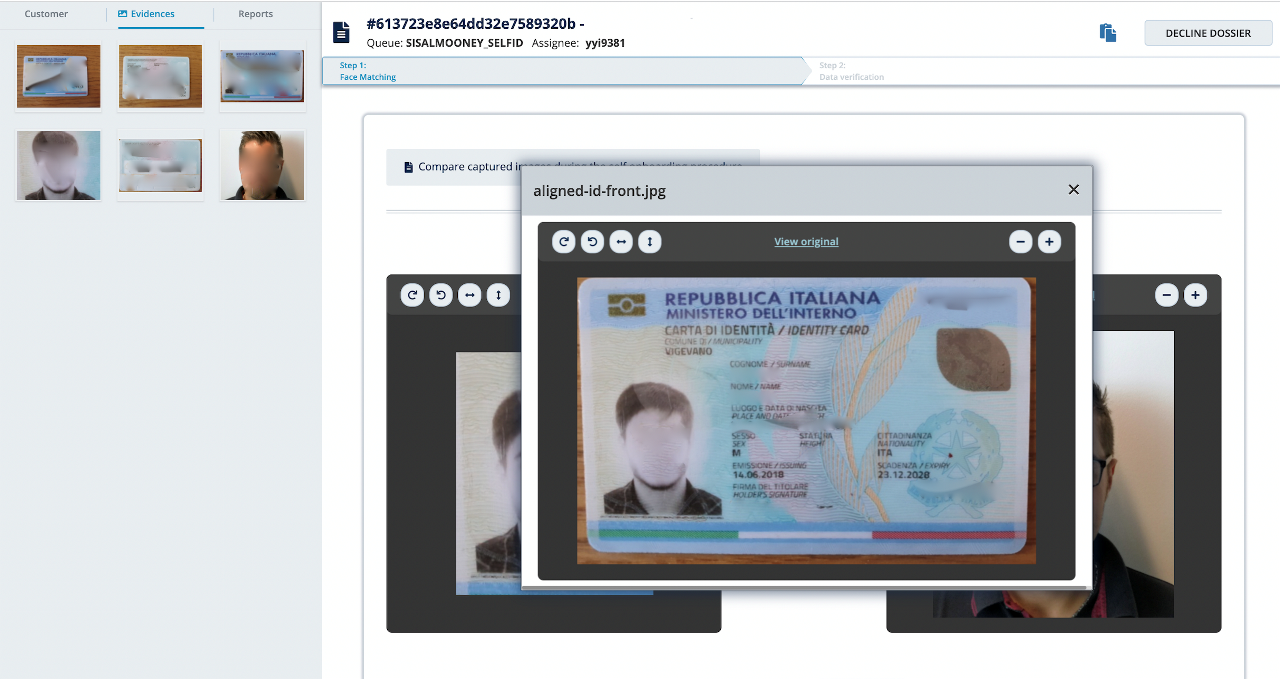
Evidence:
This section contains evidence collected during onboarding (photographs of documents, selfie of the person who did onboarding, etc.). Click on the evidence to open a pop-up window where you can enlarge, rotate or flip the image.
Report:
This section contains the reports generated during onboarding.
The following reports can be generated:
Click on the reports to view their contents.
The upper section contains the item’s data (IQP number, name, queue and assignee operator) and the steps of the process, indicating the current step.
On the right is the button where you can enter notes and the DECLINE DOSSIER button used to reject identification at any time.
Note management: To enter a note, click on the Note button and type the note in the field below, then press Enter ( ). The note contains the text entered by the operator, the date/time it was entered and the operator’s name.
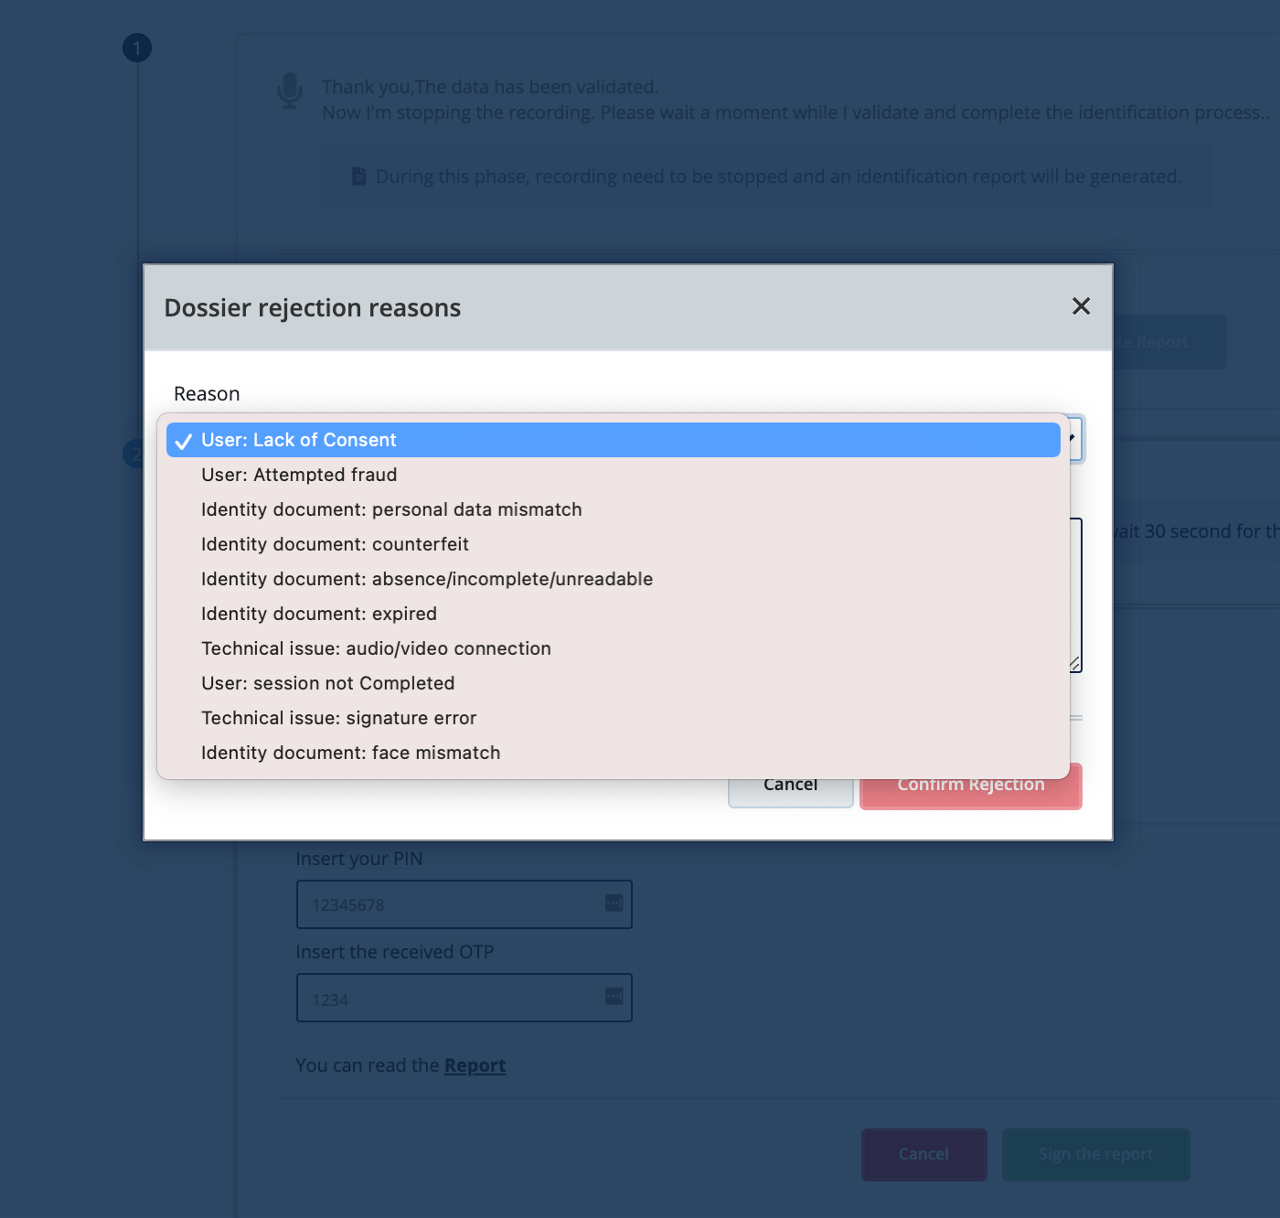
Dossier rejection: To reject the item, click on DECLINE DOSSIER, then select one of the reasons and add a note (optional). Then click on Confirm to confirm rejection or Cancel. When you confirm rejection, the item is assigned REJECTED status.
This section shows evidence collected during onboarding, step by step, so that you can verify it and decide whether the displayed data is valid for identification purposes.
The steps must be completed in the order in which they are presented.
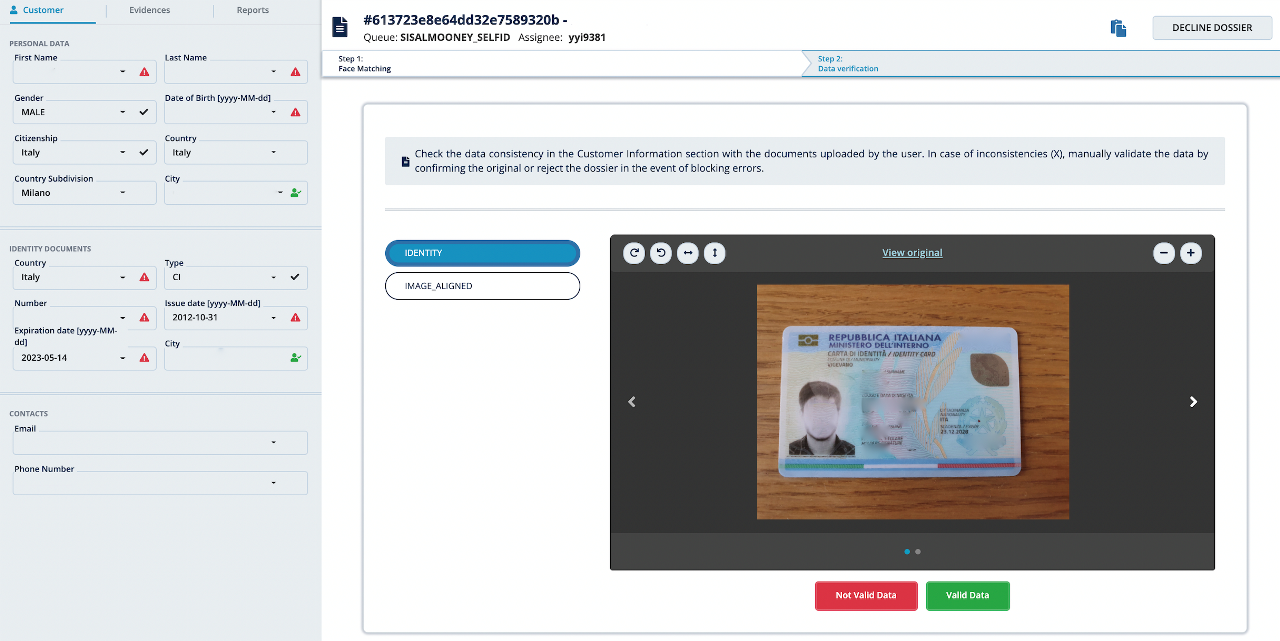
ATTENTION: The number and order of the steps can change depending on the configuration of the IQP process. The steps shown here are just examples and may be different in other processes.
If the process requires a video identification session between the person to be identified and the operator, the texts to be read by the operator during the process will be displayed as well as instructions to help the operator complete the identification process.
Here are some examples of steps in a process.
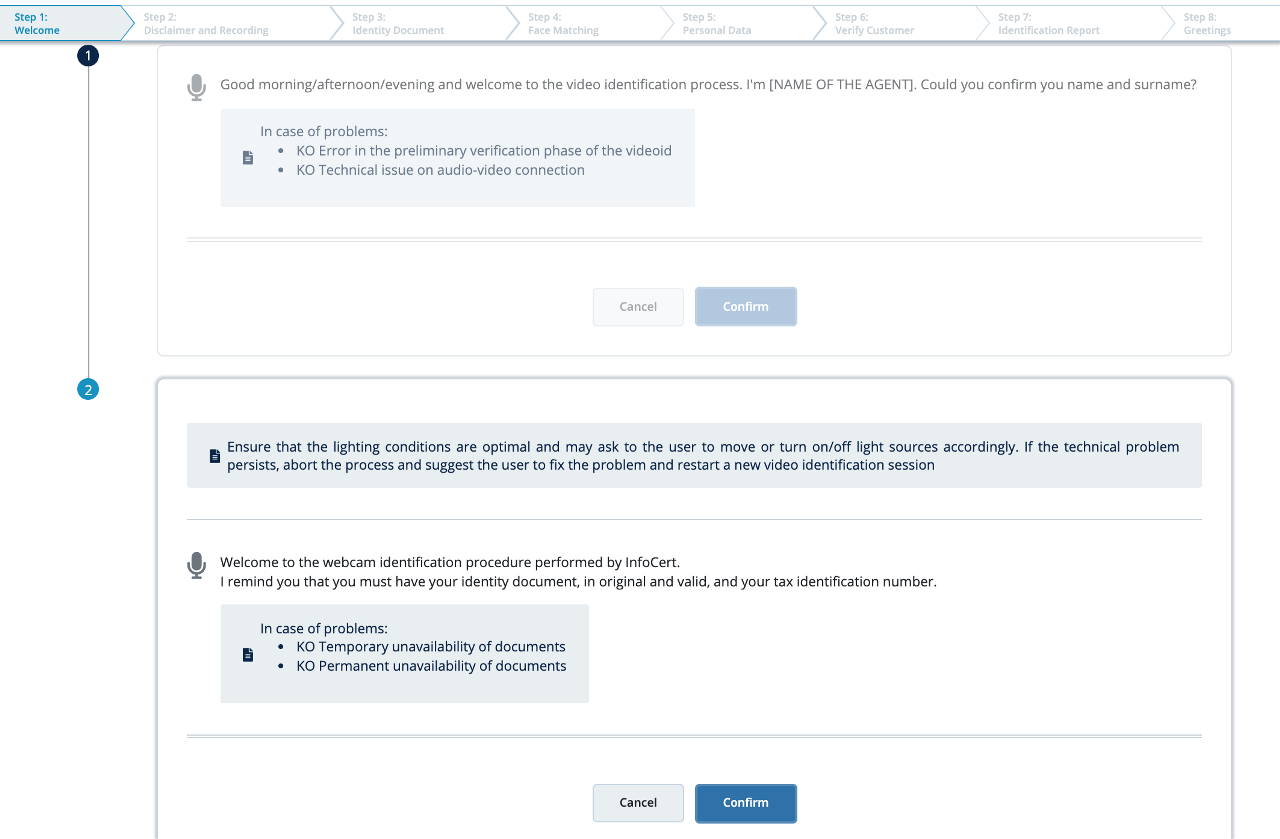
WELCOME
The operator introduces themselves to the person to be identified, ensures that the audio and video conditions are optimal for identification and that the person to be identified has a valid identity document available and a cell phone to which the OTP can be sent. This step is present only in Video ID and Fast ID processes.
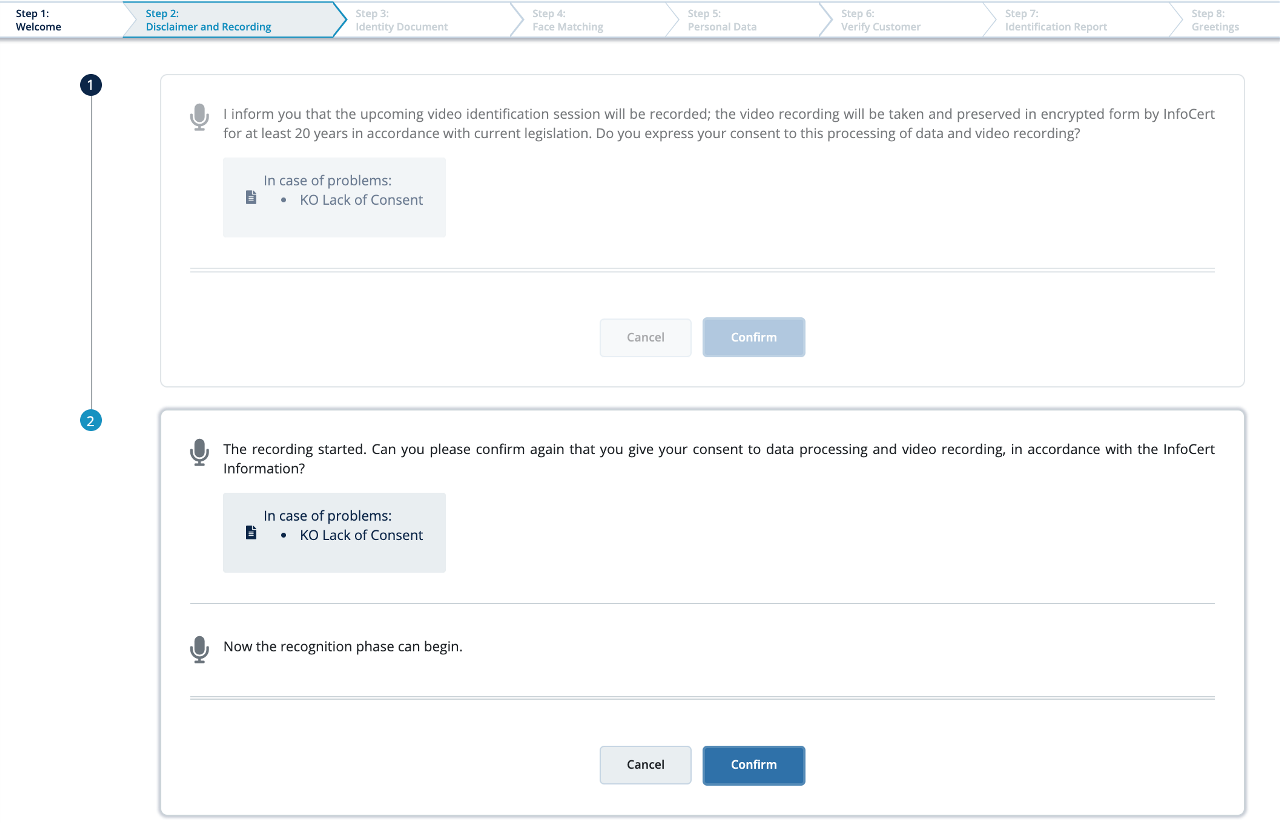
CONSENT TO RECORDING
In this step, the operator requests consent to video record the video identification session. This step is present only in Video ID and Fast ID processes.
VERIFICATION QUESTIONS
The operator asks the person to answer a few personal information questions, some general questions (e.g., today’s date) or to confirm the requested service. This step is present only in Video ID and Fast ID processes.
PHOTOGRAPH
The operator may be required to photograph the person’s face during the identification process. This evidence must be kept together with other evidence captured during the process or uploaded previously by the person to be identified. This step is present only in Video ID and Fast ID processes.
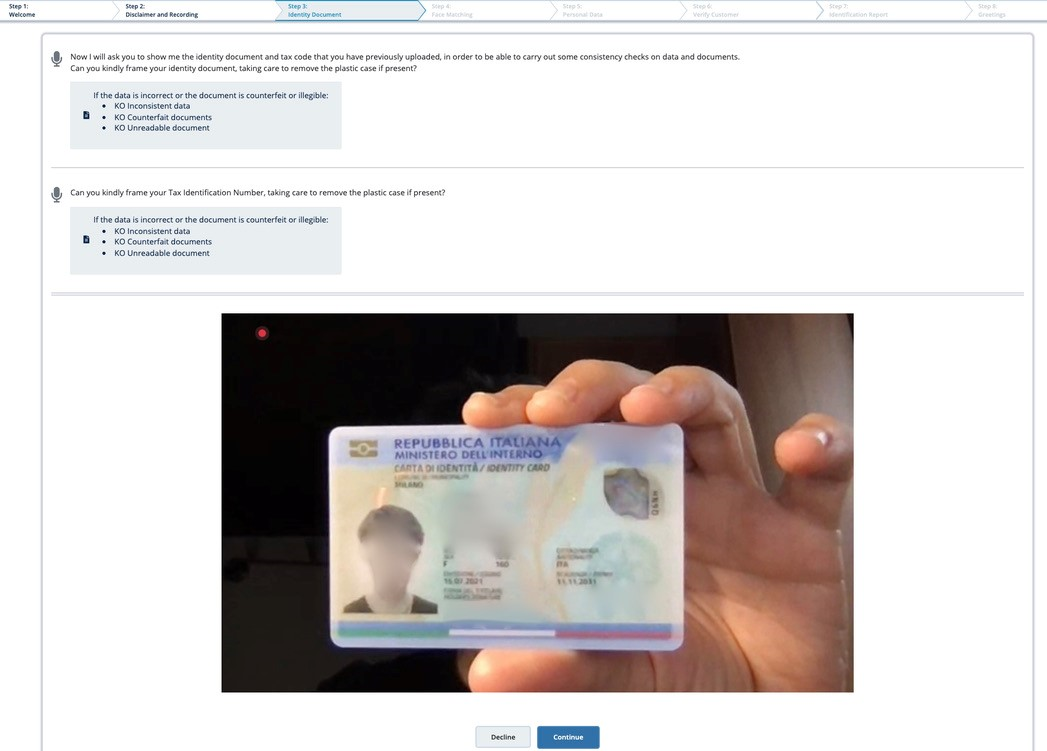
IDENTITY DOCUMENTS
The operator may be required to capture the documents of the person to be identified during the identification process. This evidence must be kept along with other evidence captured during the process or uploaded previously by the person to be identified. This step is present only in Video ID and Fast ID processes.
FACE MATCHING
The system compares the photo on the ID to the customer's face. A report provided for supported identity documents contains the result of automatic face matching. The reliability score depends on the context and image quality. Subjecting two or more images to the algorithm generates a reliability score ranging from 0 to 100. The result is displayed in the face matching step, so that the operator can decide whether to validate this step or reject the identification process based on the score.
VERIFICATION OF THE RESULT FROM THIRD-PARTY SERVICES SUCH AS DOCUMENT DATABASES TO VERIFY DOCUMENT VALIDITY
In some processes, document verification by third-party solutions, such as the SCIPAFI (centralized computer system for the administrative prevention of identity theft) and/or Crimnet (ministerial database for stolen and/or lost documents) database is required.
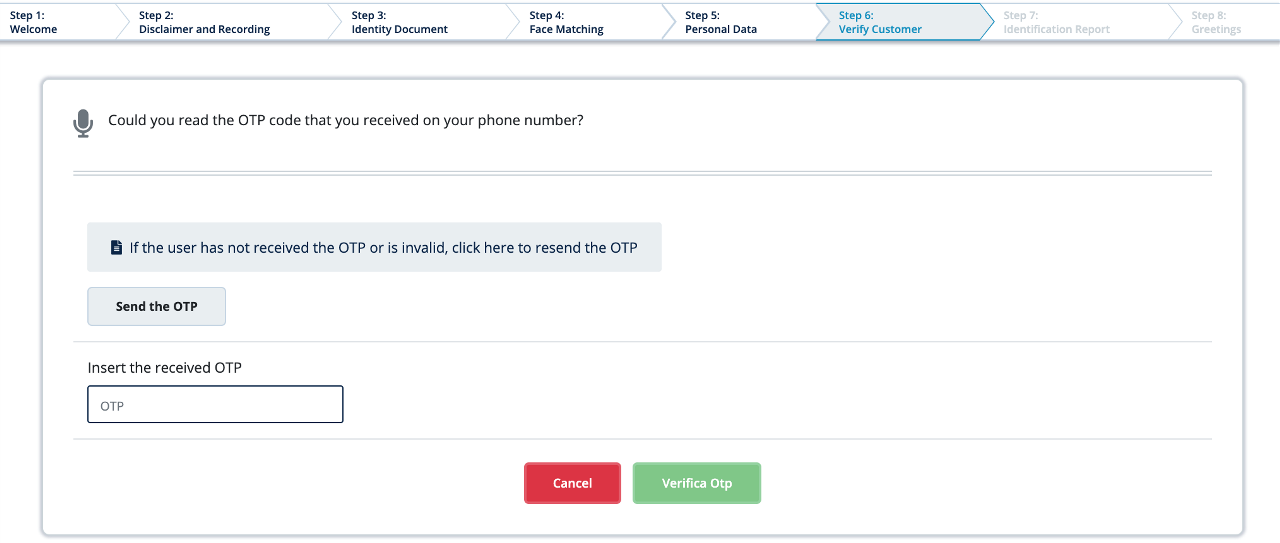
VERIFICATION OF THE CUSTOMER'S CELL PHONE NUMBER
In this step, the person to be identified will receive a text message on the cell phone number provided containing the OTP code to be read to the operator during the identification process.
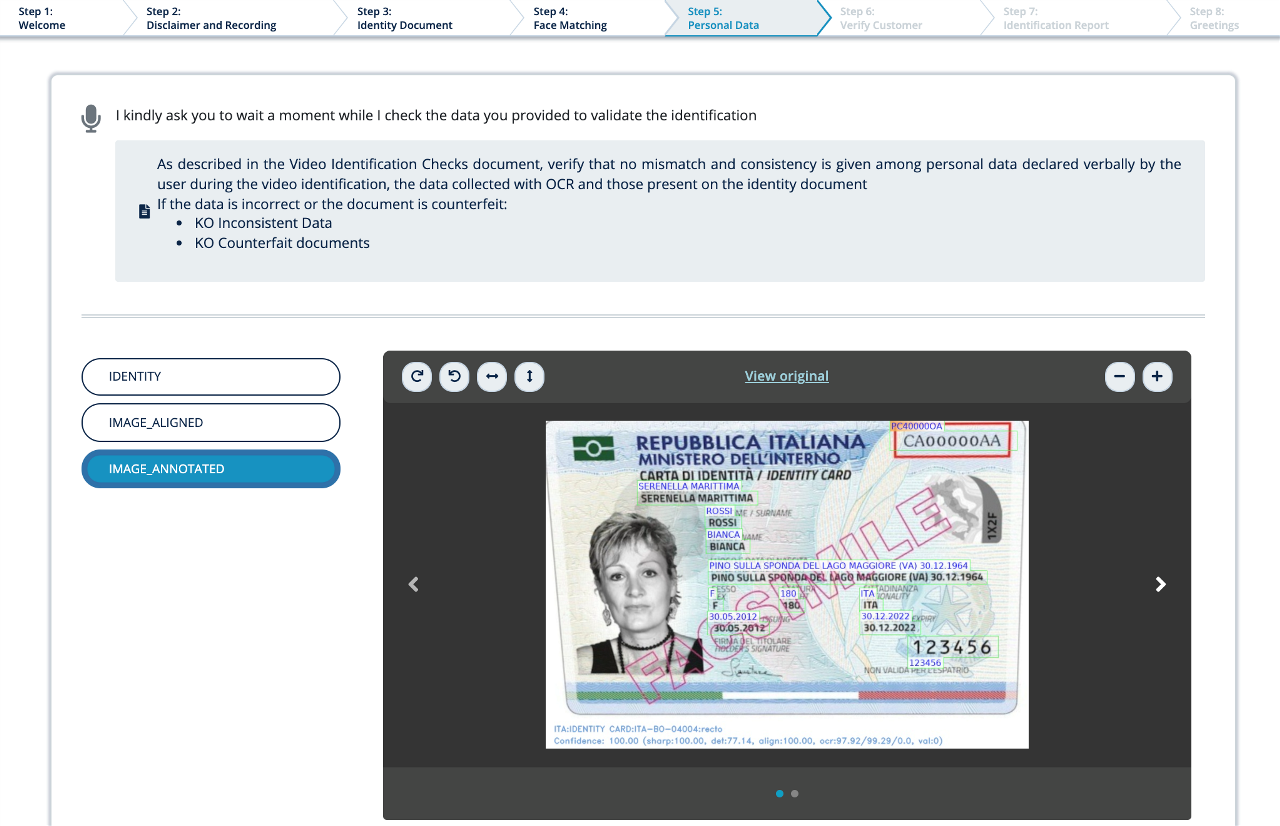
ID DATA VERIFICATION, POSSIBLY USING OCR
The operator will have evidence captured during the identification process and can compare document data with the data entered in the customer data section. If the document is to be detected (OCR), the operator will have available the annotated image with the data extracted from the document for easier verification.
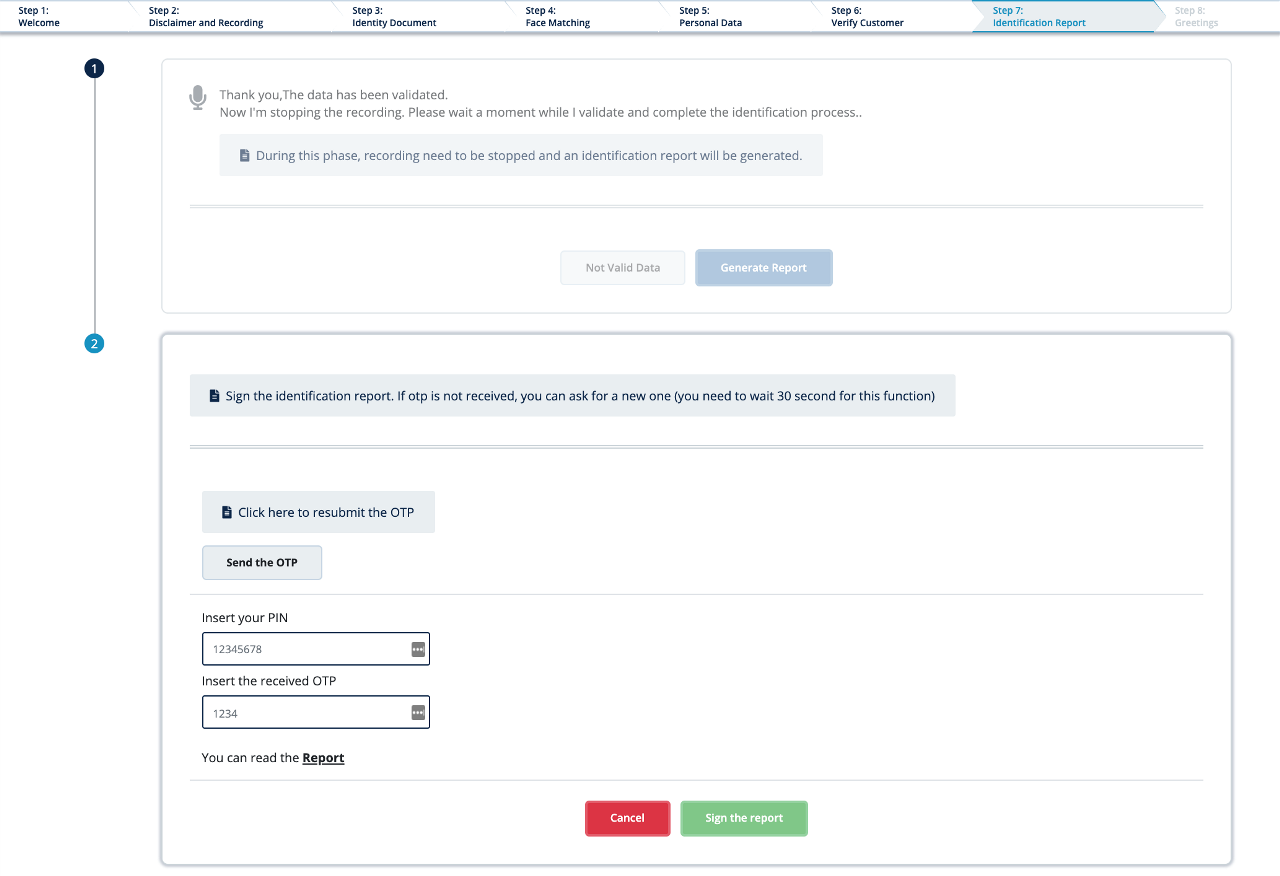
IDENTIFICATION REPORT
The operator generates the identification report that will be kept with the evidence. If you are required to sign the document, the process will be configured to allow you to enter your PIN and the OTP code received on your cell phone.
If you do not validate the data in any of the previous steps, the item is rejected, and a pop-up window is displayed in which you select the rejection reason and any notes. When you confirm rejection, the item is assigned REJECTED status.
Once processing is complete, the item and its summary data are available for consultation in the ARCHIVE folder.
