 GoSign Manual (DESKTOP)
Introduction
With the GoSign Desktop App you can sign and timestamp documents of any format using a Signature Device or Remote Signature.
Furthermore, GoSign Desktop is available for all the most used operating systems (Windows, iOS and Linux).
GoSign Desktop is used to perform a lot of functions, such as: signing a document, checking, applying time stamps and many others. If you also need an online archive for faster sharing of documents, it is recommended to have a FREE license (via InfoCert account), which also offers the possibility of using GoSign WEB.
PRO license allows you to have a complete view of the features offered by GoSign Desktop. It can be combined with both the BUSINESS license and the FREE license.
The PRO license adds to the SIGNATURE and TIME STAMP functions:
In VALIDATE section is possible to verify multiple documents at the same time. It is also available ENCRYPT/DECRYPT functions and it is possible to work with one or more documents at the same time
To activate the PRO license, it is necessary to enter the license code received via email, in the USER PROFILE menu on the left, in the license section.
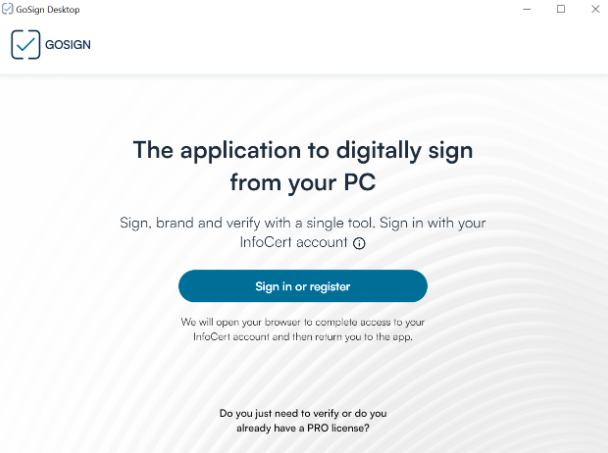
To access the web functions, you need to log in to your InfoCert account. Once the application is open, at the top of the GoSign Desktop homepage, you will find the Sign in or Register! button.
You will be redirected to the browser page for authentication where you can register if you do not have an account, or log-in using one of the InfoCert accounts you have.
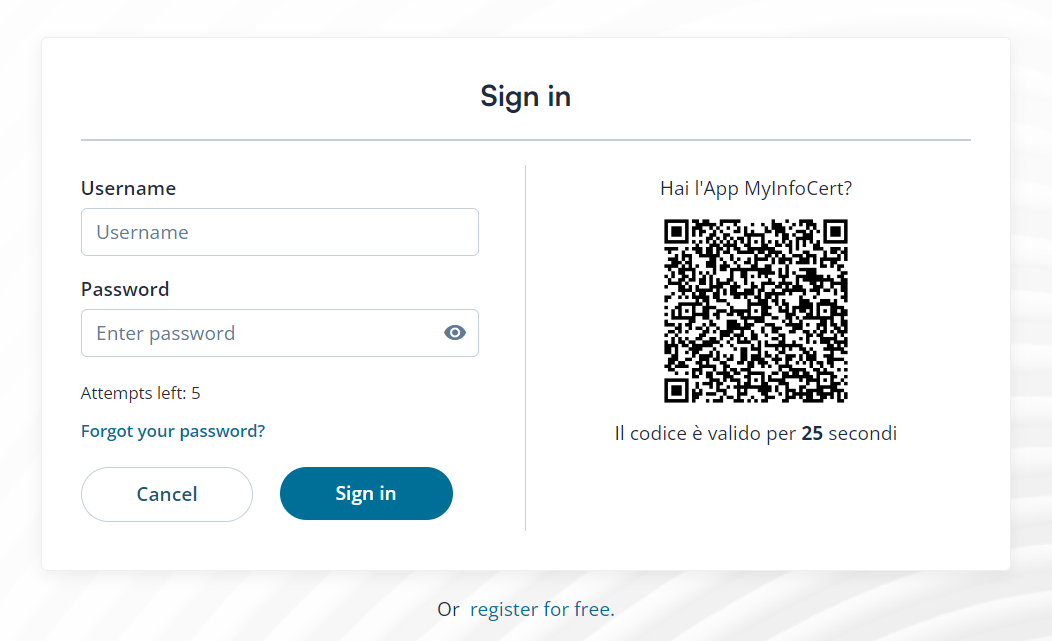
If you already have an InfoCert account, for example, the one used to access the Shop, for your Legalmail account, Electronic Invoicing or GoSign Web services, it can be used also to activate the web of component GoSign Desktop. Enter your email address and password and continue by clicking on the Sign in button.
In the event that you are NOT logged in to the application, the only option available will be Validate a digitally signed documents.
If you do not have an InfoCert account, you can register by clicking on the "Register for free" button. In the authentication page, you will have to enter an email address and choose a password that respects the instructions provided on the screen. Continue by validating the registration with the CAPTCHA control and indicating your choices regarding the processing of optional data and terminate the operation by clicking on the Register button.
You will receive an E-Mail to confirm the registration process.
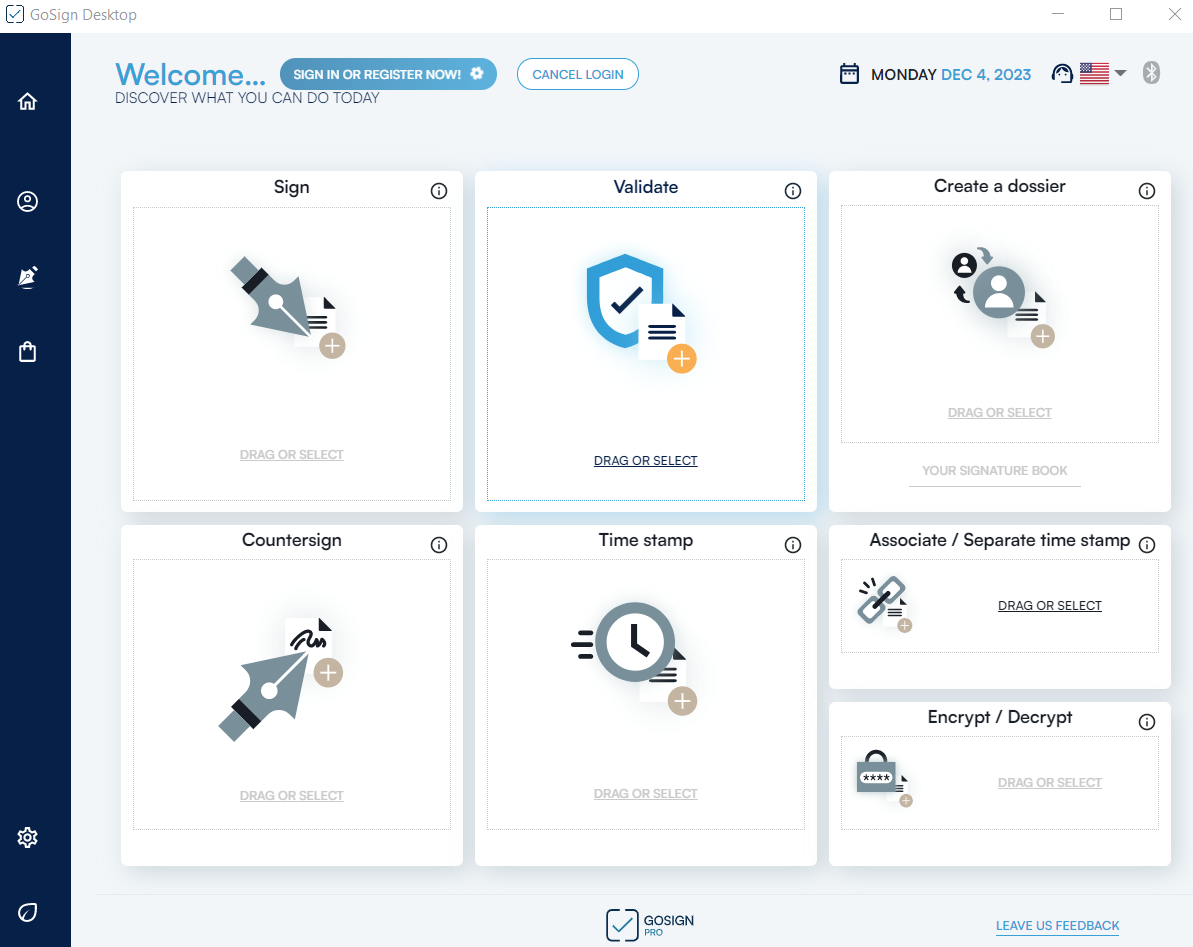
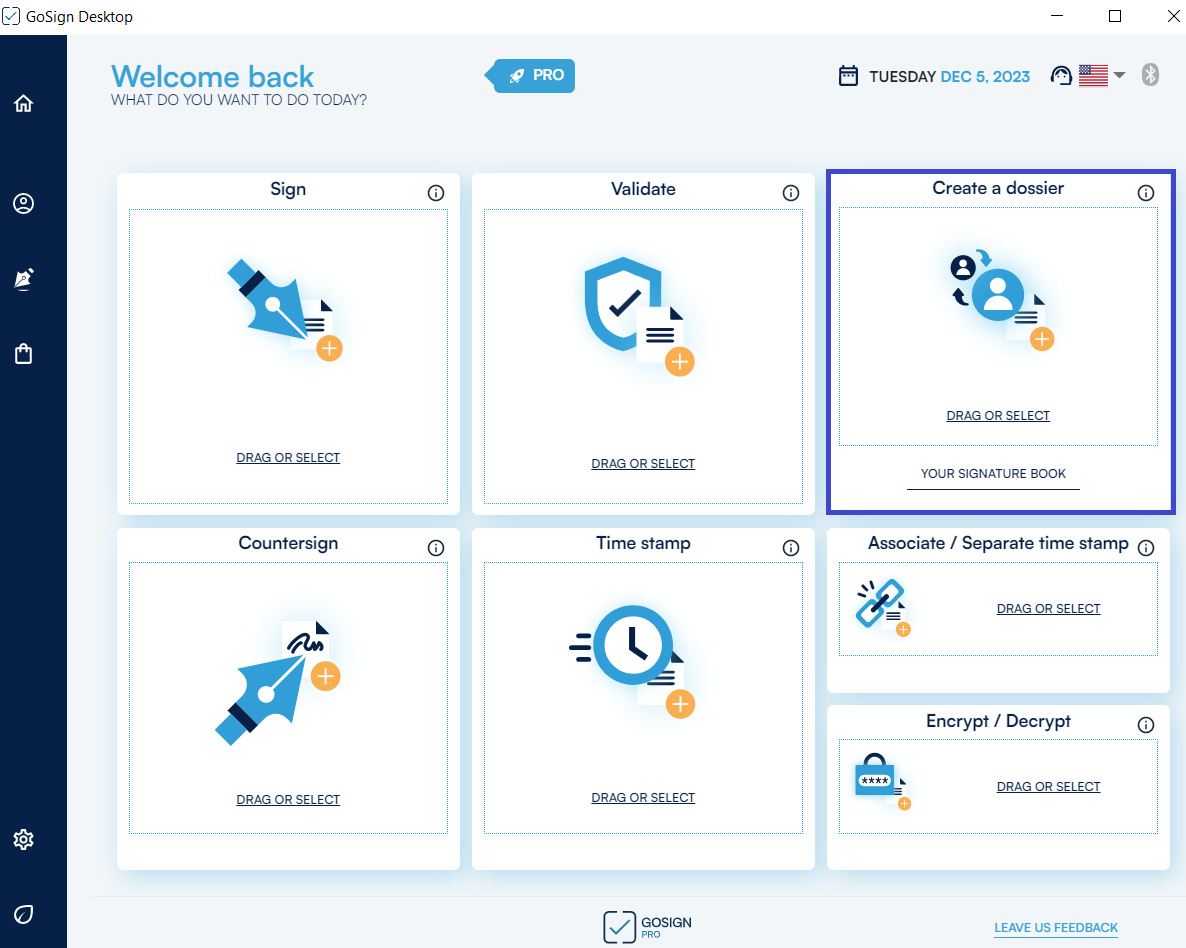
Once GoSign Desktop has been started, the software home page shows the user all the GoSign Desktop features and a side menu that allows the configuration of all accounts to better manage the signature and time stamping of documents.
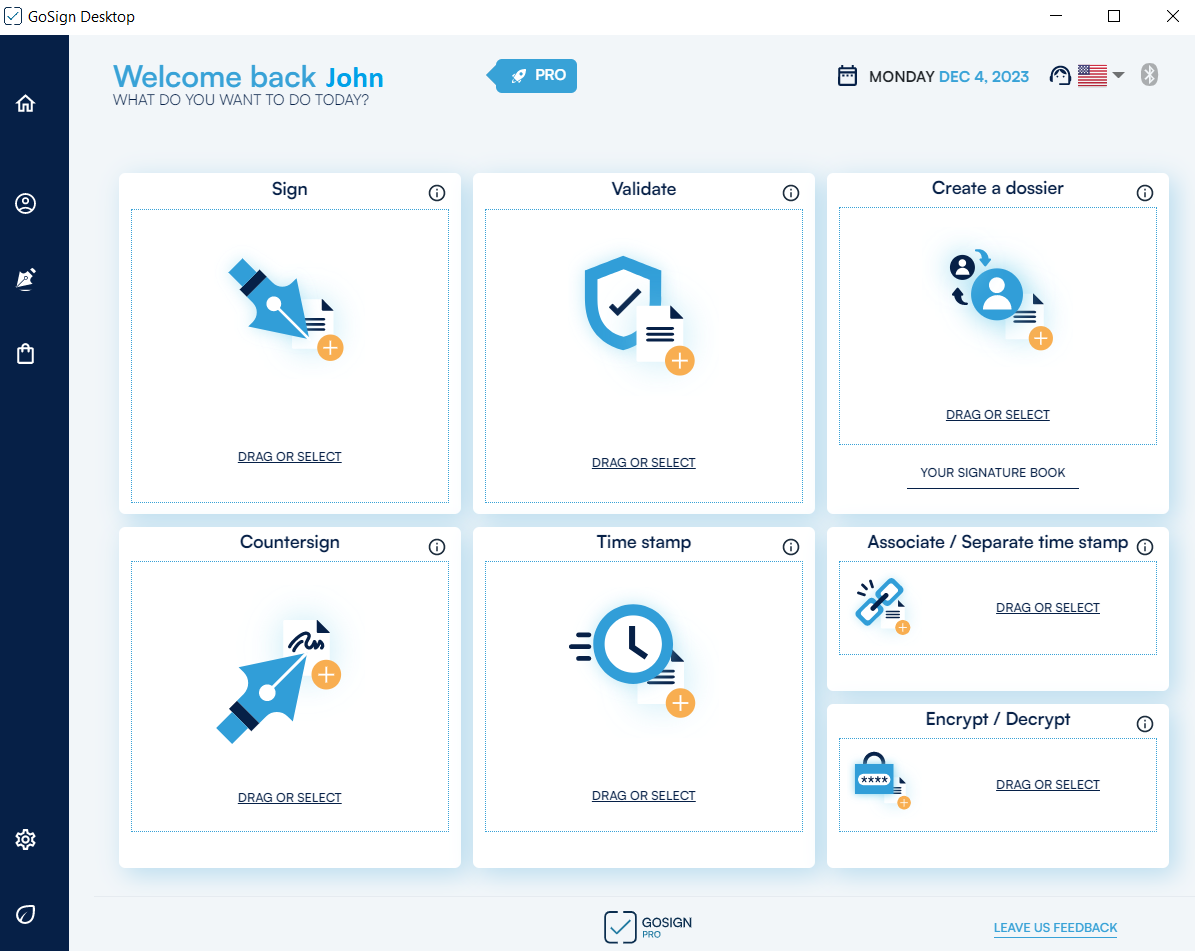
On the home page, at the top right, a series of icons allow you to manage your account and ask for support.
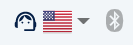
The first icon with a microphone connects GoSign Desktop to InfoCert's online assistance and you are redirected to the web page https://help.infocert.it/.
The book icon is a link that opens the InfoCert YouTube page (https://www.youtube.com/user/infocert/playlists) where you can find all the video tutorials for the possible uses of GoSign Desktop.
The Bluetooth icon to connect the Wireless Key.
The Flag icon allows you to choose the language.
The Configuration Menu (reachable by moving the mouse to the dedicated section on the left of the GoSign Home page) allows you to configure all accounts related to signing certificates and timestamps, PRO license management, certificate list and other settings related to the use of the application.
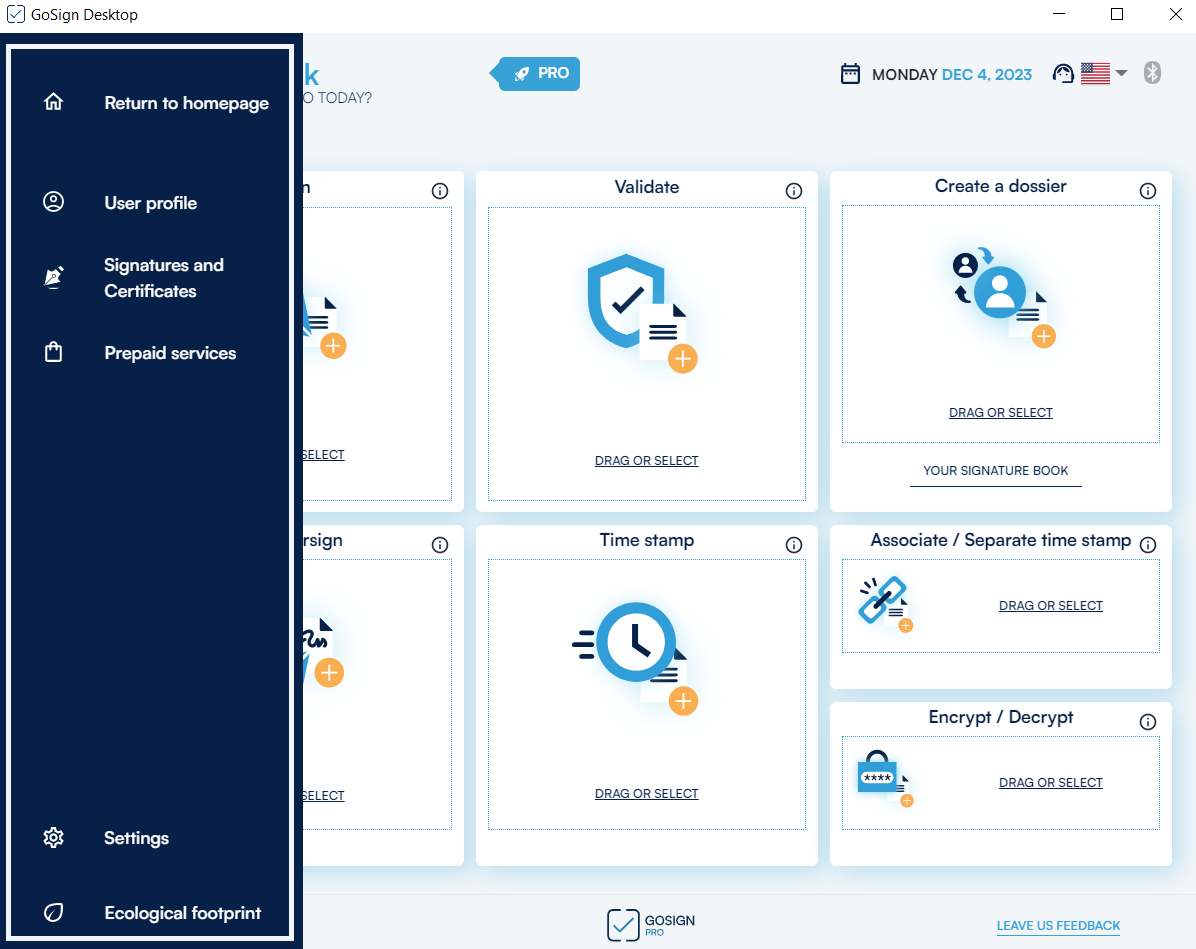
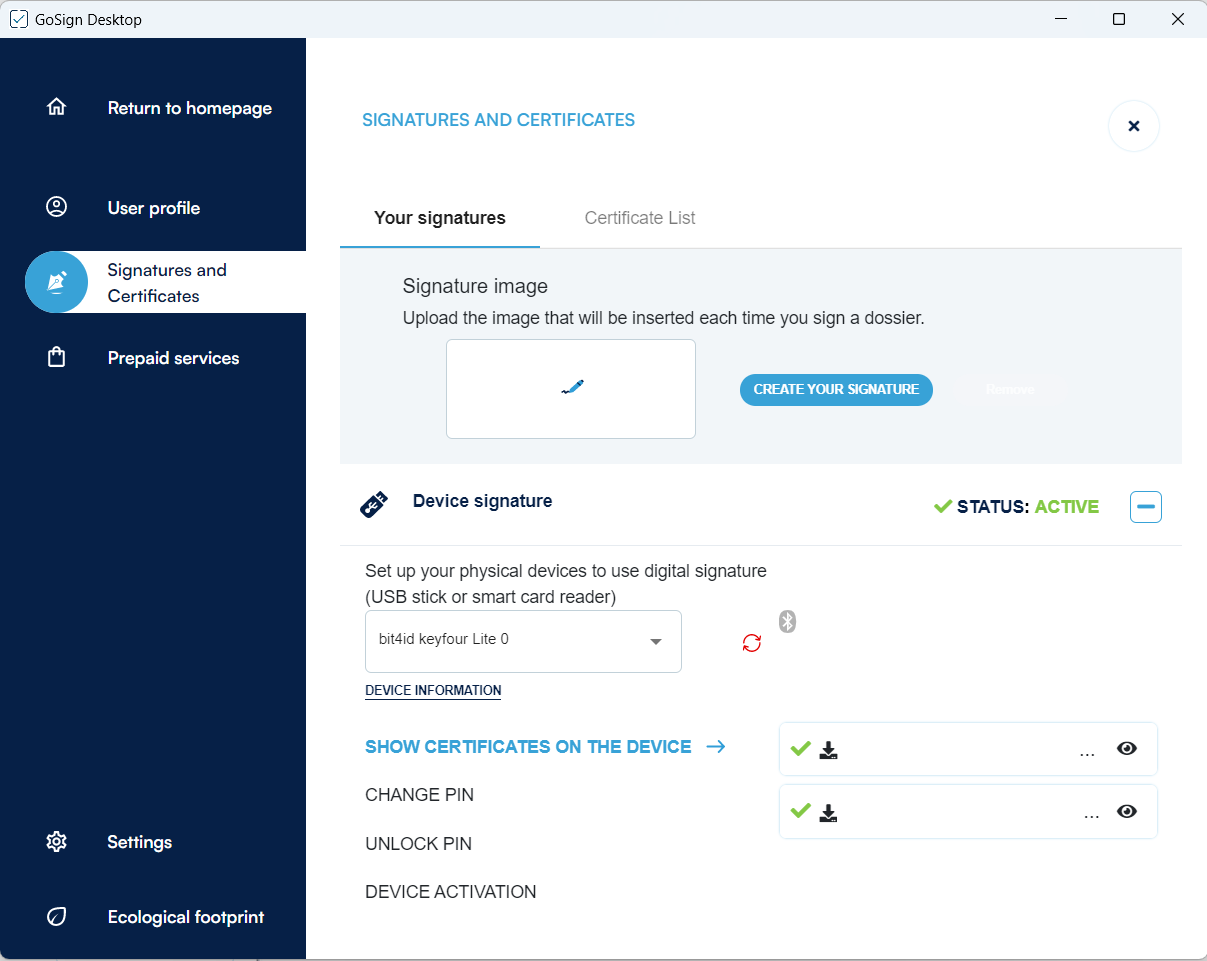
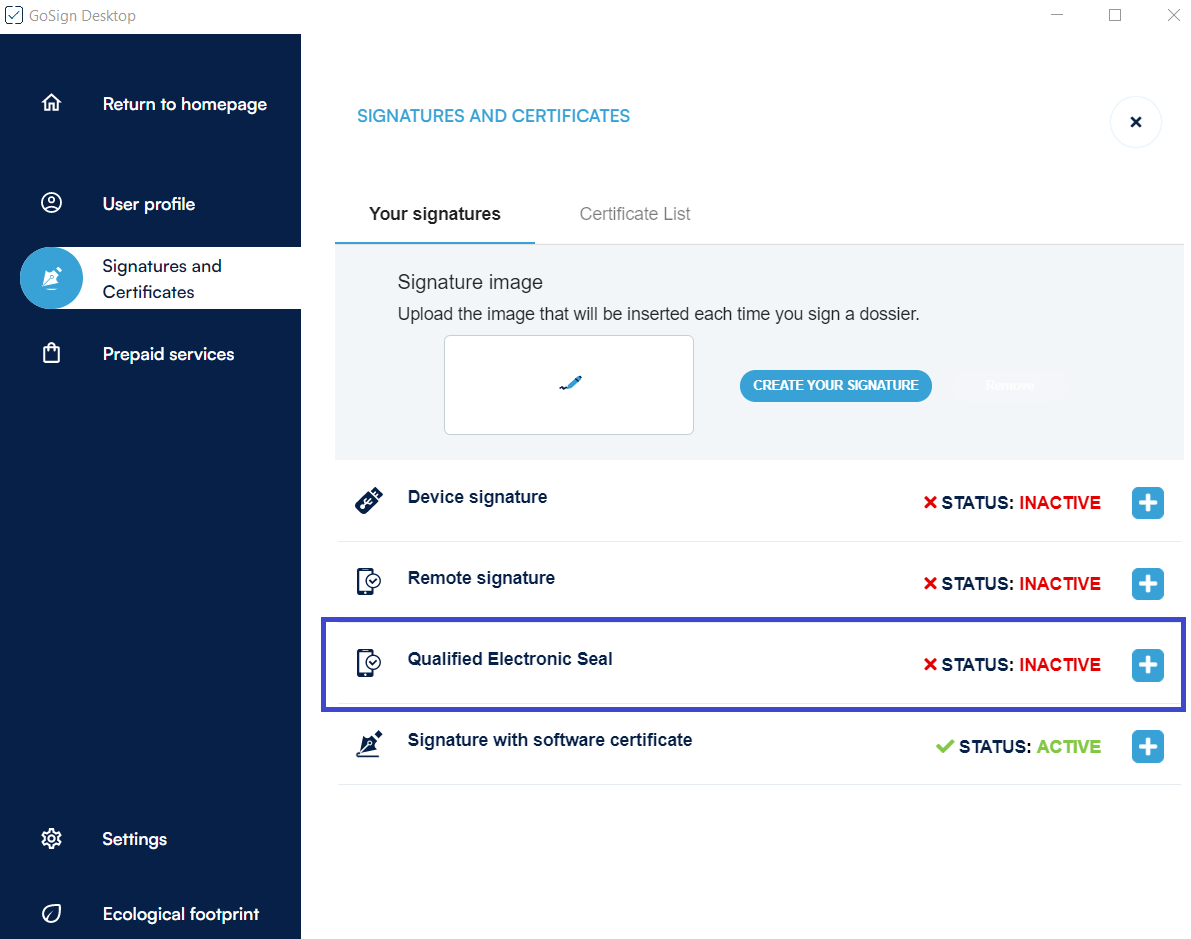
In Signatures and Certificates section you can check the status of the signatures entered in GoSign (Active or Inactive) and create your own signature image.
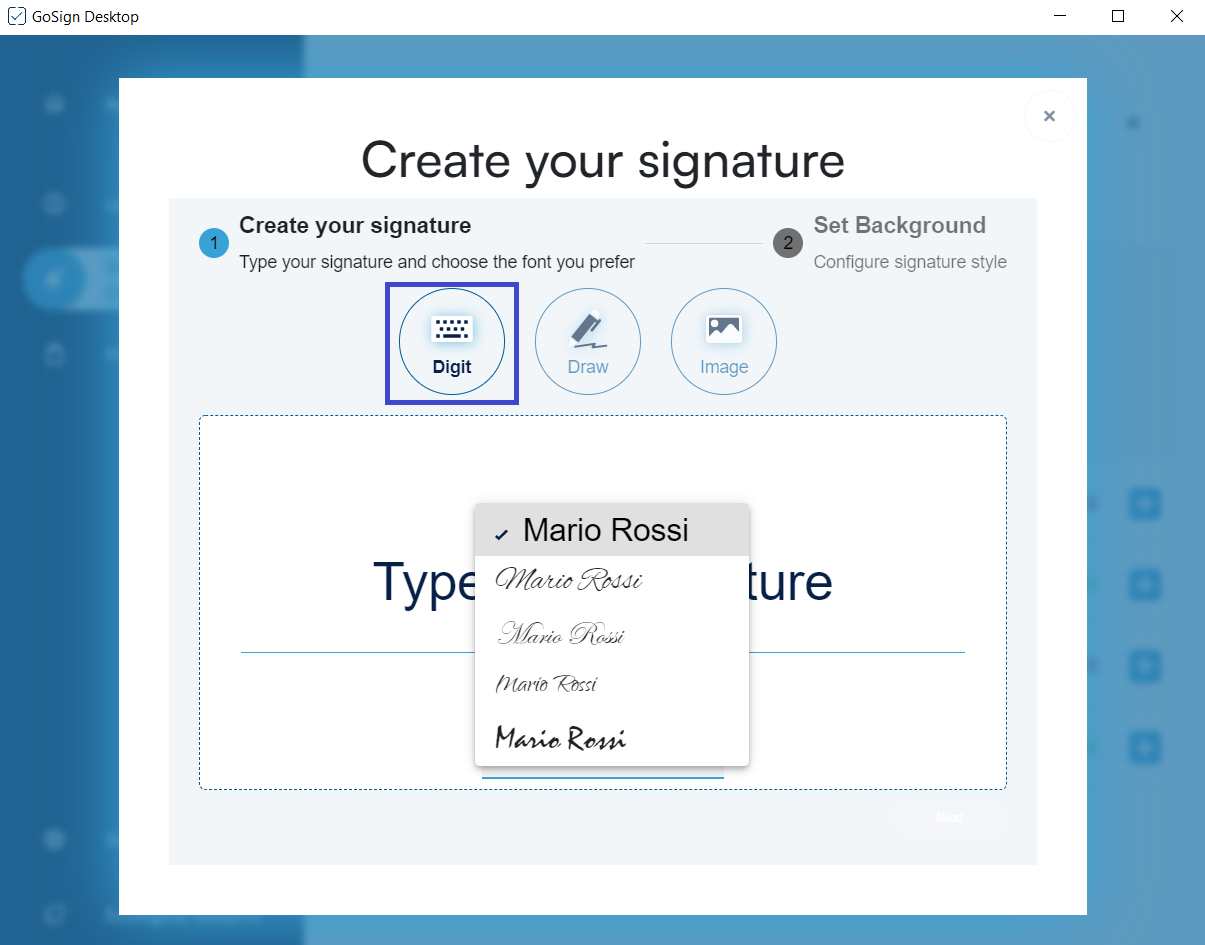
GoSign Desktop allows you to create your own signature image. From the menu on the left you need to select the dedicated section Signatures and Certificates. By clicking on Create your signature you can choose the image you want.
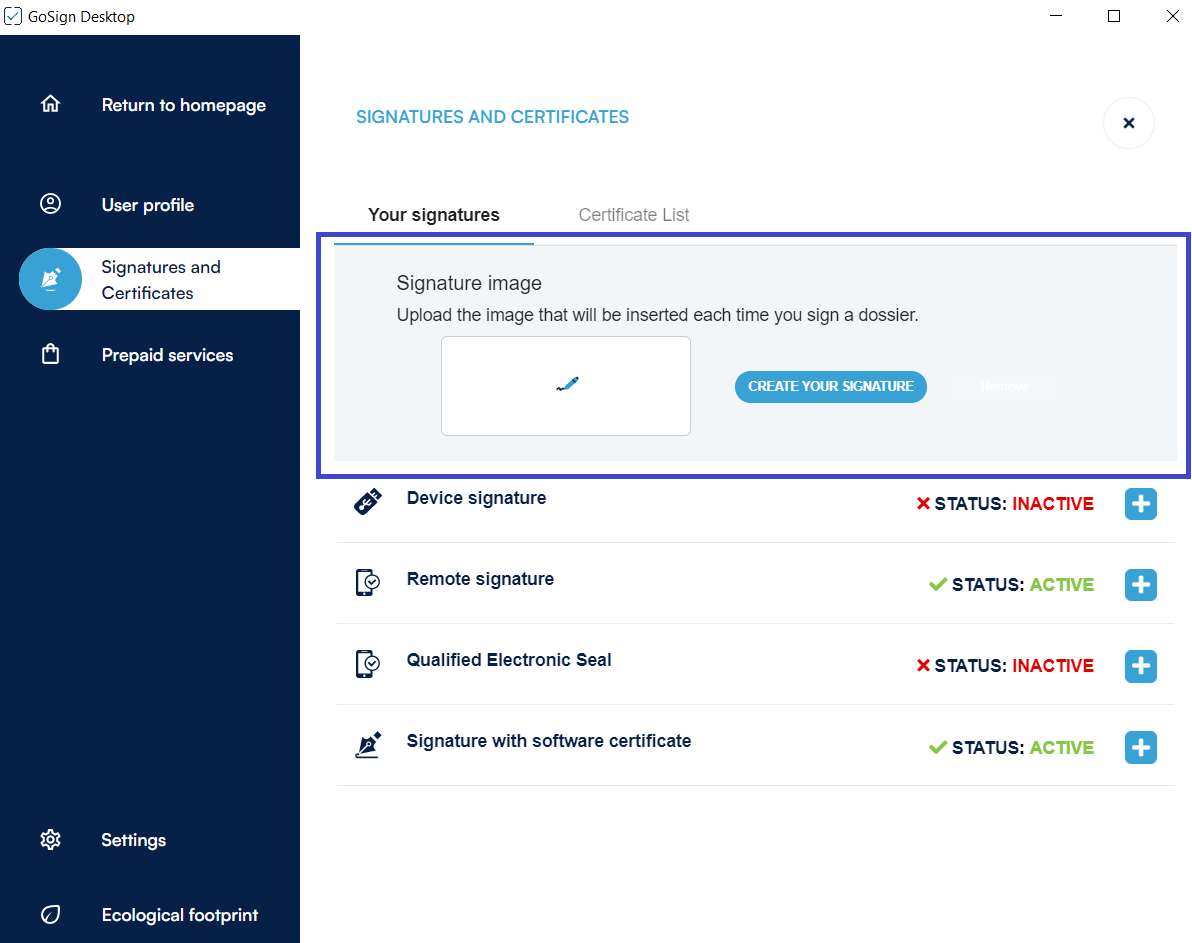
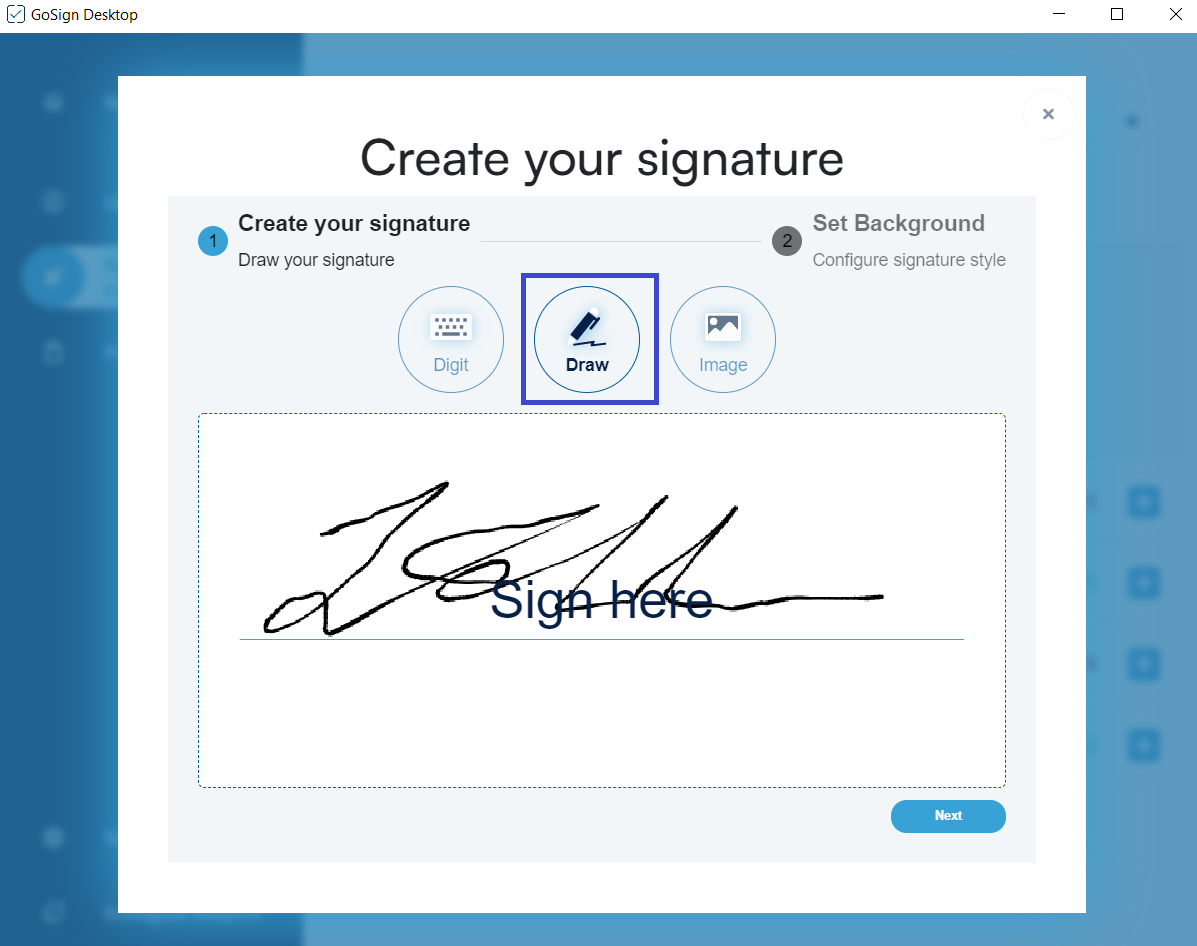
Entering the section you can choose between three options and then confirm the choice by clicking on Save as default:
a) Type your signature, then choosing a bottom right font for the signature;
b) Draw your own signature;
c) Upload your own signature image. A file .jpg that will be used as the default image when you decide to make visible (in the formats that allow it) the signature on the document. It will be possible, once loaded, to change its display (zoom and rotate).
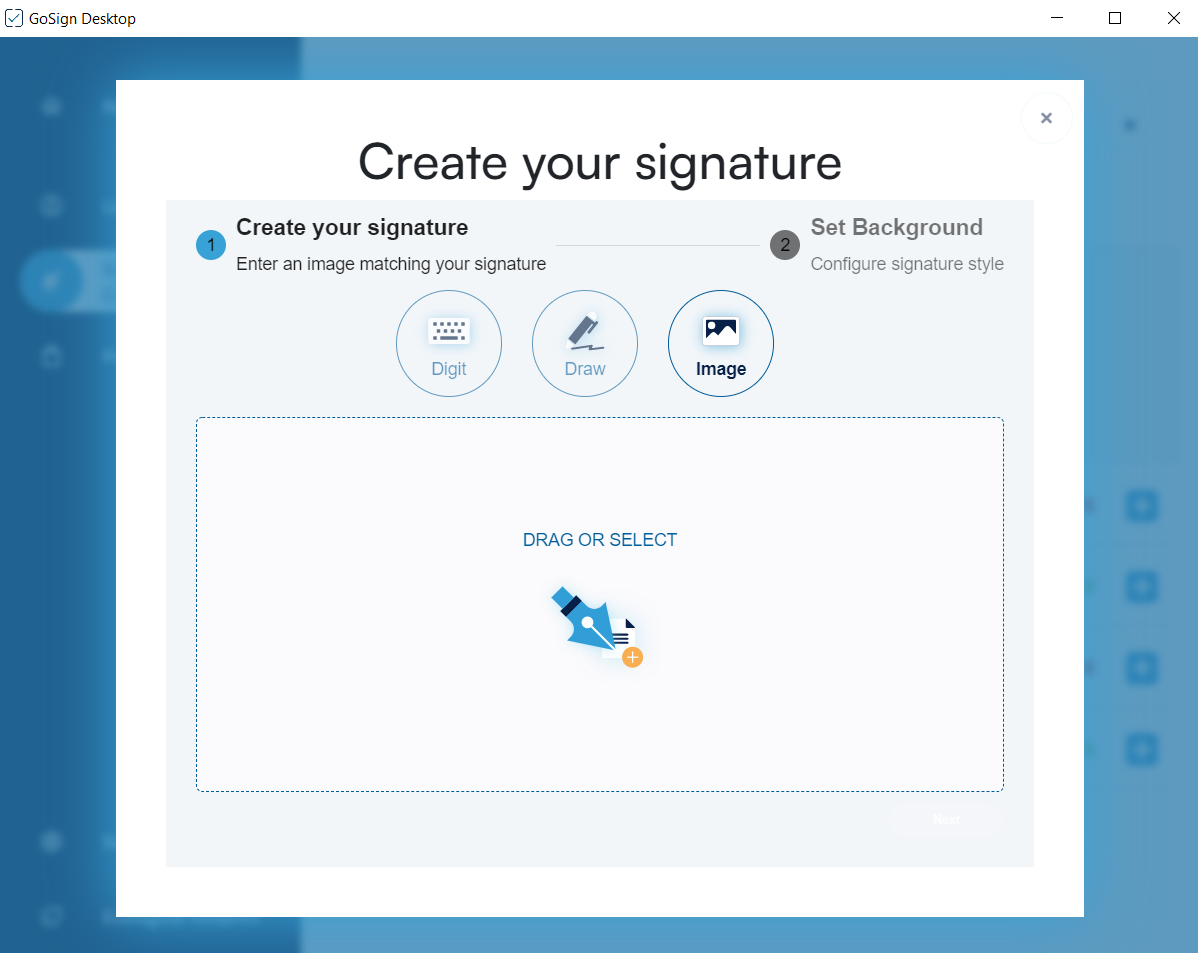
Once uploaded, two options will be possible: Edit (indicated with the overwrite icon), that allows you to change it, and Delete (indicated with the trash icon) that removes the uploaded image.
If you have a signature device, to view it you will need to move to the menu on the left and select the dedicated section Signatures and Certificates in the Device Signature section.
It will be possible to view the certificates on the device and perform some operations:
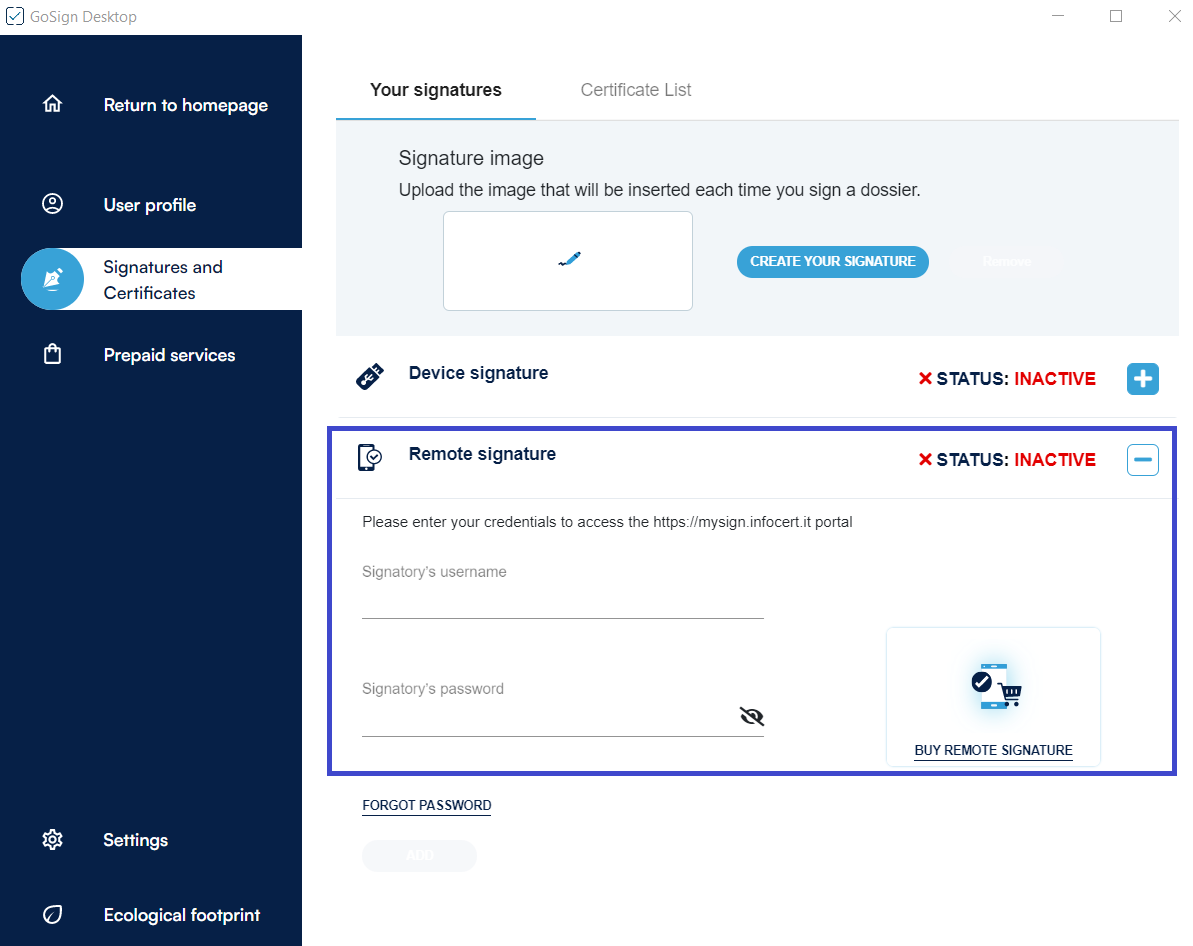
If you have a remote signing certificate, to configure it you have to move to the menu on the left and select the dedicated section Signatures and Certificates in the Remote Signature section.
Within this area you have the possibility to insert:
the User name of the signatory that is related to the account of the service;
the Password (which corresponds to the password used to access the portal dedicated to the holders of a remote certificate, MySign, and must be customized when activating my certificate).
Once you have entered the credentials you need to click on the Add button and the system will perform a verification. In the same panel, you can remove a remote signature that is already present or store the credentials of other remote signatures.
The Qualified Electronic Seal Certificate (QSealC), or Certified Electronic Seal, can be compared to a "qualified electronic signature", but registered to an Organization.
The InfoCert electronic seal guarantees the identity of the company and if affixed to a document, certifies its origin, authenticity and integrity.
The Seal is regulated by the European eIDAS Regulation on Digital Identity and can be requested by the legal representative of the company or by a person delegated by him.
If you have a Qualified Electronic Seal to configure it, you need to move to the menu on the left and select the dedicated section Signatures and Certificates in the Qualified Electronic Seal section.
Then, you will have to enter the credentials of the Qualified Electronic Seal:
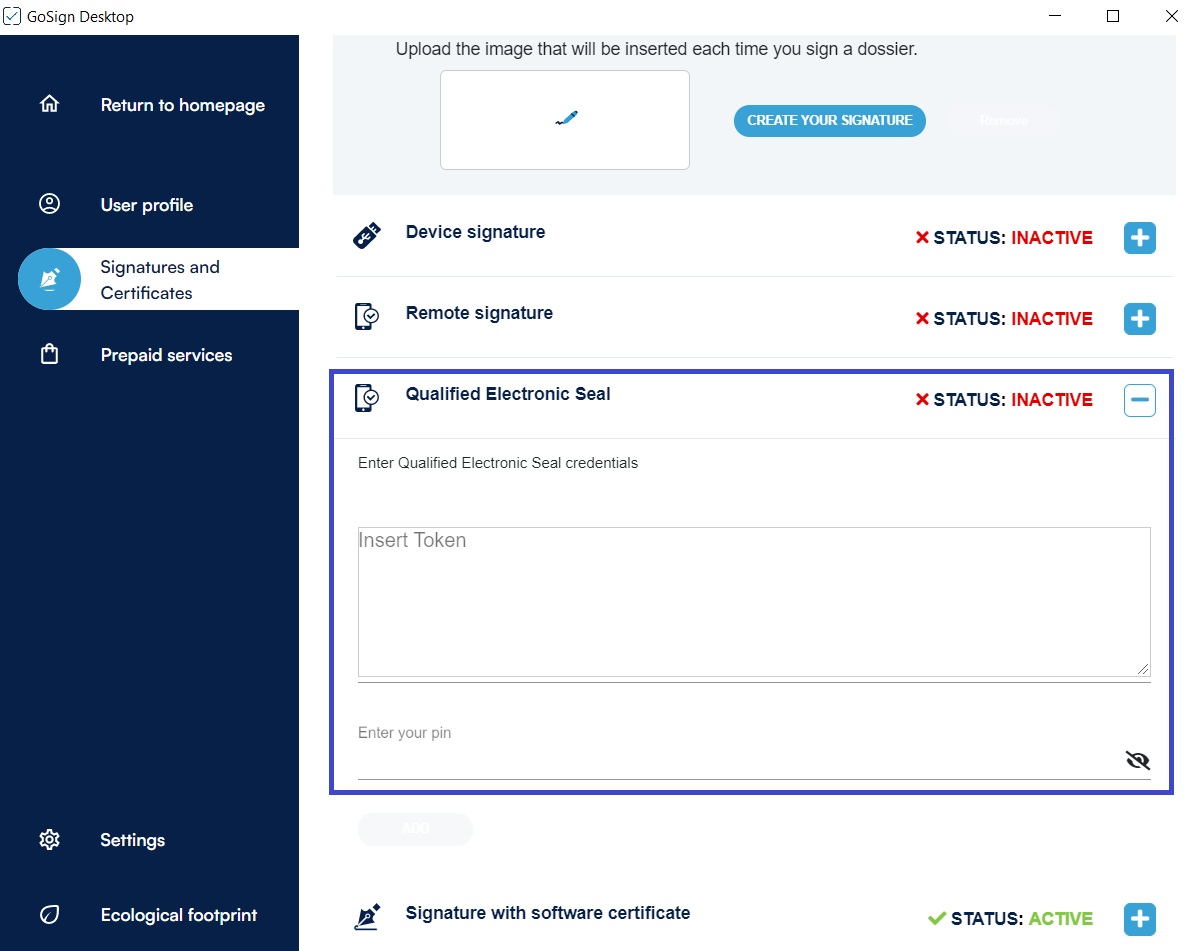
A click on the Add button allows you to conclude the procedure.
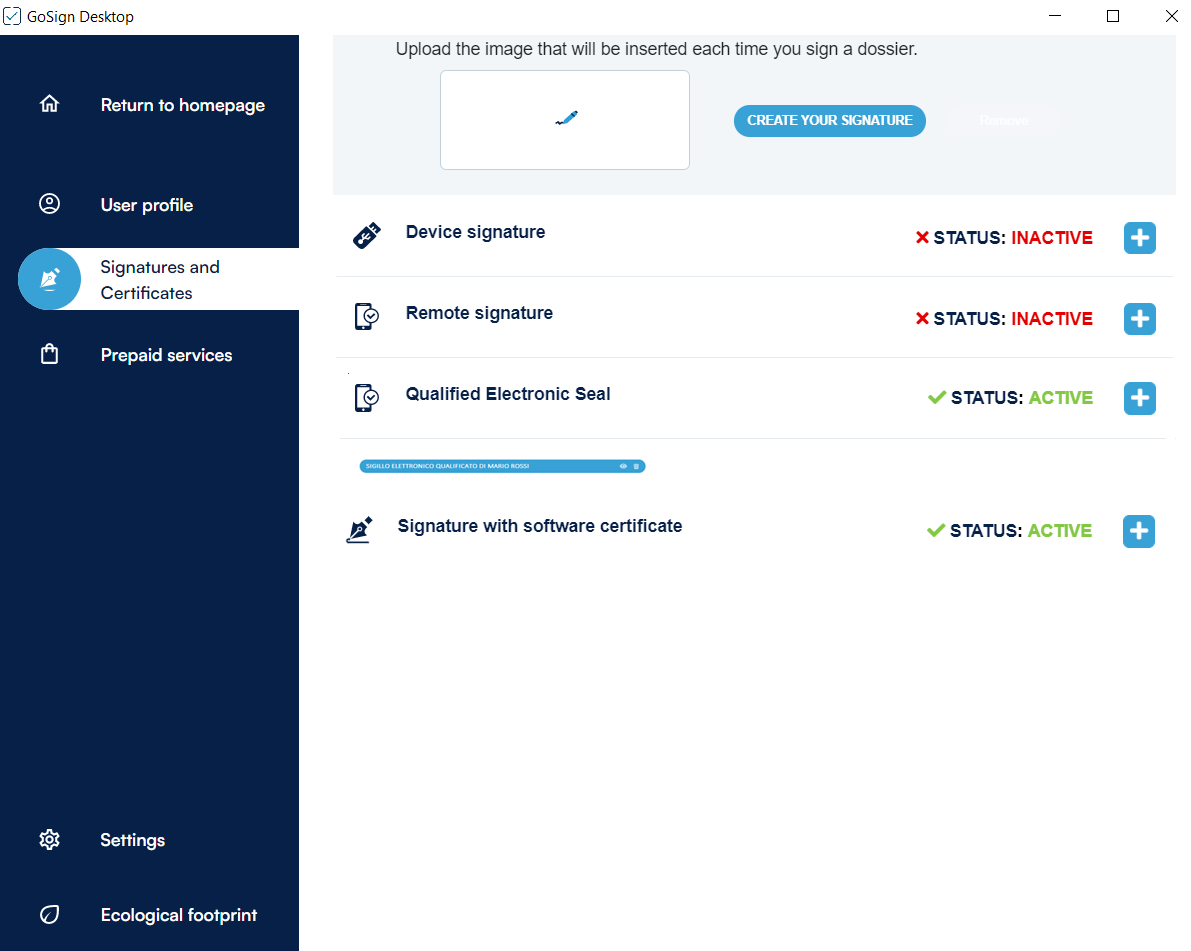
Once the signature token has been generated on MySign (Signature Token section), it will be possible to insert it in the appropriate box inside the Qualified Electronic Seal configured previously.
If you have a P12 certificate, to configure it you have to move to the menu on the left and select the dedicated section Signatures and Certificates_ in the Signing with software certificate section.
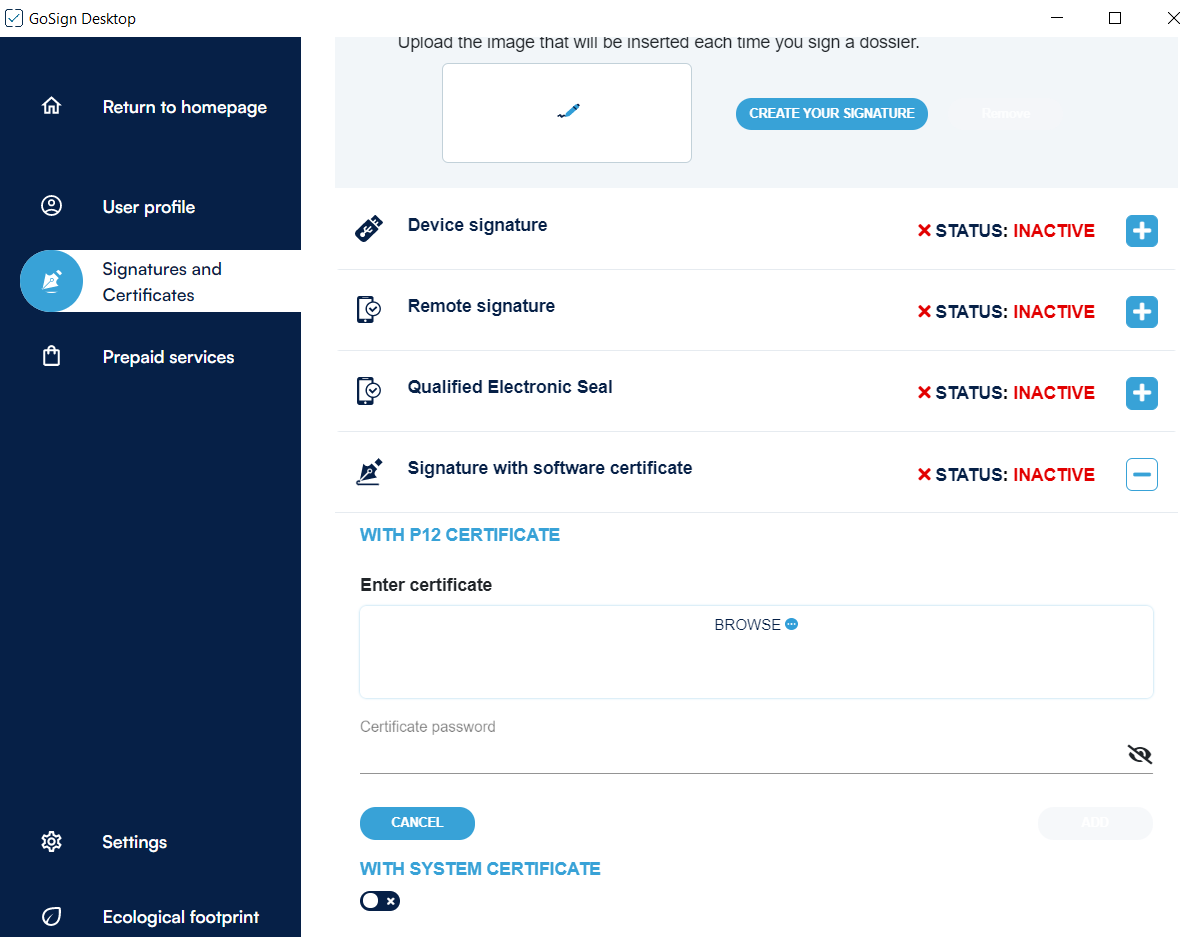
To upload the certificate, you have to click on the BROWSE box and call up the p12 certificate file in the software. Once uploaded, you will be prompted for the password to activate the certificate.

If you need to prove - or validate - the existence of a document on a certain date, you can do it by using the time stamp.
Before starting the actual time stamping process (or even later via the CONFIRM function), check that you have an adequate number of time stamps at disposal by clicking on the menu on the left and select the section dedicated to Prepaid services.
Within this area, you have the possibility to enter the User ID to access the service and the password. You also have the possibility to choose whether to add the time stamp to each document.
A click on the Add button allows you to proceed.
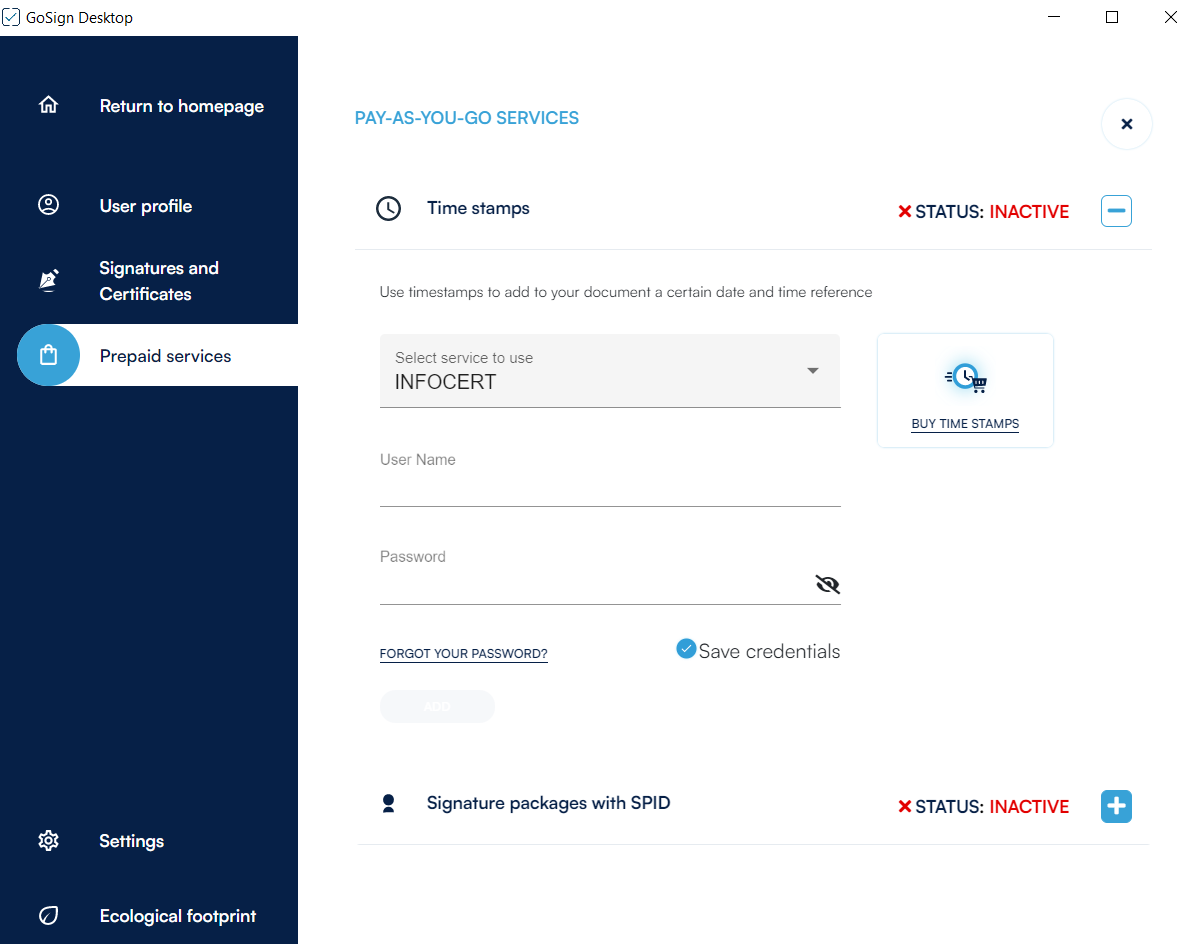
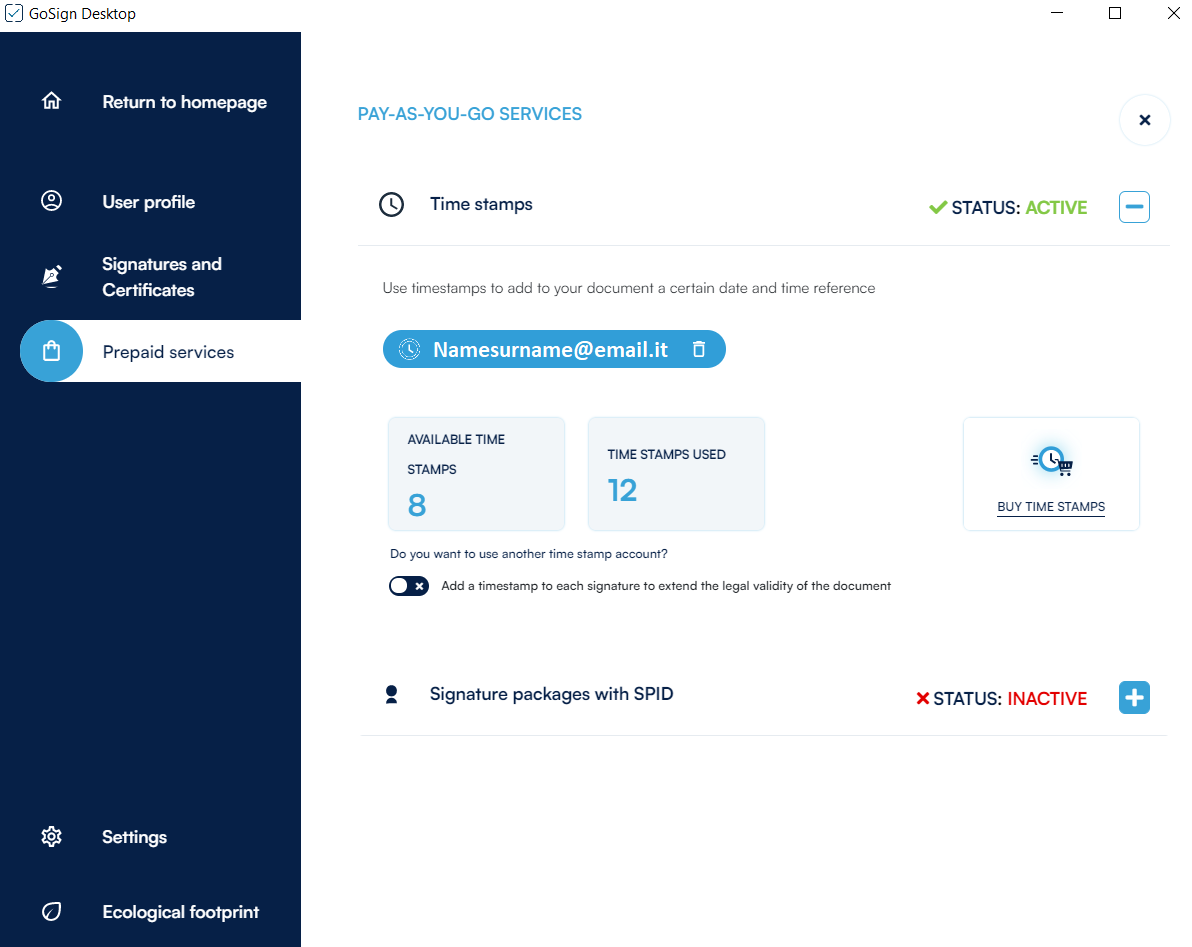
GoSign Desktop performs the required check and give you the report on your situation; if you have a sufficient number of time stamps, you can continue your work, otherwise, you can purchase the missing ones by clicking on the Buy time stamps option.
Time stamps can be used in several ways:
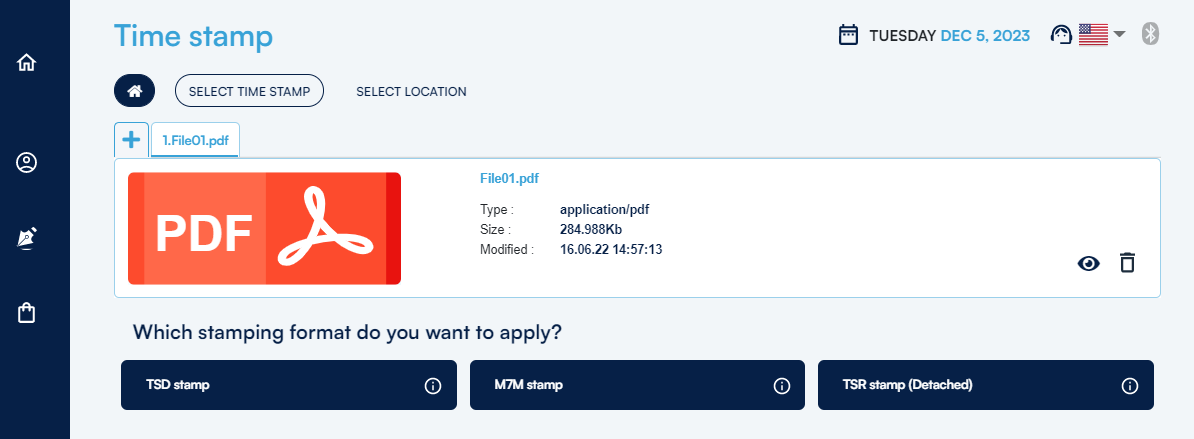
Once the document has been selected, GoSign Desktop indicates its details (type, size, etc.) and if necessary, you can view it by clicking on the eye icon and the delete it by clicking on the trash icon.
In the lower part of the screen you can see the three types of time stamps that can be applied to the document (or to documents if you work with a PRO license).
Three marking technologies are available:
TSD: will return a document with .tsd extension;
M7M: will return a document with .m7m extension;
TSR (Available only with PRO license): it will return a document with .tsr extension (detached).
Once you have selected the type of brand you click on the CHOOSE button under the chosen type. You will see at the bottom of the screen the data relating to the status of the brands still available and those already used linked to the account; if it has not yet been configured, you will be asked for the credentials for the time stamp certificate account and you will be redirected to the Prepaid services section in the Time stamps menu.
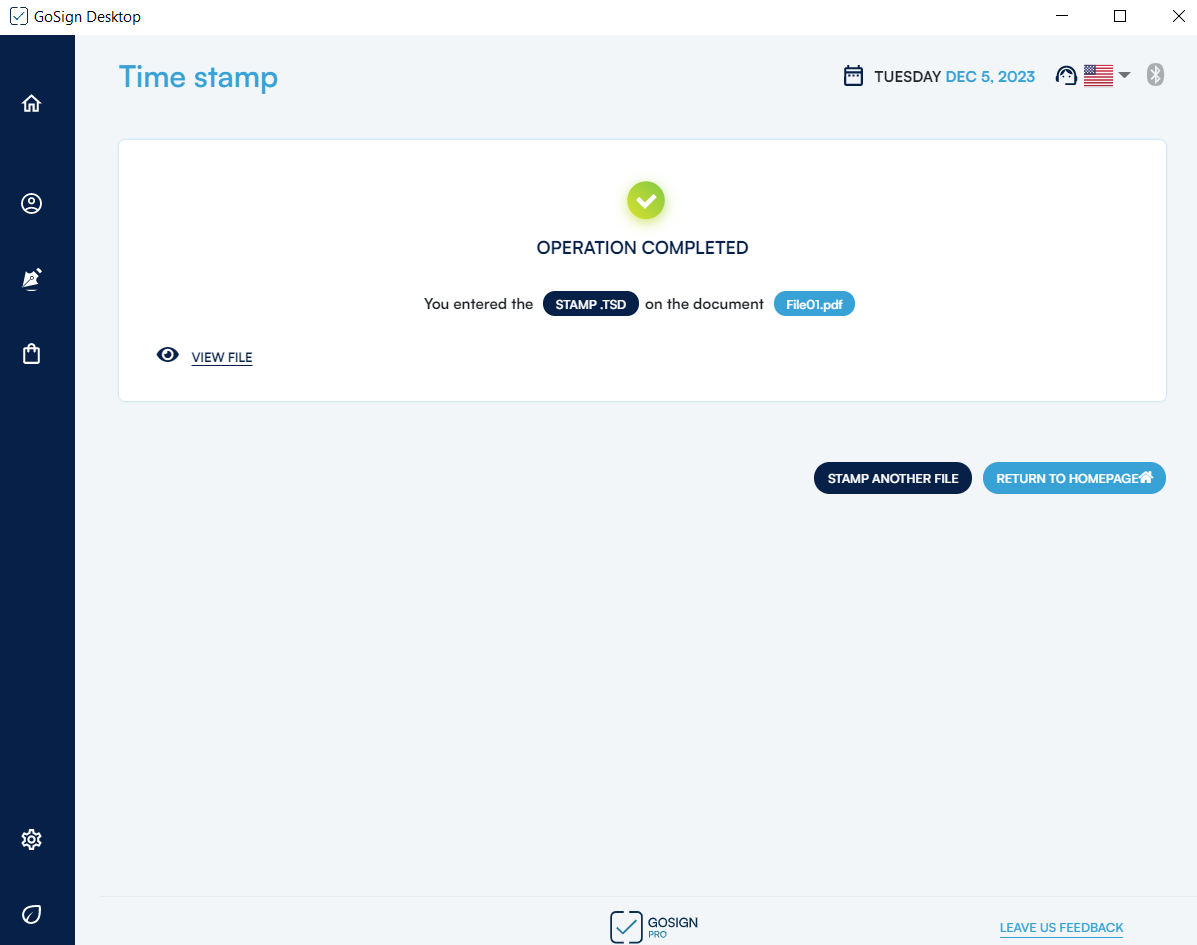
Once you have verified that you have enough time stamps available to be able to mark the document (or more documents) you have to press the CONFIRM button, and you will be asked to decide where you want to save the marked document. By default, the path provided corresponds to the source folder of the marked file.
The time stamping process ends by pressing the CONFIRM button. GoSign Desktop will confirm the time stamp in the last screen of the function process.
In the User profile menu on the left you can activate the PRO license by going to the License section.
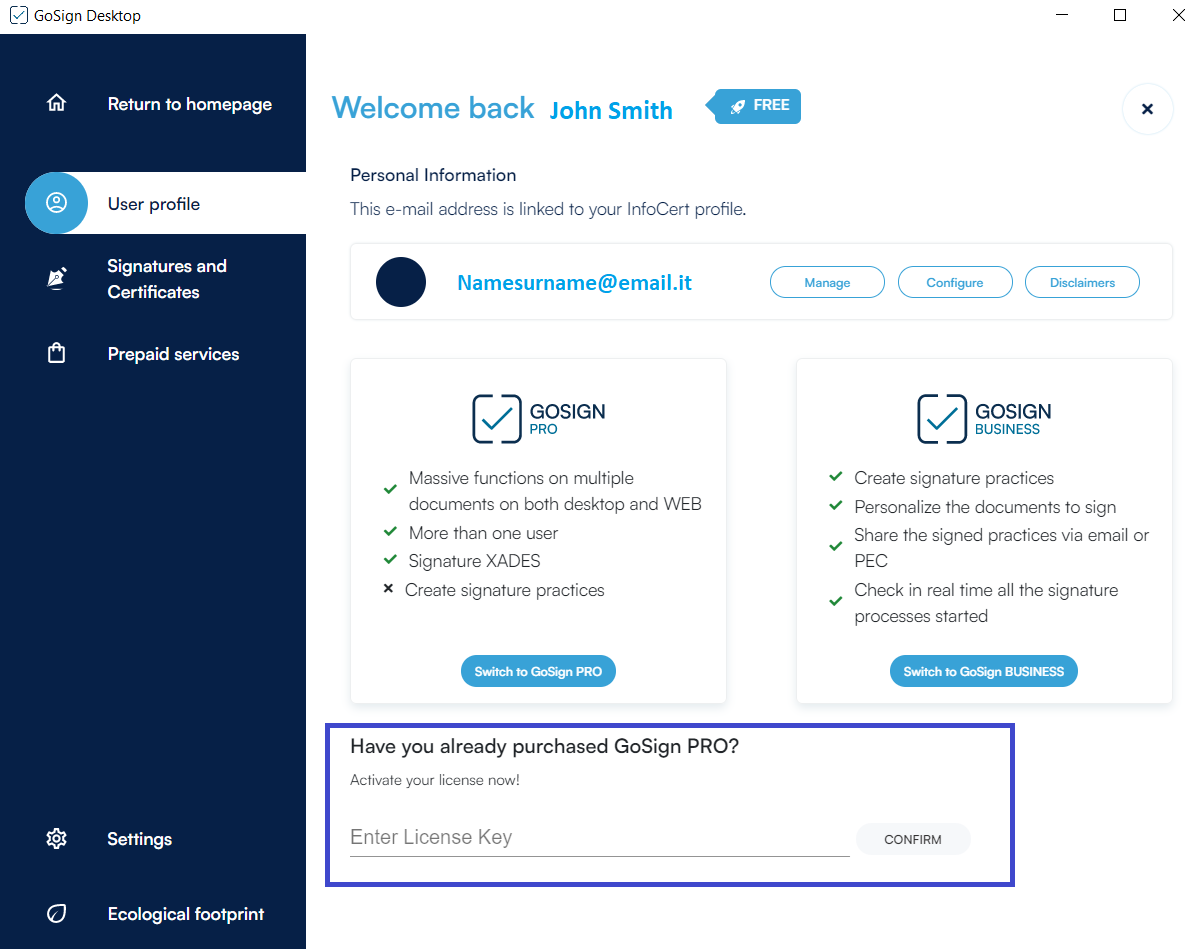
Within this section it will be possible to enter the number code of the PRO license that was sent by email from InfoCert. Once the code has been entered, activation is carried out by clicking on the Confirm button.
GoSign Desktop PRO confirms the successfully update showing the currently active PRO license code on video.
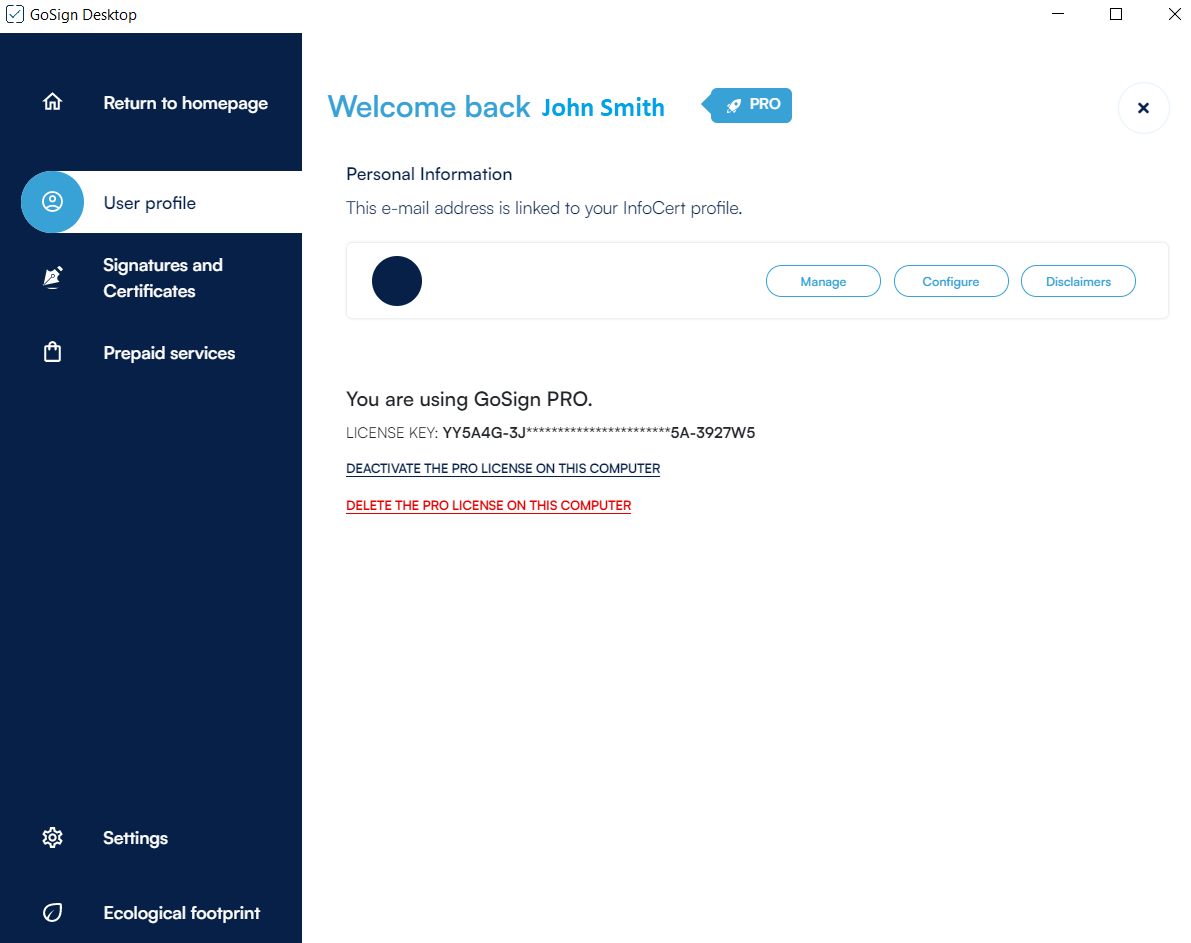
If you need to uninstall the advanced features from the workstation, simply click on the Deactivate the Pro license on this computer link; a message will be shown asking you to confirm the uninstallation.
In this section you can also check the duration status of the license: near the expiration of the license, you will be asked if you want to buy a new one or if you want to renew the existing one.
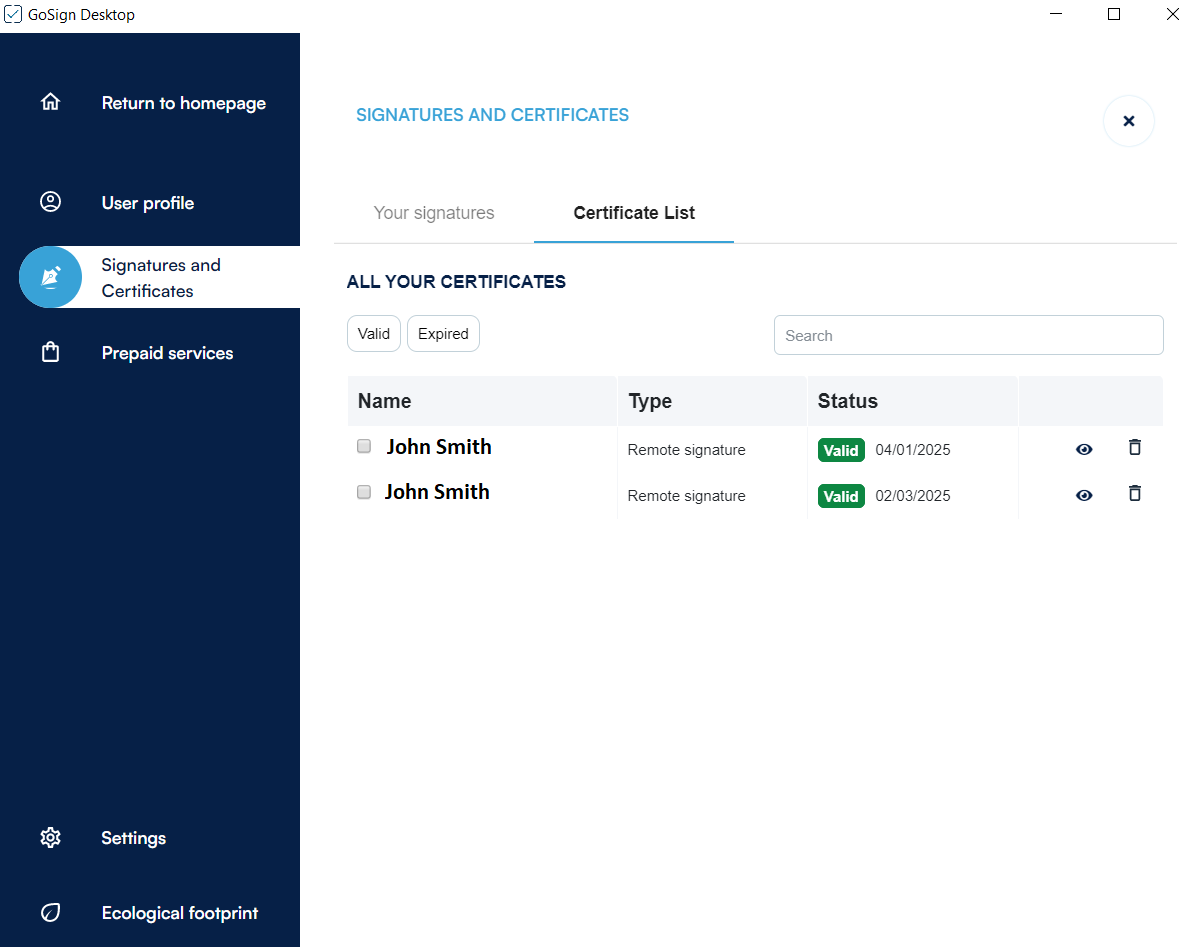
In the Signatures and Certificates menu you can view all the certifications configured at that time in GoSign Desktop and you can view them in the Certificate List section.
The section displays the list of certificates. For each certificate, the following is displayed:
the name of the owner of the certificate;
the type of certificate;
expiration date;
the eye icon to view the technical information related to the certificate;
the trash can icon to clear the certificate.
There is a special section where you can see expired or expiring signatures. In addition, when the expiration date itself approaches, you will be asked if you want to renew or purchase a new certificate.
In the Settings section you can change:
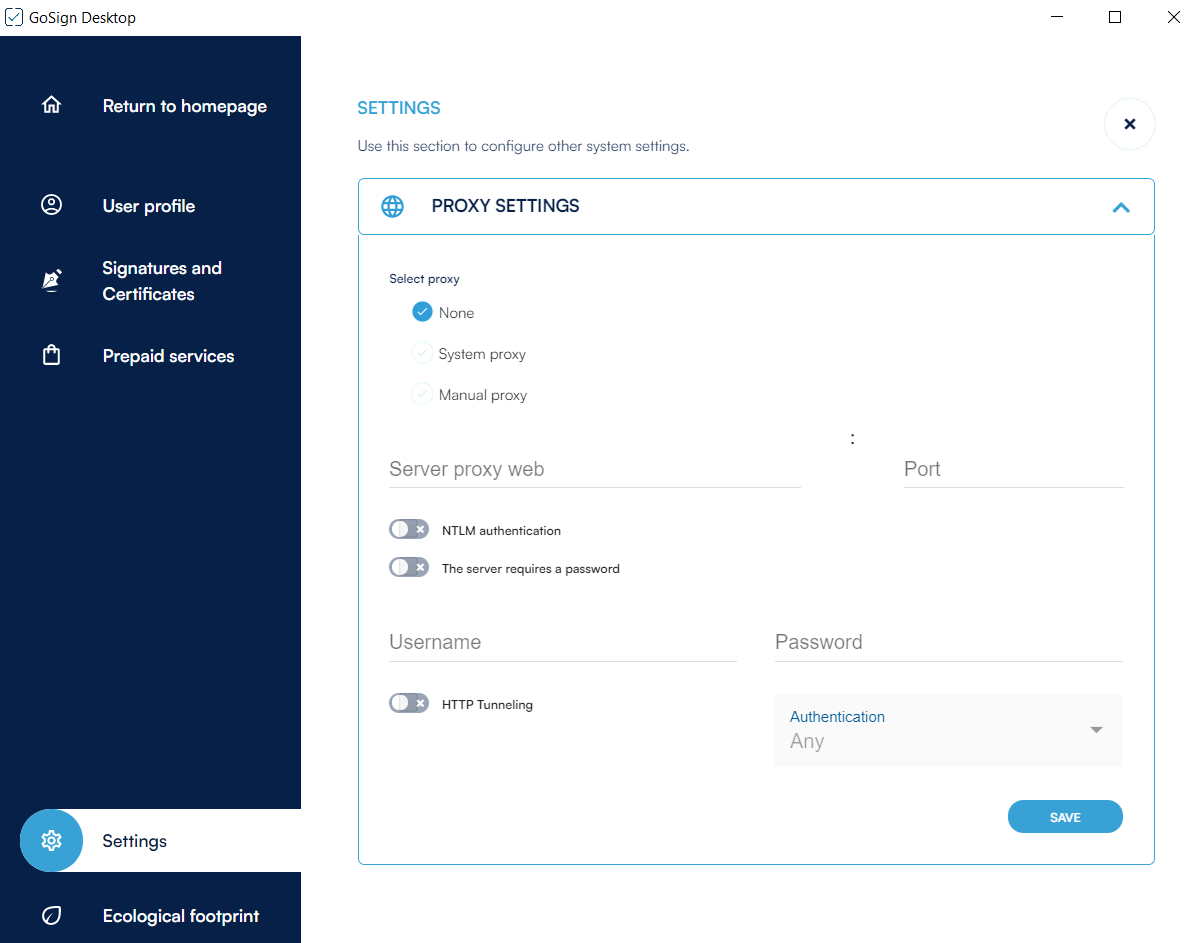
Sometimes it is necessary, for security reasons, to have an active proxy server on your computer. For this reason, GoSign Desktop allows the user both to have no proxy and to choose two types of proxies.
System Proxy -> By selecting the system proxy option, the application will rely on the proxy that is set by the operating system. Once you have decided to make it work simply press on SAVE.
Manual Proxy -> If, on the other hand, the user has the address of a specific proxy on which he knows he will have to rely in order to work safely, it will be sufficient to choose the Manual Proxy option. With this option, it will be mandatory to enter the address of the proxy server with its port. In addition, if necessary, you can also activate the option of obligation to enter the username and password of those who can access the proxy or if you need to authenticate through NTLM. The authentication method can also be chosen.
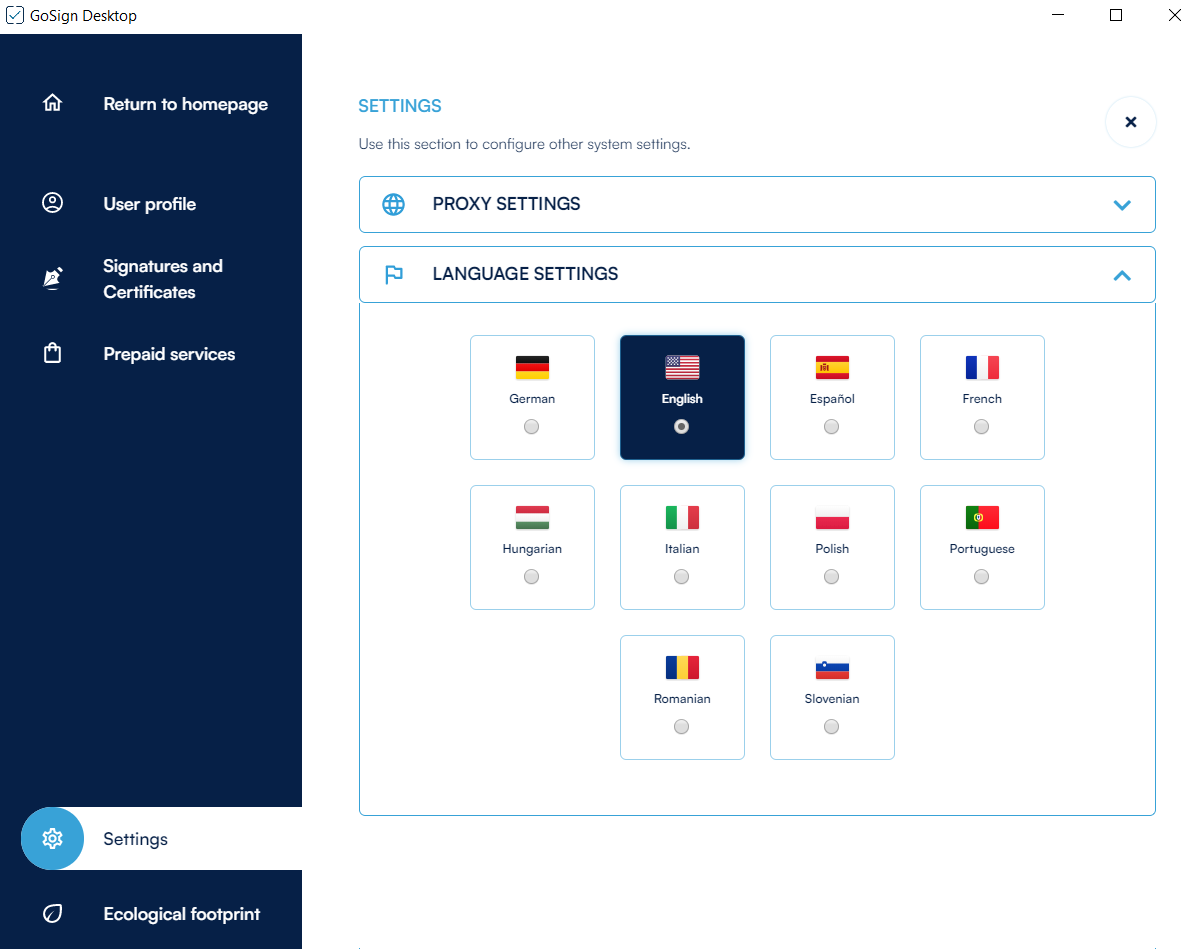
Given the wide diffusion of GoSign it is possible to translate the whole application into 10 different languages:
German;
English;
Spanish;
French;
Hungarian;
Italian;
Polish;
Portuguese;
Romanian,
Slovenian.
To change the language simply click on the tab of the language you prefer to use.
With this option, the user can import the entire list of certifications where the documents will be recognized; will be updated automatically. Clicking on the eye icon will show all the Alt InfoCert present at that time.

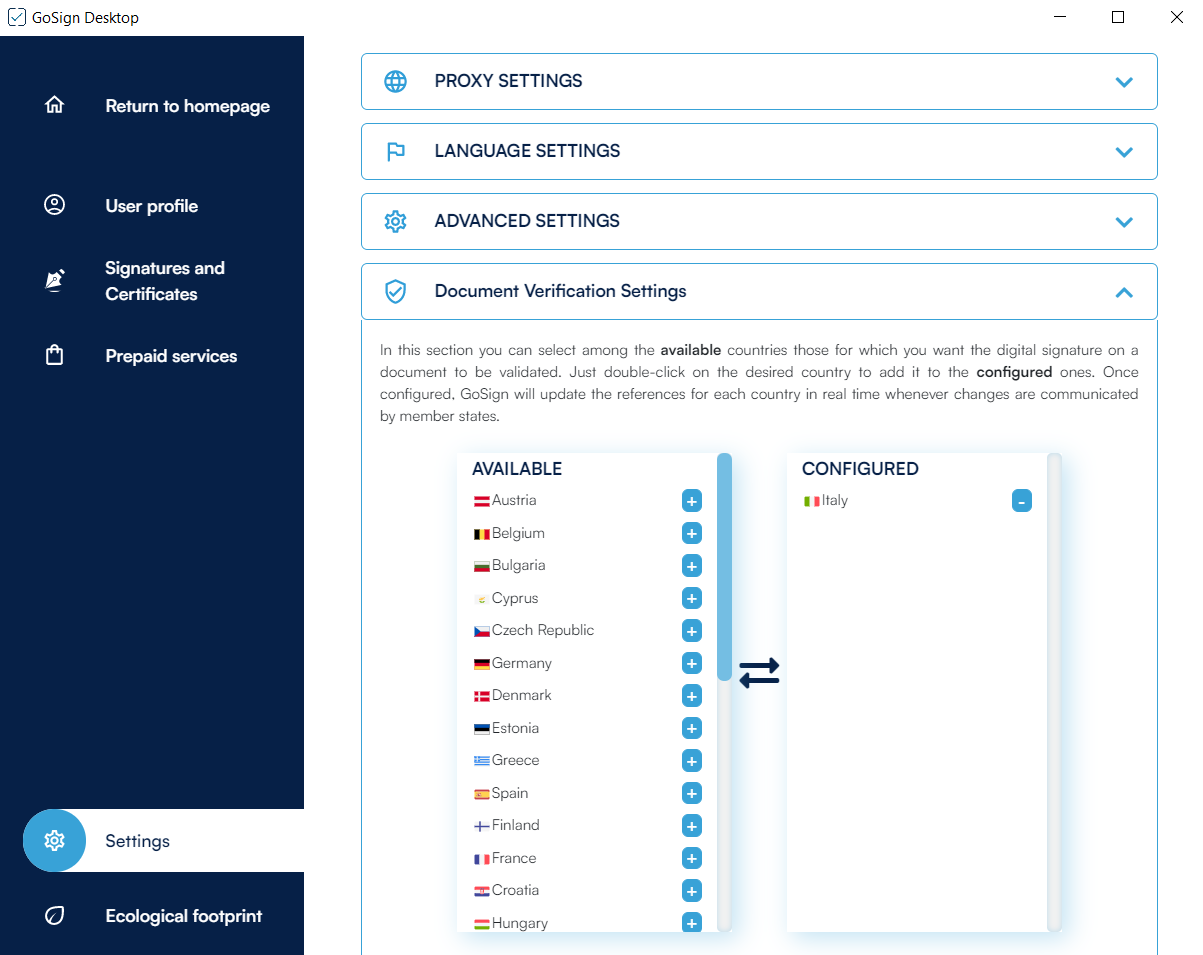
With this option, you can view the list of available European countries for which you want the digital signature to be verified on a document.
In the left column you will find all the countries that can be configured on GoSign Desktop by double-clicking.
Clicking on the Refresh button will perform a certificate search to check whether or not there are any updates related to the configured certificates.
The Sign function allows you to select one or more (the ability to sign multiple documents at the same time is only possible in the PRO version) documents to be signed and recall them within the software by clicking on the section of the home page dedicated to the Sign function.
GoSign Desktop, once the document has been loaded, presents the details of the document (type, size, etc.) and, if necessary, you can Open the document (by clicking the eye icon) and Delete it (by clicking the trash icon).
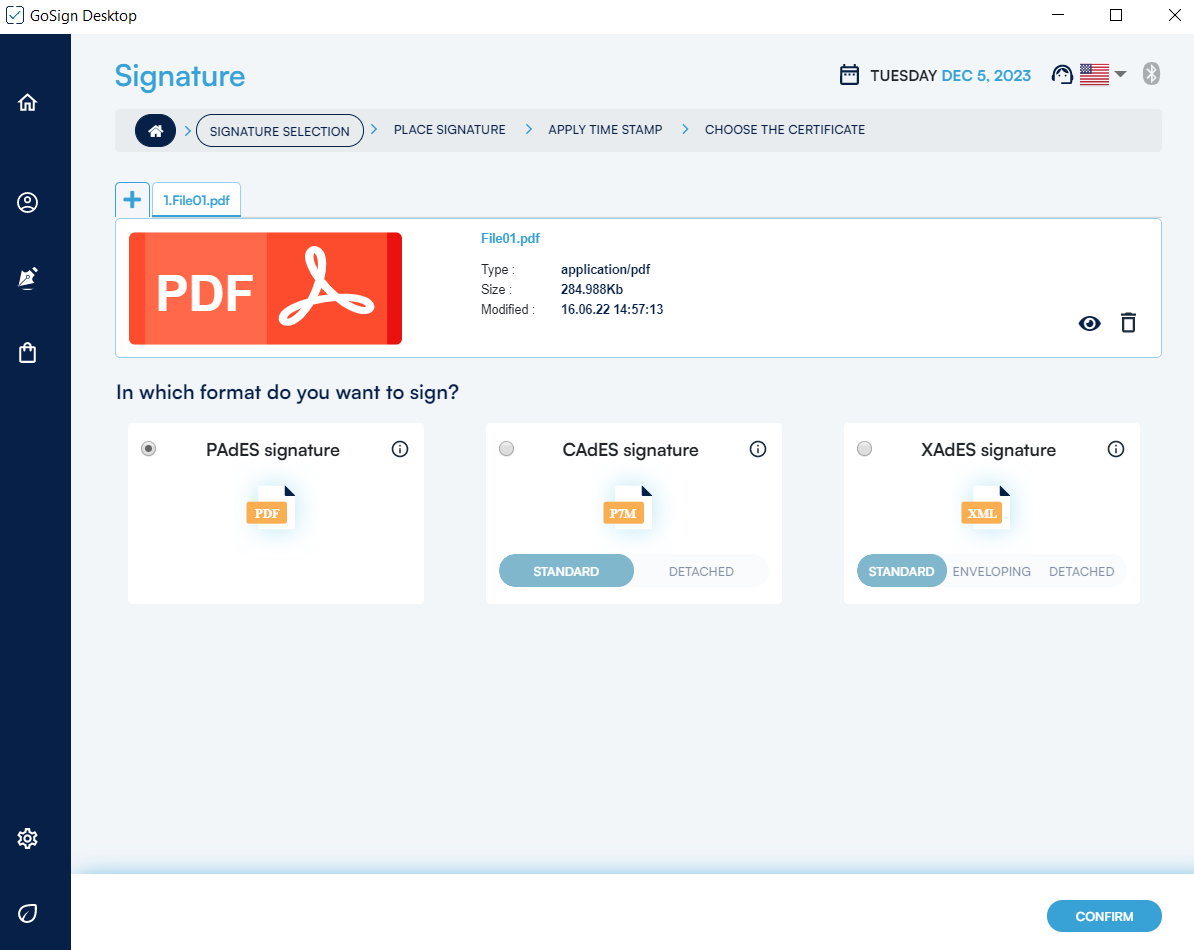
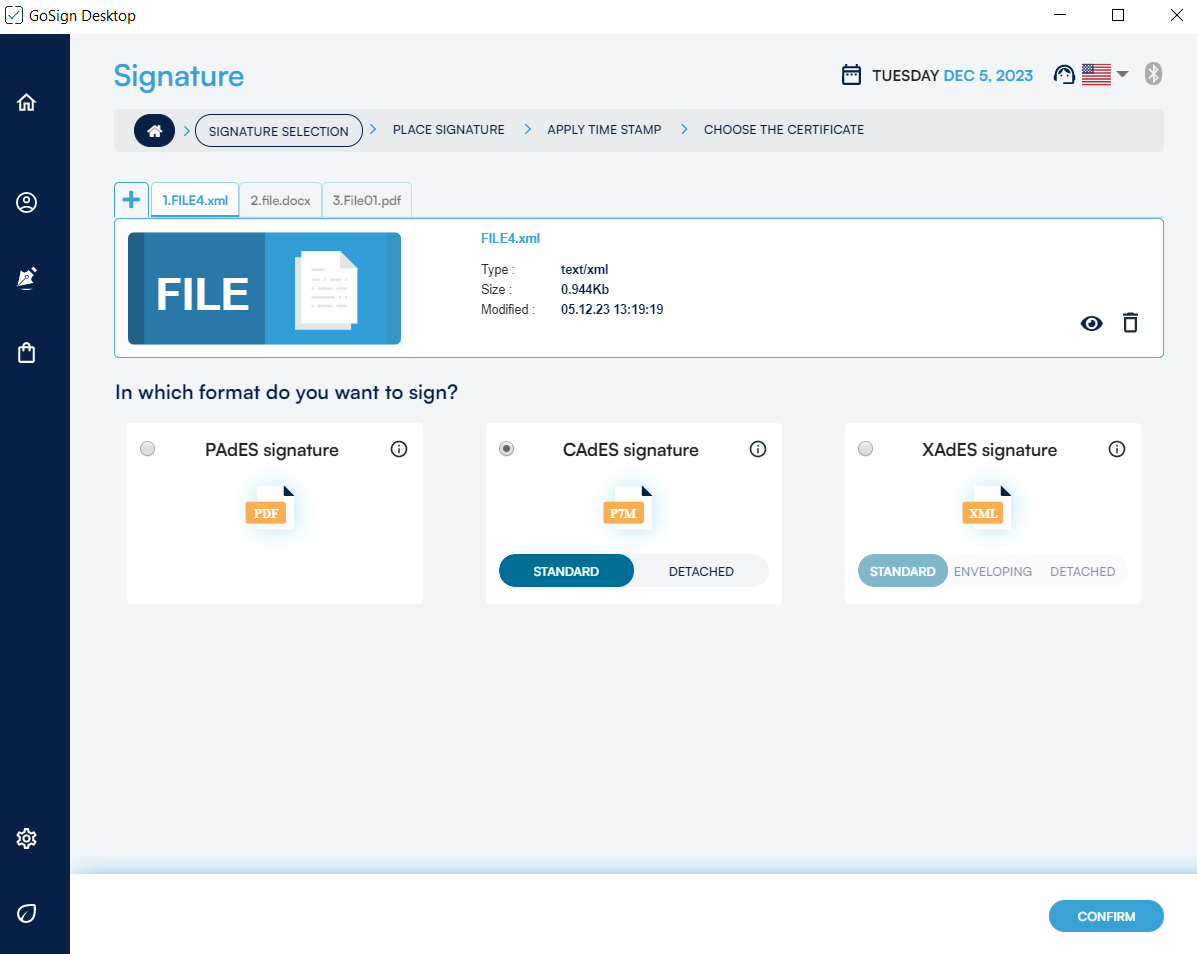
Among the features offered by the PRO function, there is also the possibility to select the type of signature format you want on that document. This possibility is given for the CADeS and XADeS signatures.
The three formats available are:
PADes(.pdf) -> It is a digital signature that can only be affixed to documents in .pdf format; you can proceed by clicking the PADeS signature.
CAdES (.p7m) -> To produce a document with the .p7m extension, you need to choose the CAdES technology, (this signature format allows you to sign any type of document). You can then choose between_ Standard CAdES_, recognizable by the additional .p7m extension added to the original file extension; Standard CAdES but detached, recognizable by the further extension .p7s attributed to files that contain digital signatures; by choosing this option you will have as a final document a file containing ONLY the digital signature.
XAdES (.xml) (only in the PRO version) -> Among the advanced features offered by the PRO version of GoSign Desktop is available the signing of .xml documents.
Then, you can choose between:
Standard, recognizable because they will keep the original .xml extension;
Enveloping, where it is the signature that embeds the original documents;
Detached; by choosing this option you will have as a final document a file containing ONLY the digital signature.
N.B: if you save the signed file in this way, in order to verify the document in the Check function, you will also need to upload the original document together with the signature file.
Signature image insertion
If PADeS signature technology is chosen, GoSign Desktop gives the possibility to make the signature visible within the document. This is possible by activating the display signature in document check box; in this case, it is mandatory to apply the signature in the document by double-clicking on the preview of the document, otherwise, it is not possible to continue the Signature process. It is also possible to change the size and position of the signature slip.
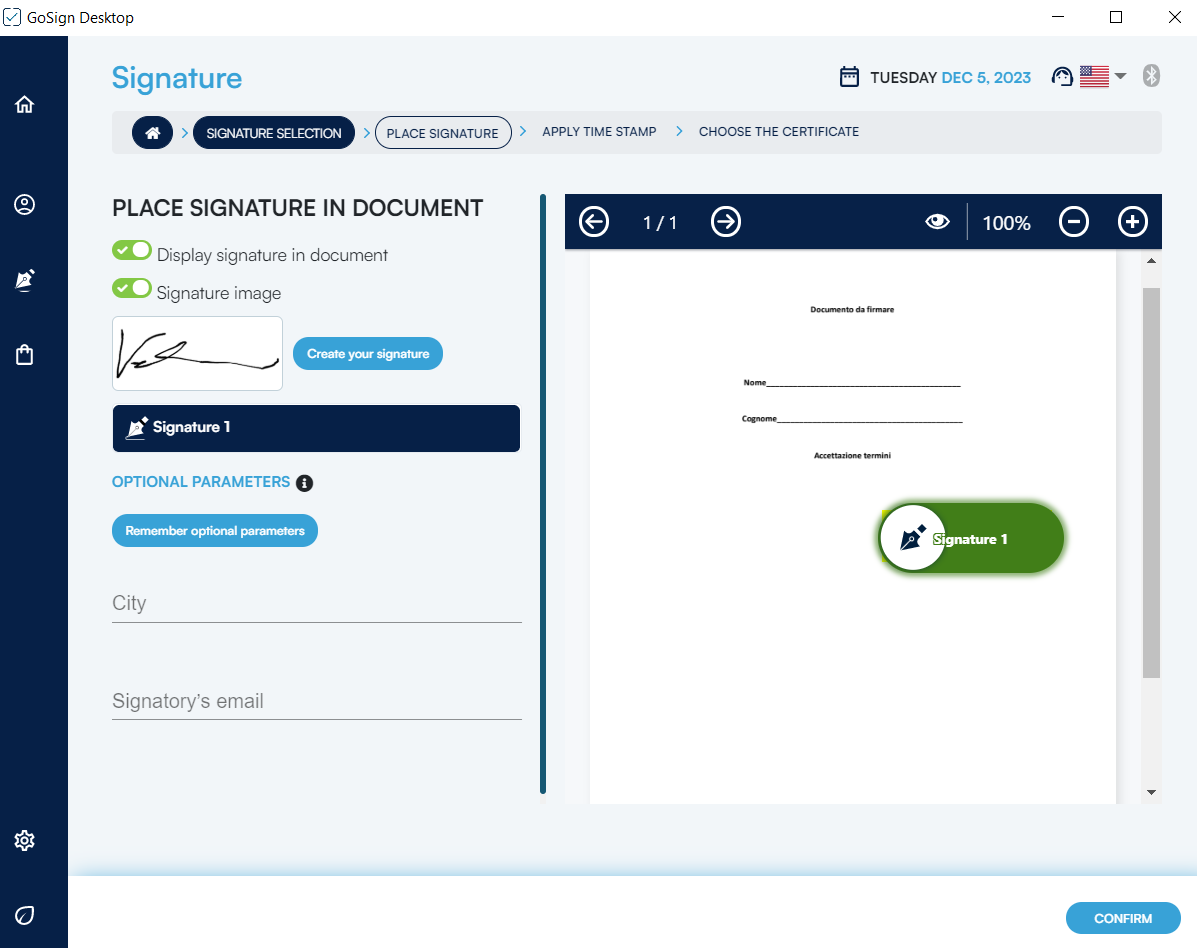
It is very important to keep in mind that this graphic sign has no legal value and this is NOT my digital sgnature.
It is possible to add additional information:
The locality;
E-mail of the person who signs.
To add more signature boxes, just double-click on the pdf preview; to remove it, click on the trash icon.
When signing a document, in the last section, Choose the certificate, you can select the type of signature in GoSign that you want to use to finalize the operation and affix the digital signature.
After selecting the signature with device option (Smart Card or a BusinessKey), you can proceed with signing the document.
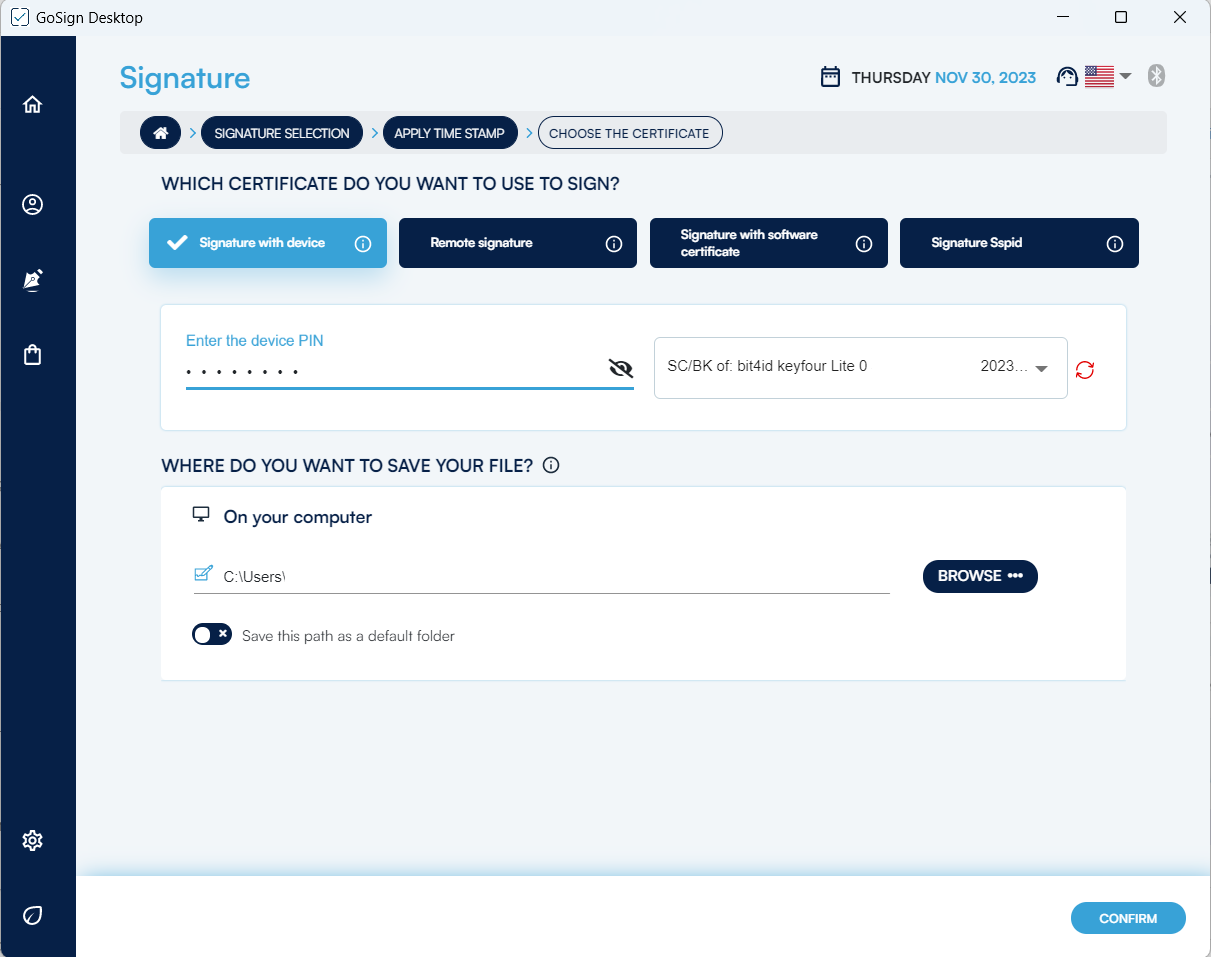
You have to enter the protection PIN of the physical device in the Enter the device PIN field. If no device is detected by clicking on the refresh icon, a signature device connected to the PC, will be searched again and if the result is positive the name will be displayed in the menu.
By default, GoSign Desktop proposes a possible path in the Save destination field, which coincides with the overwriting of the original file, thus being replaced by the signed document. If you choose to overwrite the original document, you will be prompted to confirm the operation. Otherwise through the Browse button it will be possible to change the destination of the signed document with the possibility of renaming it. Once you have chosen the destination of the document by clicking on the OK button, the process of over-writing the document will be concluded.
After selecting the Remote signature certificate option, you can proceed with signing the document.
To complete the signing operation, enter the remote signature PIN, and then the OTP code that you will receive.
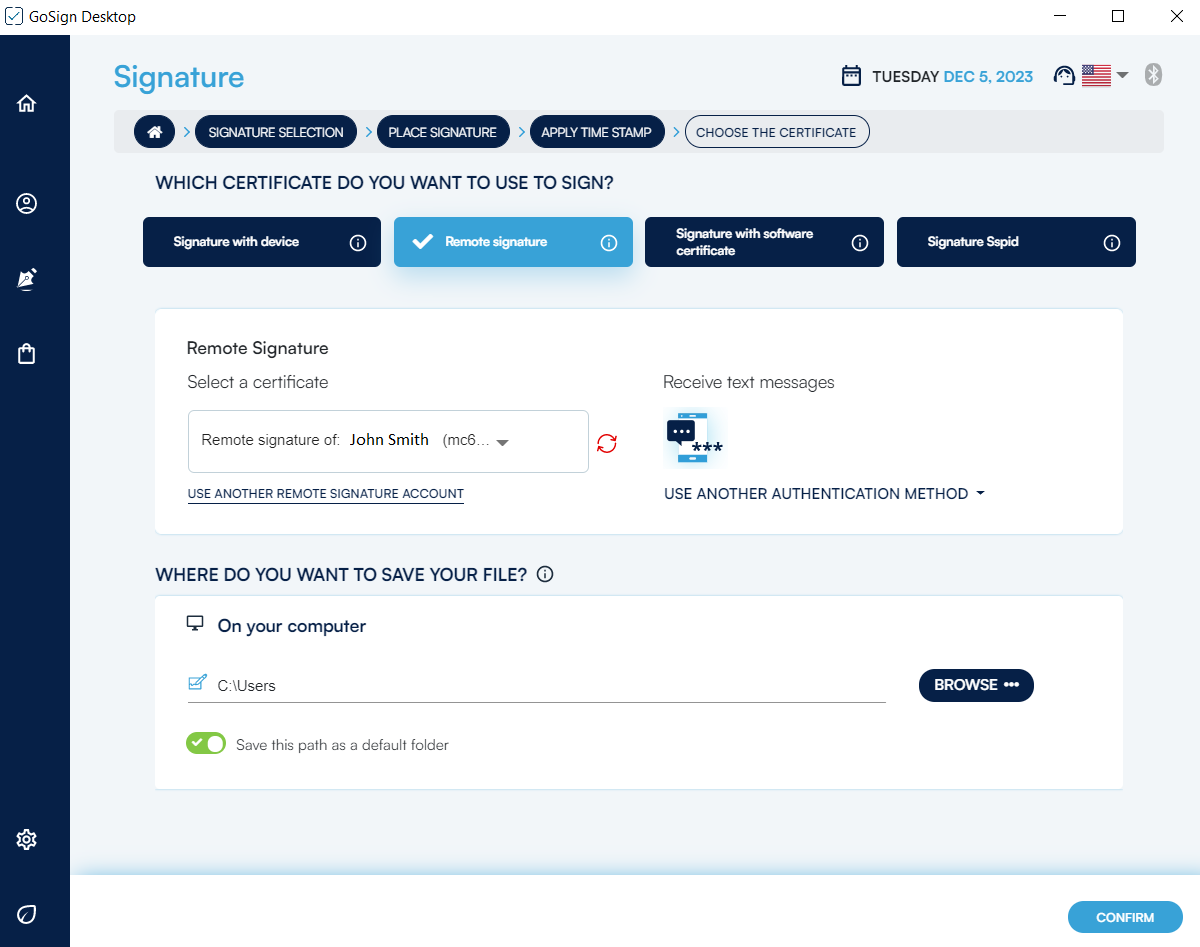
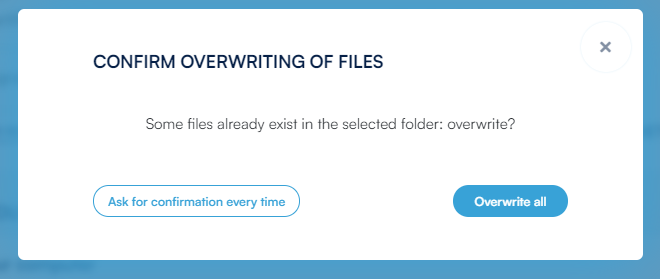
In case of multiple signatures, you will be asked on the next screen if you want to overwrite all the documents (overwrite all), or decide separately for each (decide for each file); in the second case, as many pop-ups will appear as the number of documents for the possibility of signing them or not.
To complete the signing operation, simply enter the remote signature PIN, and then the OTP code received. GoSign Desktop Pro allows you to sign up to 10 documents with a single OTP code.
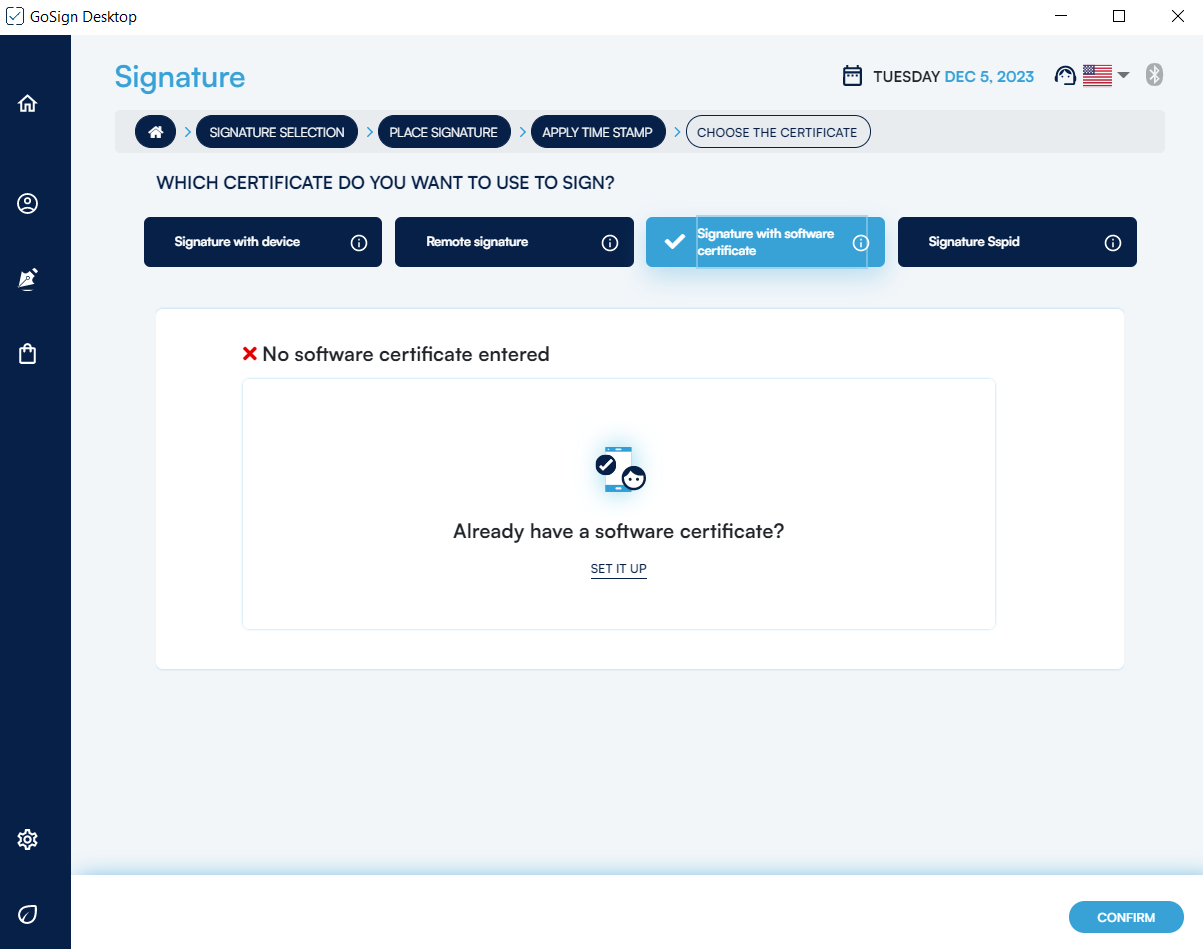
After selecting the software certificate option, you can proceed with signing the document.
Using the drop-down menu, you can choose the P12 certificate you want to use for signing the document. If it has not already been configured by clicking on Configure it will be possible to add a software signature certificate in the dedicated section.
Like the other modality, GoSign Desktop proposes a possible path in the Save destination field, which coincides with the overwriting of the original document, thus being replaced by the signed document. By clicking on Confirm, through the popup window you will be asked for the password relating to the certificate.
The last type of signature is the Sign with SPID: after selecting the appropriate tab, the counter of available/used signatures will be displayed, If the user used for access coincides with that of purchase.

If, during the purchase phase, you have chosen to associate the product with another user, different from the one used for the purchase, it will be possible to click on the link Do you want to pay with a coupon code? in order to enter the disposable code received by e-mail after the purchase.
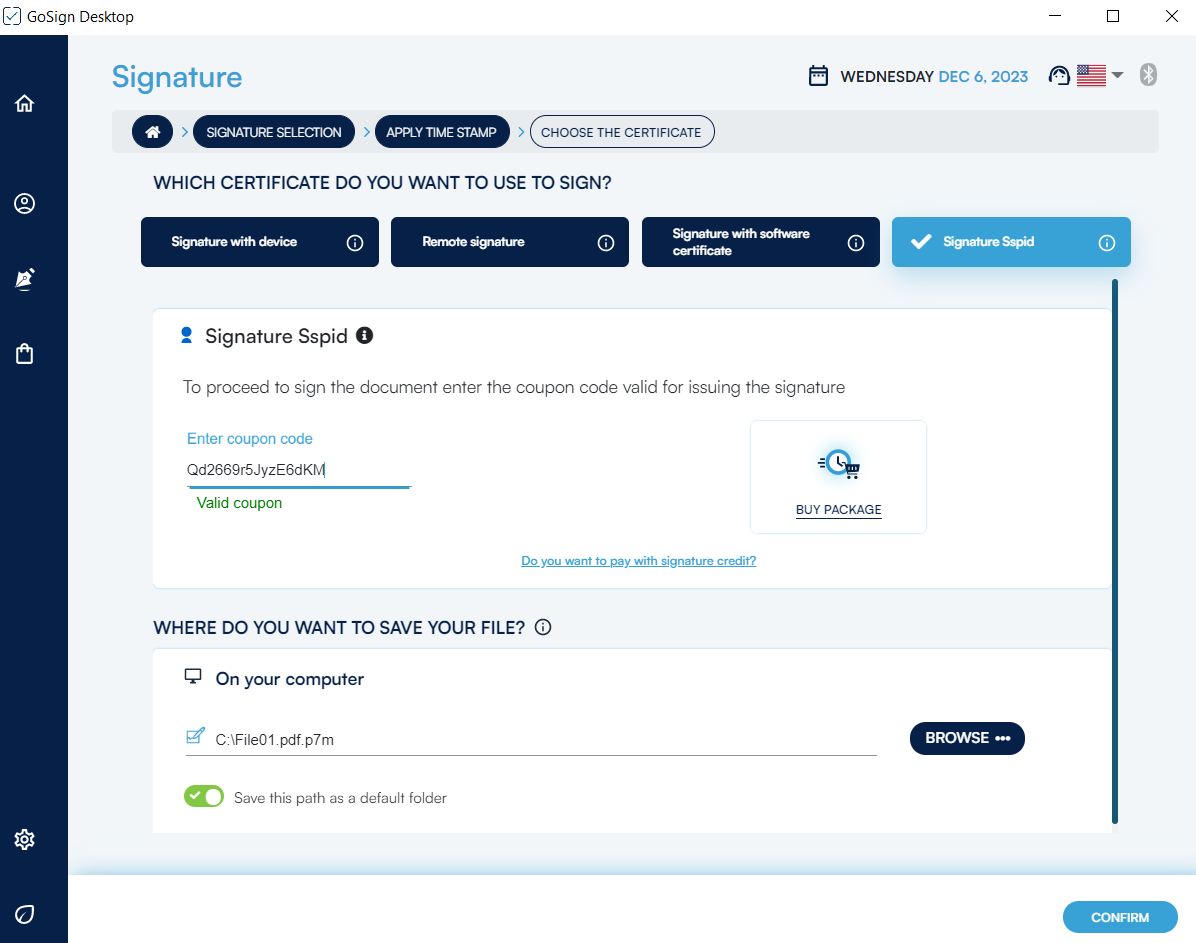
It will be necessary to pay attention to the coupon entered, which may be invalid if it has already been used previously.
The signing process, once the signing certificate is selected, will be the same for both options (account association and use of signing coupons).
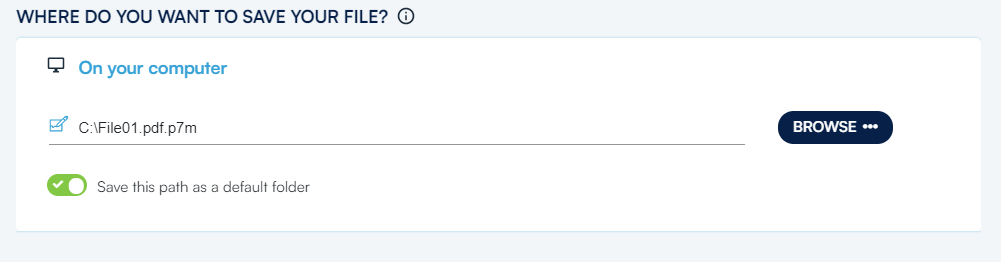
The next step involves choosing the destination folder for saving the signed file.
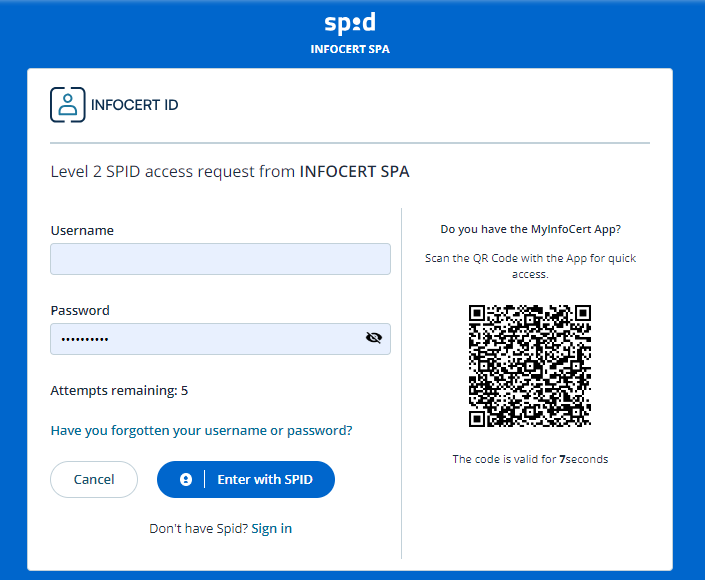
Finally, you will be asked to log in with the credentials relating to your SPID user.
By clicking on the Login in with SPID you can select the provider of your digital identity.

You will then be asked for level 2 SPID access, after which the GoSign Desktop app will open.
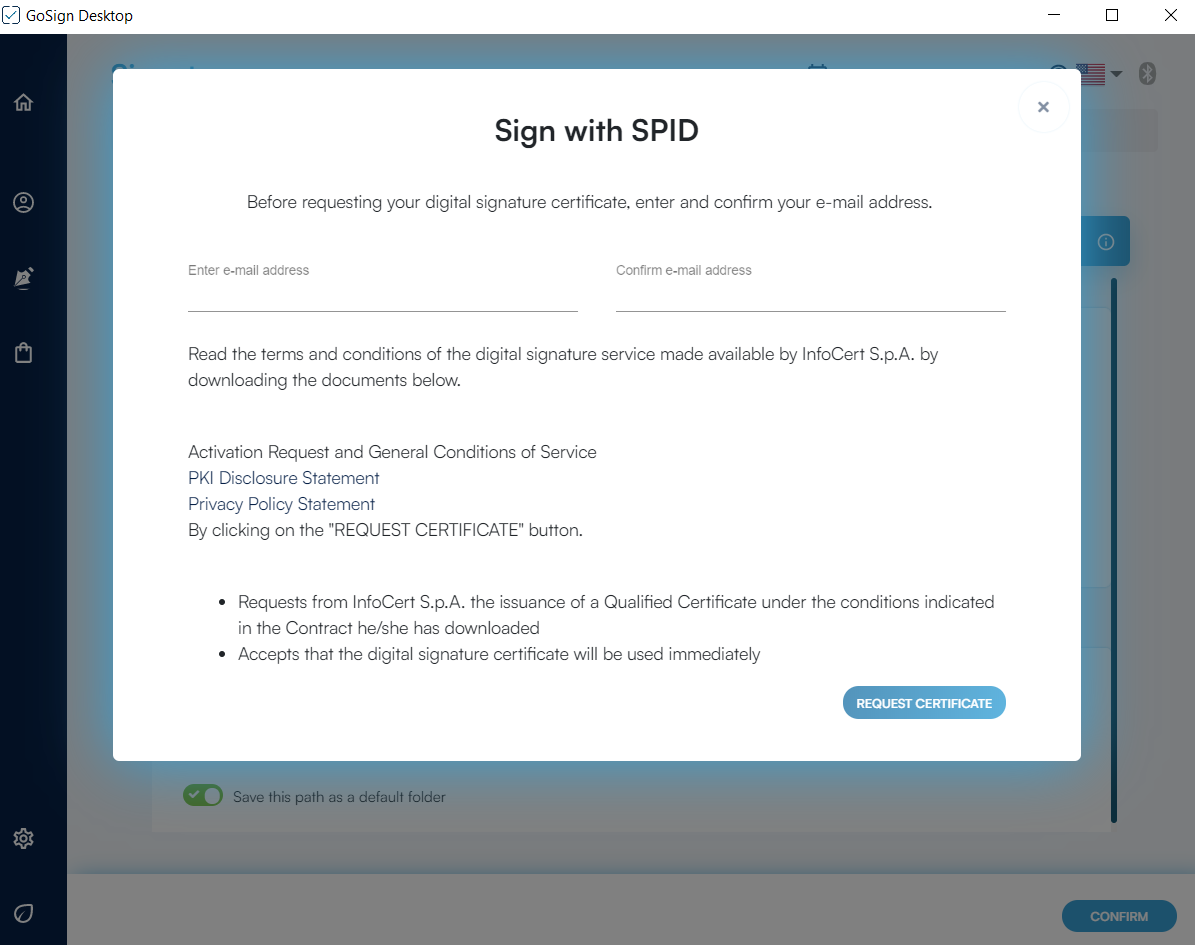
You will then proceed to enter and confirm any e-mail address, necessary to receive the contract for the use of the one-shot signature.
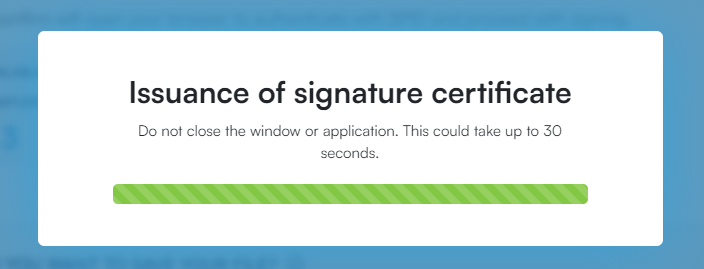
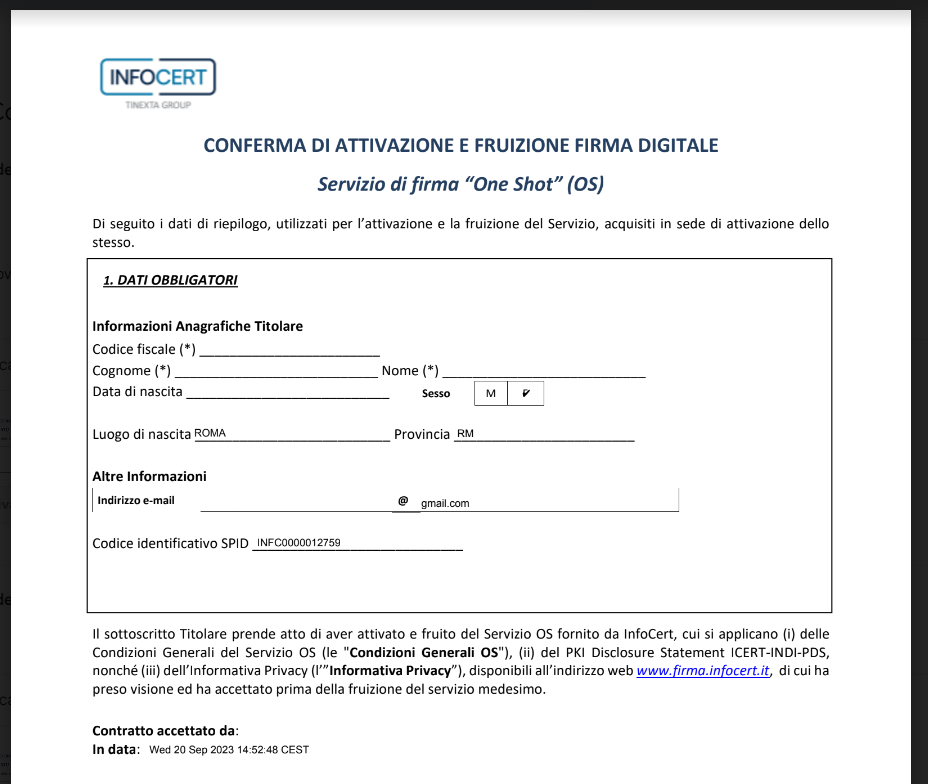
On the e-mail address previously entered and confirmed, you will receive the e-mail containing the contract relating to the signature request.
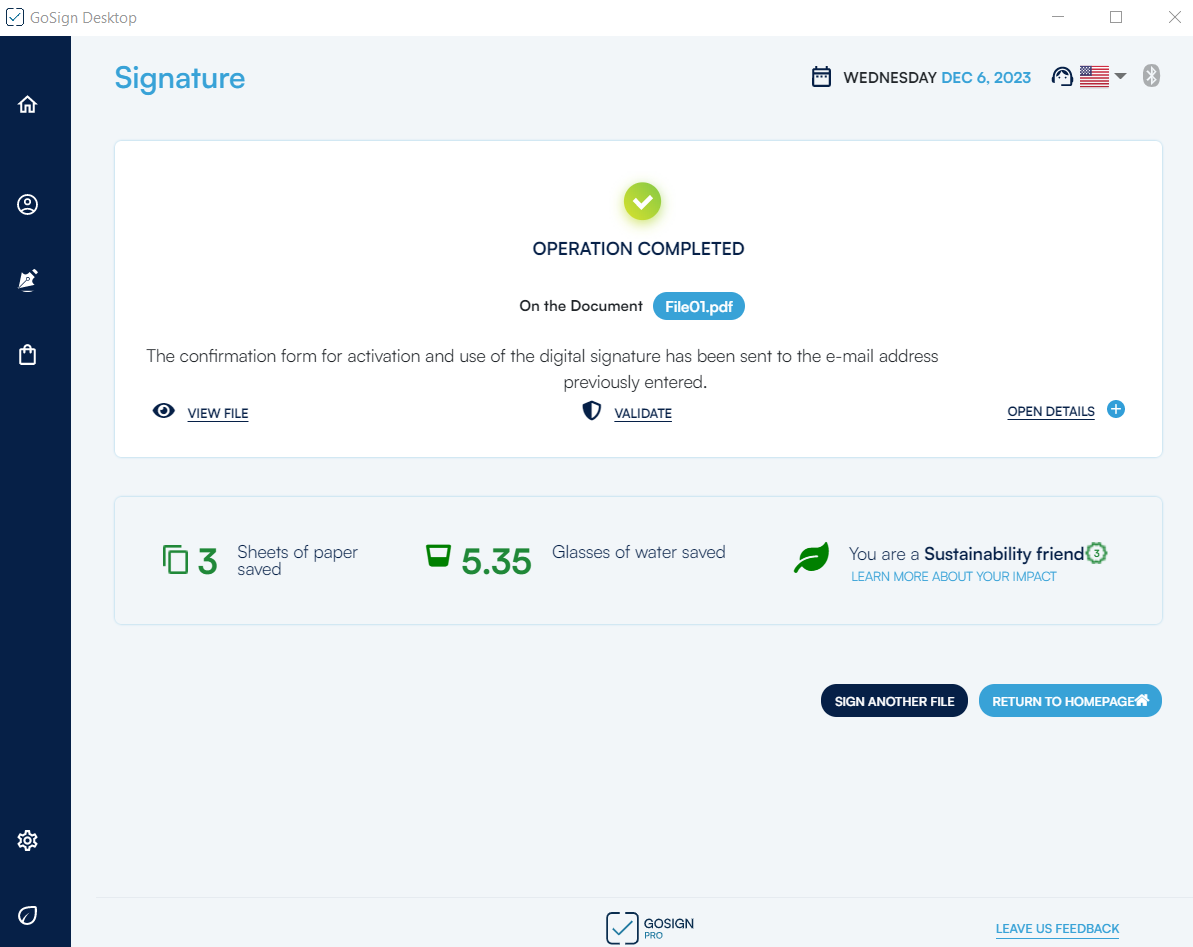
GoSign Desktop will confirm the successful signature in the last screen of the Signature function process. Clicking on the "+" next to Open details it is possible to view the type of signature and which certificate has been used and, if necessary, the signed document will be opened using the view file function.
Than you can choose if sign another file or return to the home page.
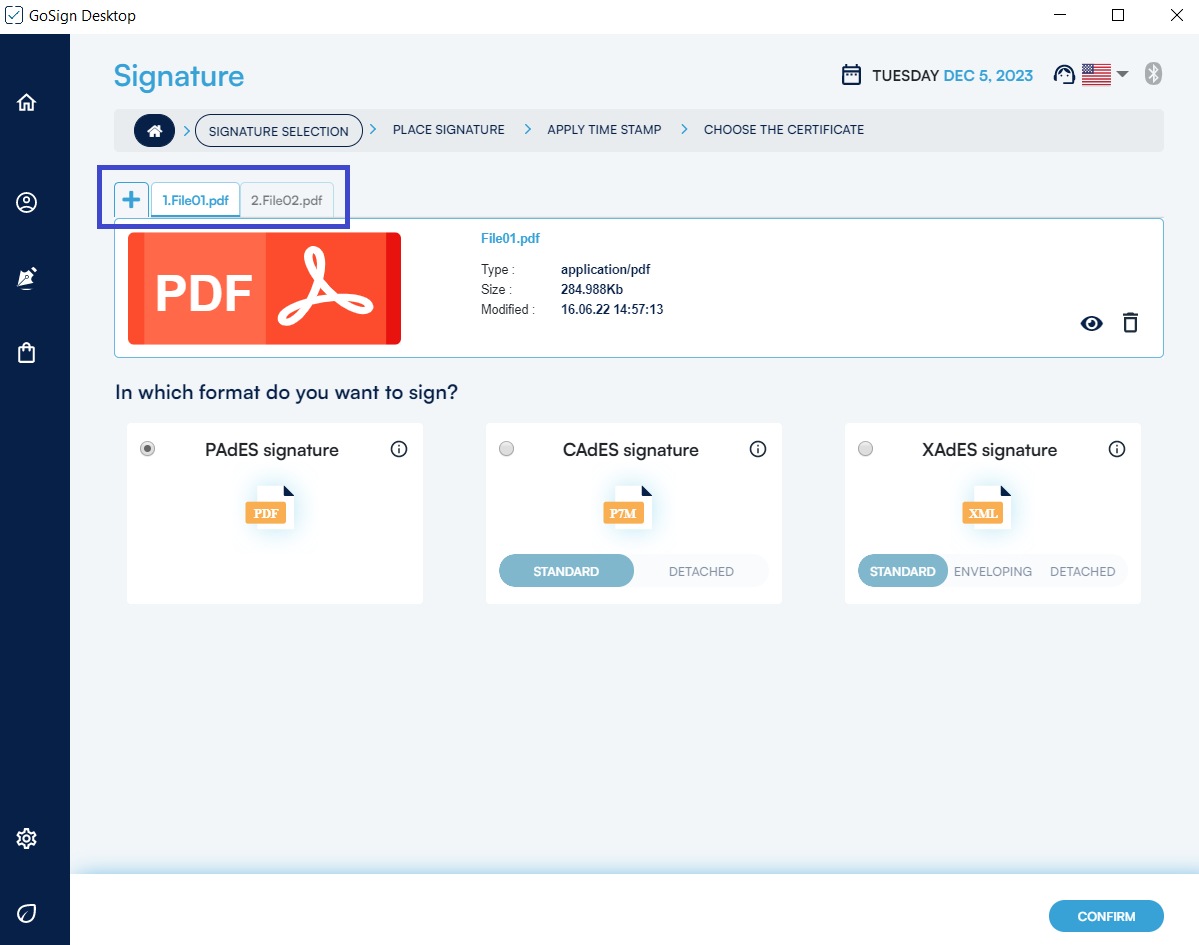
The Signature function available on the PRO version of GoSign Desktop allows you to select multiple documents to be signed simultaneously and to recall them within the software; up to 10 documents can be signed with a single OTP code.
You can select some or all of the documents contained within a folder and sign them with a single PIN authentication.
GoSign Desktop PRO shows you the details of the documents to be signed (name, type) and the possible ways of signing, which will depend on the type of documents selected. Since you are using GoSign Desktop PRO, you will have many view panes available (which contain the documents, allow you to scroll through them, delete them or view the file)
If you have selected an inhomogeneous group of documents (files with non .pdf / xml extension together with .pdf / xml files), you will be able to get signatures:
CAdES standard, recognizable by the additional .p7m extension whatever the original file extension;
CAdES standard but detached, recognizable by the further extension .p7s attributed to files that contain digital signatures.
You can move between the various documents by clicking at the top on the appropriate label containing the name of the single file.
If you have selected only documents with .pdf extension, you will be able to obtain signatures:
PAdES standard, recognizable because they will keep the original .pdf extension;
CAdES standard, recognizable by the additional .p7m extension added to the original file extension;
Standard CAdES but detached, recognizable by the further extension .p7s attributed to files that contain digital signatures.
If only documents with .xml extension are selected, the signatures that can be obtained are:
XAdES format, recognizable because they will keep the original .xml extension;
CAdES format, recognizable by the additional .p7m extension added to the original file extension;
CAdES but detached format, recognizable by the additional .p7s extension attributed to files that contain digital signatures.
A click on the Confirm button allows you to proceed.

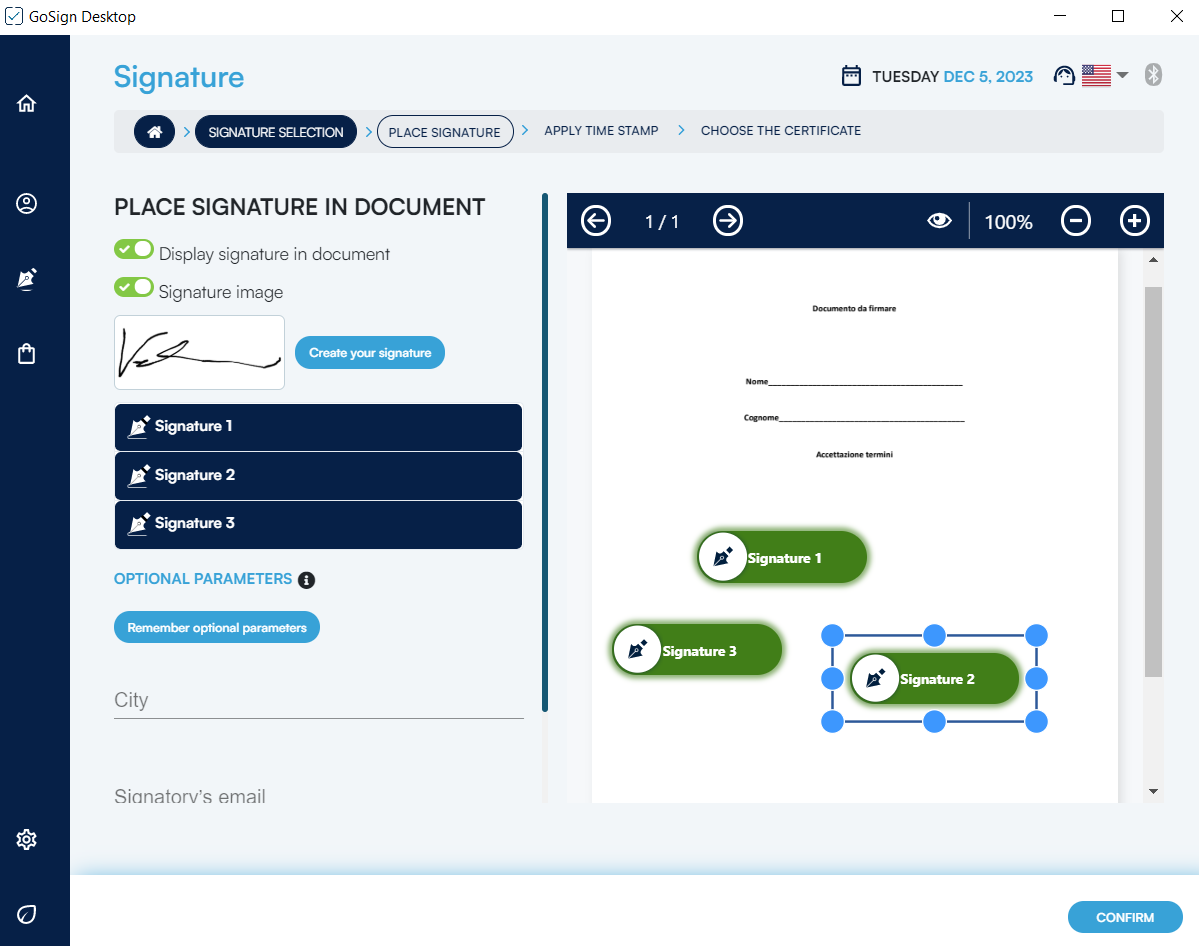
In the case of multiple signatures, if you select PADeS as the standard signature technology, the next step is represented by the positioning of the signature, which gives the possibility to: place the signature in the document, make the signature visible within it, insert additional information.
If you decide to apply the same settings to all documents, you will need to click Apply current settings to all documents. Otherwise, if you decide not to standardize the settings, you can switch between one document and another using the appropriate heels at the top.
Considering both cases, the features offered are varied.
First of all, make the signature visible within the documents. This is possible by activating the Enable checkbox and double-click to add signature; in this case, it is mandatory to apply the signature to the document through a double click on the preview of the document, otherwise it will not be possible to continue the Signing process.
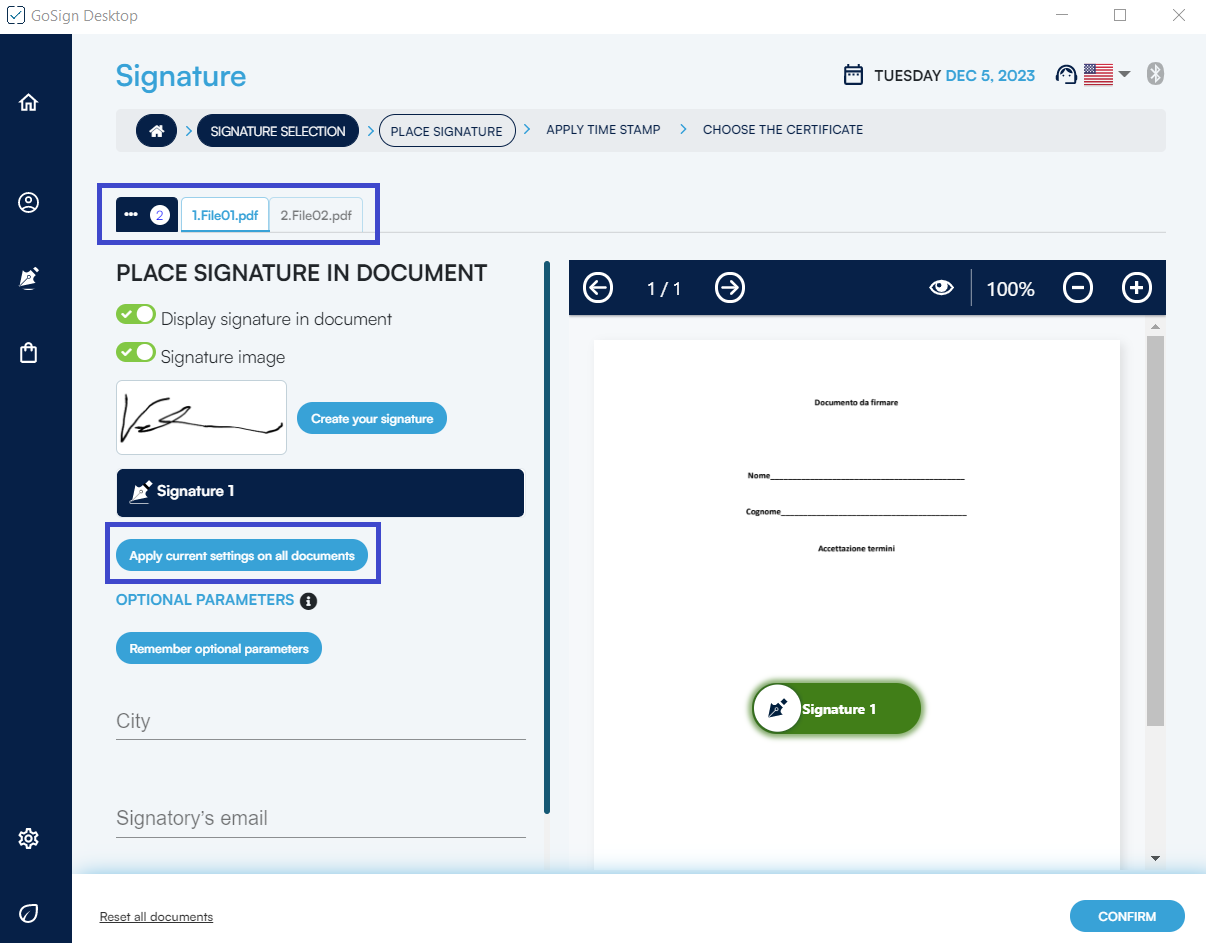
It is very important to keep in mind that this graphic sign has no legal value and is NOT my digital signature.
You can also enter, for one or more documents, additional information:
The locality;
E-mail of the one who signs.
To add more signature boxes, simply double-click on the pdf preview; to remove it, click on the trash can icon.
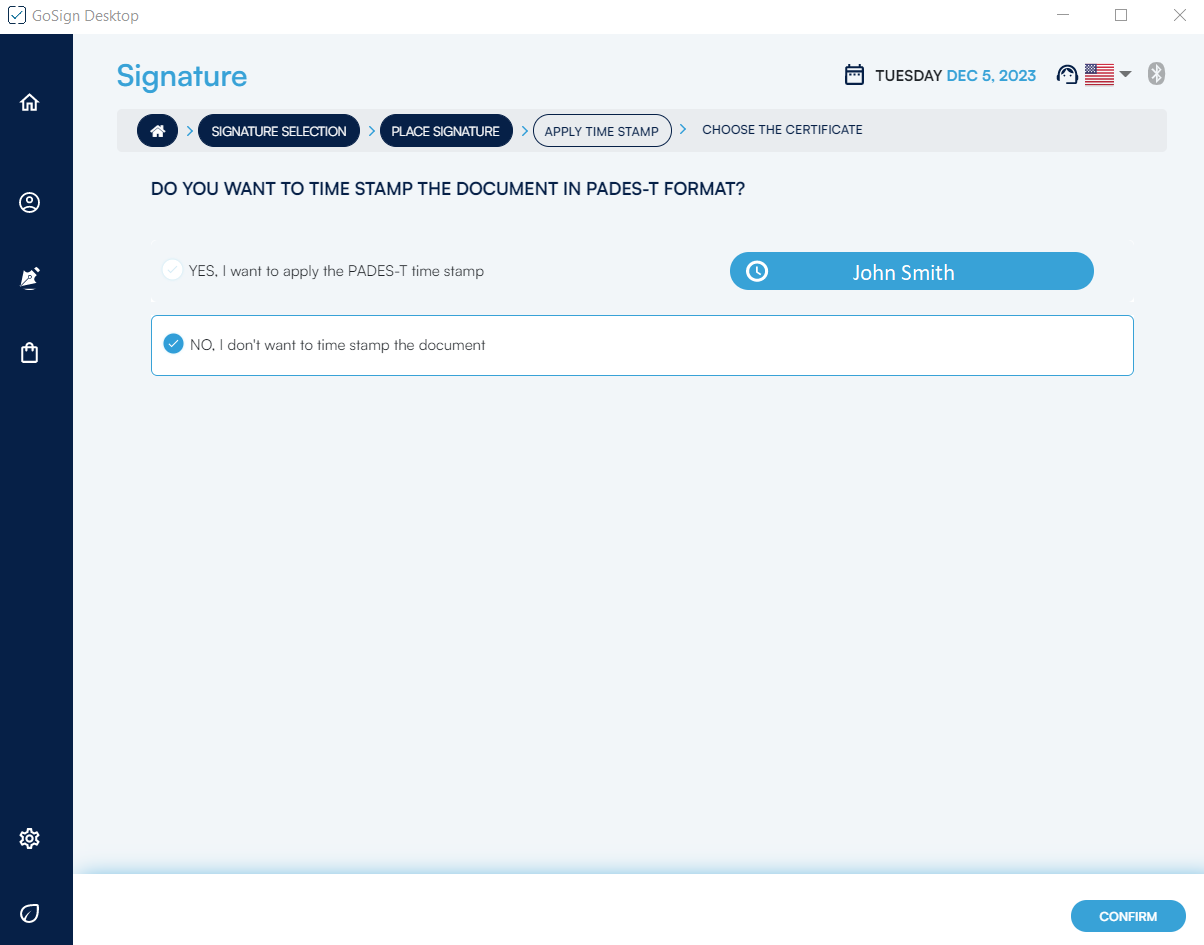
As with other signatures, once you choose the signature format, GoSign Desktop will ask whether or not you want to apply timestamp to documents you are digitally signing.
To apply a Timestamp, an account containing timestamps has to be configured. Once you have chosen if you want less to affix a timestamp you need to press the Confirm button to proceed to the next step.
Then, you will need to select the signing certificate to conclude the operation.
GoSign Desktop will confirm the signature on the last screen of the signature function process.
Over the years, the digital signature has considerably evolved: from a technological point of view but, above all, from a regulatory point of view. This means that today it is possible to find yourself dealing with documents signed with certificates issued in the face of a different legislation from the current one and with a validity influenced by the rules in force at the time of issue. To make the recognition of these different types of files more intuitive, GoSign Desktop uses icons of different colors.
By clicking on the Validate function available on the home page, it allows you to select the document to be checked, or more documents if we are working with an active PRO license and recall them within the software.
Once the document to be validate has been uploaded, there are two possible scenarios once the upload has been completed.
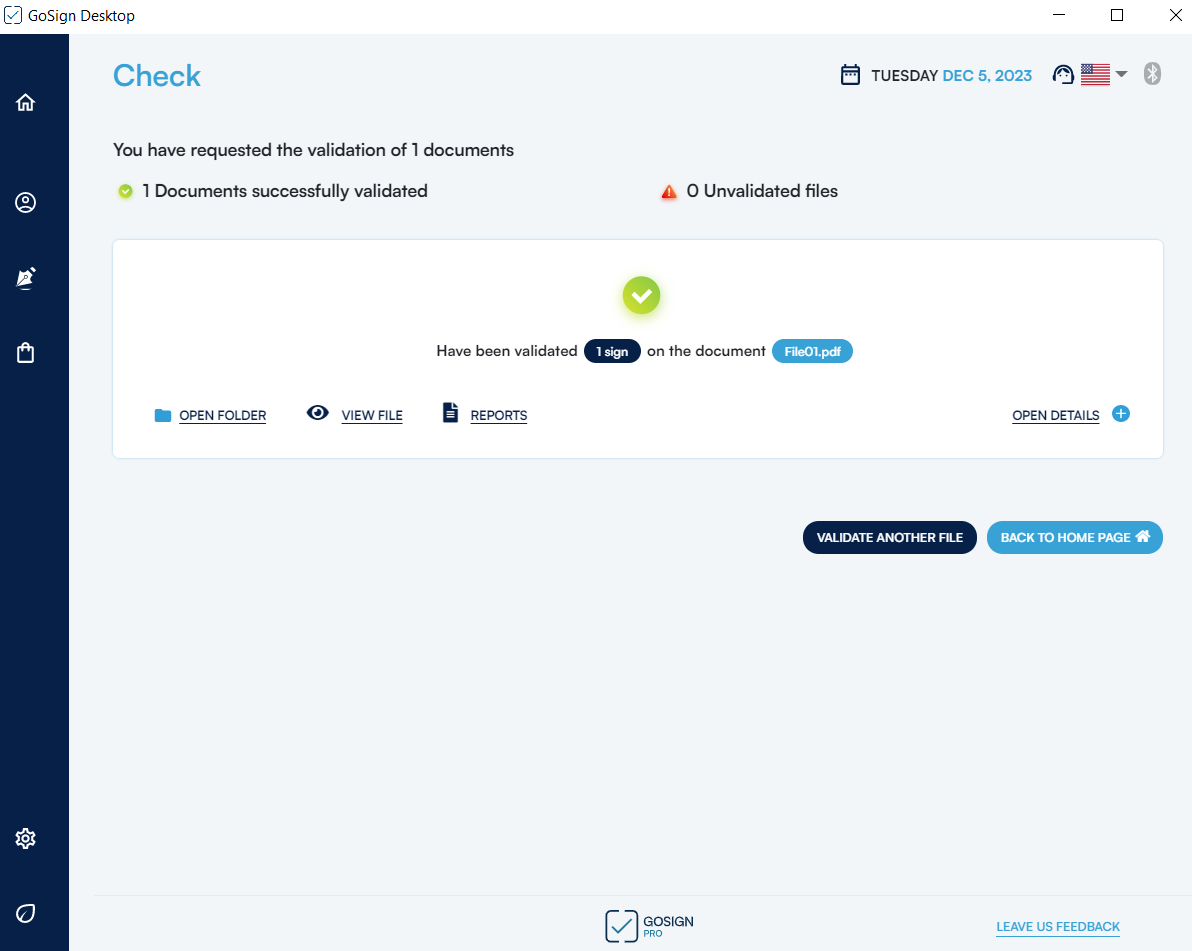
The Light Green icon indicates that the document has been successfully recalled by the software and has been able to verify the signatures and/or timestamps affixed to the document and signatures and/or timestamps have been found.
By opening the Details section, all the signatures and time stamps contained in the document are displayed and through different colors and icons, they indicate whether they have been fully, partially, or not verified.
By clicking on the eye icon, a popup window will open showing more information about the signature, the signer, and the certificate used to sign. The detailed information also includes the updated date of the CRL list, which provides information on revoked, suspended, or expired certificates.
The information will change according to the type of document:
1 If you select a document signed in PDF mode (PAdES standard), you will get more information about the signature, the signer, and the certificate used to sign as well as the details of the PDF signature: reason, place of signature, possible contact of the signer. If there is also a time stamp, I will also have information relating to the time stamp.
2 If it is selected from documents marked in .m7m format. These are documents that combine the signed electronic document and the relative time stamp which actually has the extension .tsr. For this reason, during the verification phase, it is not necessary to select the file to be associated with the time stamp.
3 If you select a document signed in XML mode (XAdES standard with GoSign PRO), you will get more information about the signature, the signer and the certificate used to sign as well as the details of the XML signature: date of signature as per workstation.
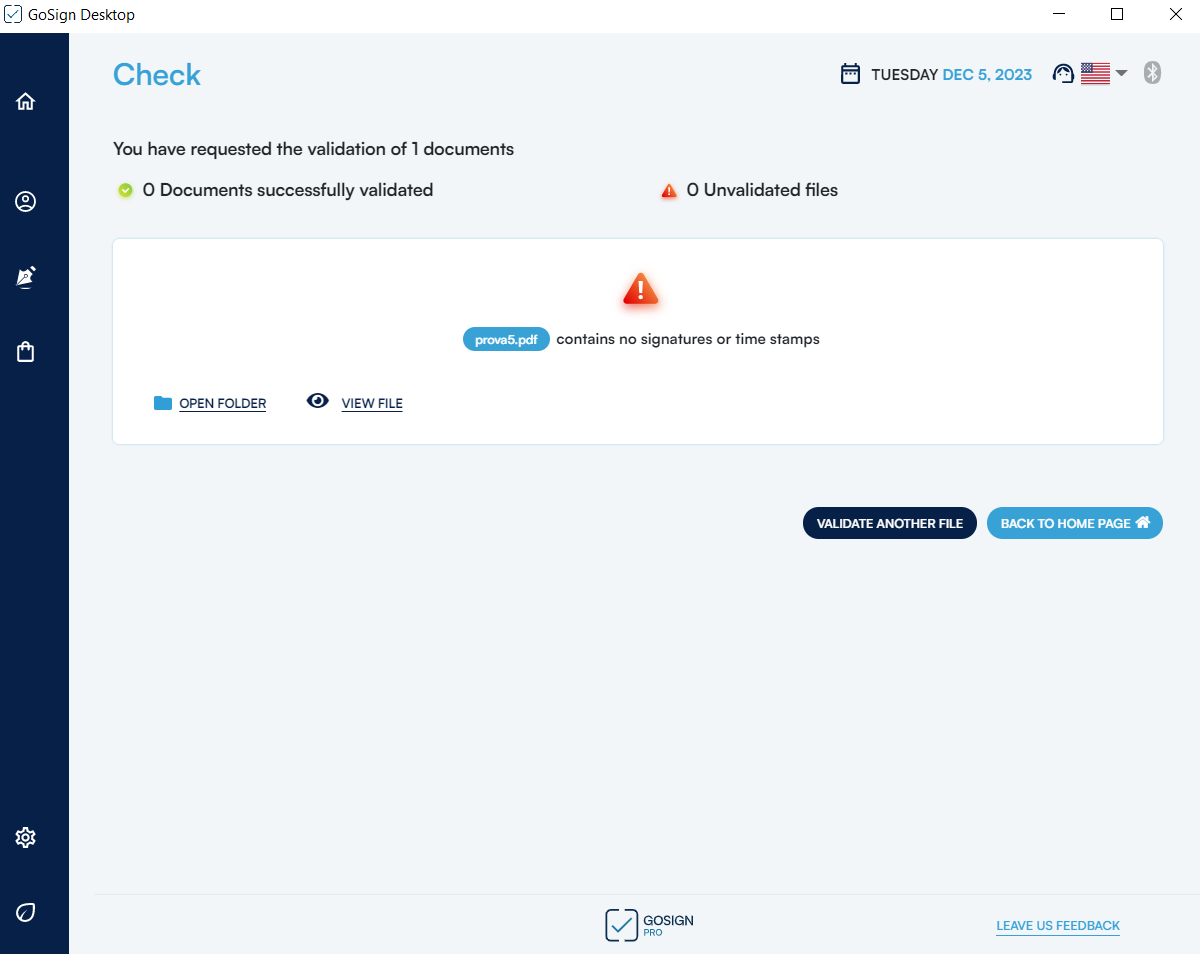
The danger icon indicates that neither signatures nor time stamps have been detected on the document; the document was in any case correctly recalled by the software and was able to carry out the verification of the signatures and/or time stamps affixed to the document but neither signatures nor time stamps were detected on the document.
Signature verification detail
Once the signature has been verified, by clicking on Open details, with the "+" icon, a further and thorough verification will be possible.
The green signature/time stamp icon indicates that the digital signatures and/or time stamps affixed to the document are fully valid under the current legislation.
The document, therefore, assumes full legal value both in Italy and in the countries of the European Community under, respectively, the Legislative Decree 7 March 2005, n. 82 - Digital Administration Code - with subsequent amendments and additions and of EU Regulation No. 910/2014 - eIDAS.

The blue signature/timestamp icon may indicate that:
the signature is valid but may not be recognized in Italy based on AGID Resolution 189 of 23 June 2017 and the EIDAS ETSI EN 319 412-2 standard since the use of the signature key is not among those allowed.
The signature is valid but the PDF signature format does not meet the minimum requirements of the eIDAS regulation (PADES-Basic signature, example shown in the figure).
The signature is valid but the CADES signature format does not meet the minimum requirements of the eIDAS regulation (Cades / Pades without SigningTime).
Signature with SHA1 hash calculation algorithm, not compliant with AGID Resolution 189 23/6/2017.
The timestamp was affixed using a SHA1 hash calculation algorithm, which does not comply with AGID Resolution 189 of 23/6/2017.

Once the verification has been carried out, it is possible to have a Verification Report and it can be obtained by clicking on the file icon next to the Report link. Clicking on the icon opens a browser page showing:
The document that was verified with its file path;
Date and time of the verification;
Data relating to verified signatures and/or time stamps.
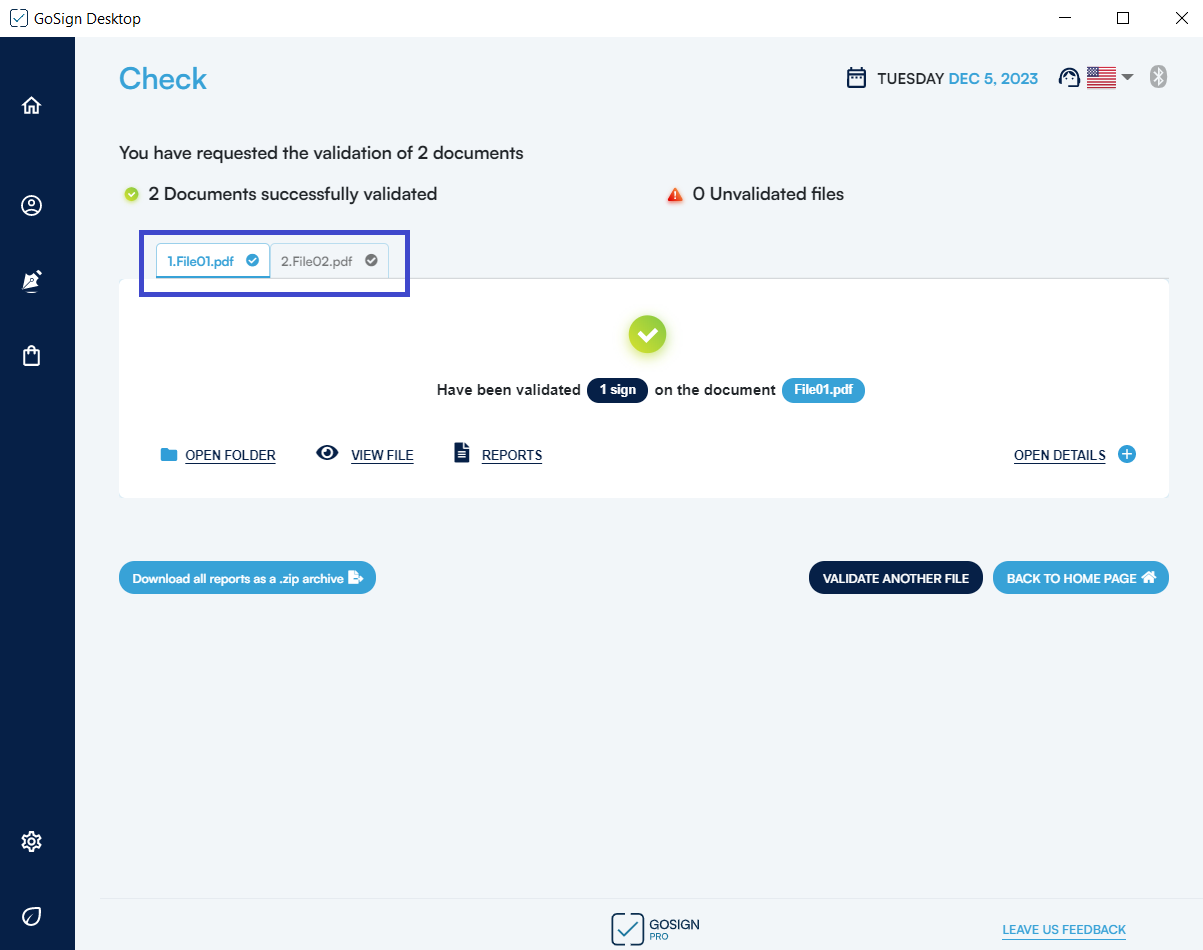
The Validate function available on the PRO version of GoSign Desktop allows you to select multiple documents to be verified simultaneously and to recall them within the software.
The GoSign Desktop PRO response is direct and consists of a summary of the verification outcome.
You can select only some documents contained within a folder or all the documents present - and check them with a single operation. You can submit documents signed with different signing methods to the same verification process. It will be possible to move from one file to another by clicking the label relating to the file at the top.
By clicking on the Open details option, you can check the status of the verification and by selecting the eye icon, you can proceed to get more information about the signature, the signer and the certificate used to sign.
If you have selected a document signed in PDF mode (PAdES standard), you will get more information about the signature, the signatory and the certificate used to sign as well as the details of the PDF signature: reason, place of signature, possible contact of the signatory.
If I have selected a document signed in XML mode (XAdES standard), you will get more information about the signature, the signer and the certificate used to sign as well as the details of the XML signature: date of signature as per workstation.
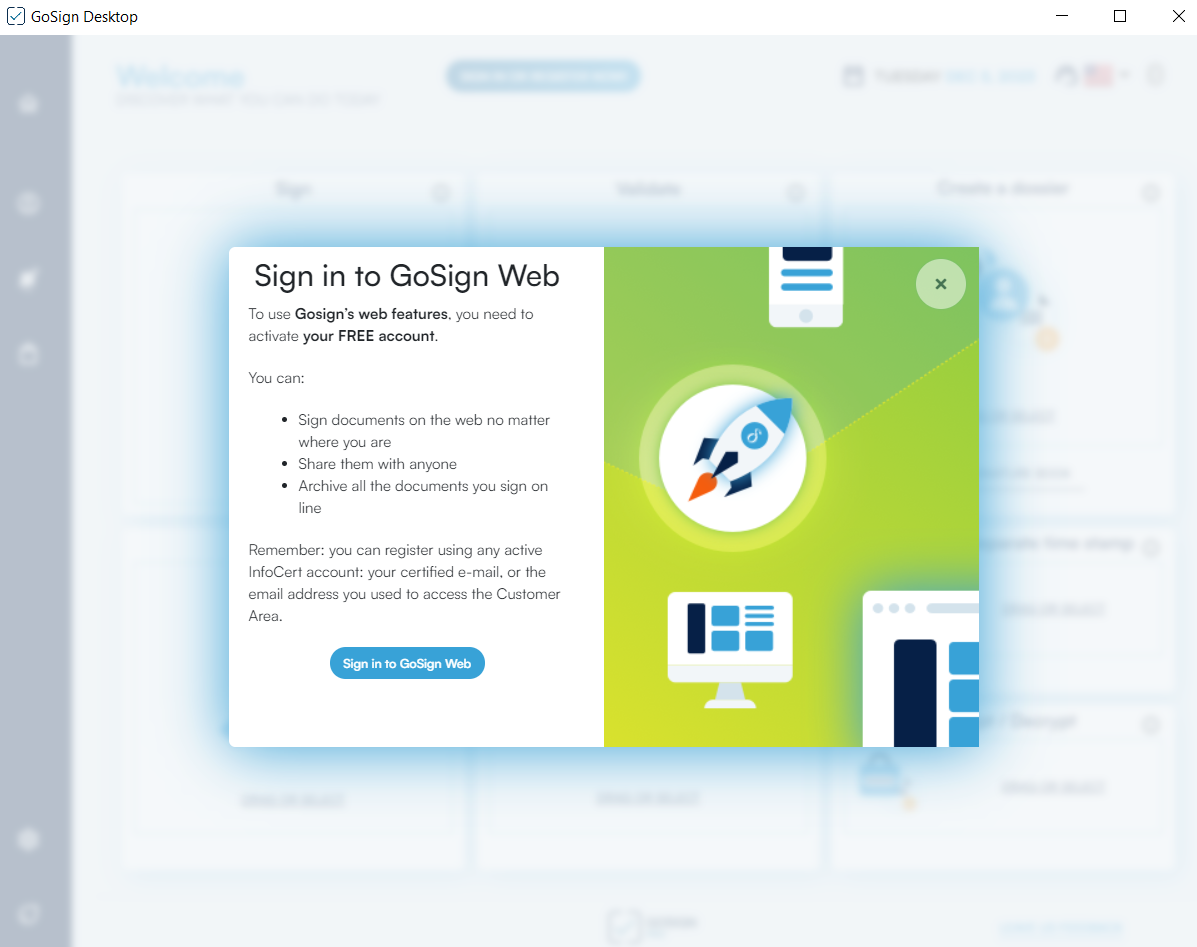
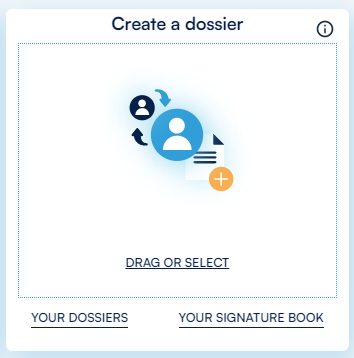
The Create a dossier is a function offered to all users who have logged into GoSign Web.
By clicking on the section Create a dossier without having logged in, a popup will be displayed in which the user will be asked to log in to GoSign Web.
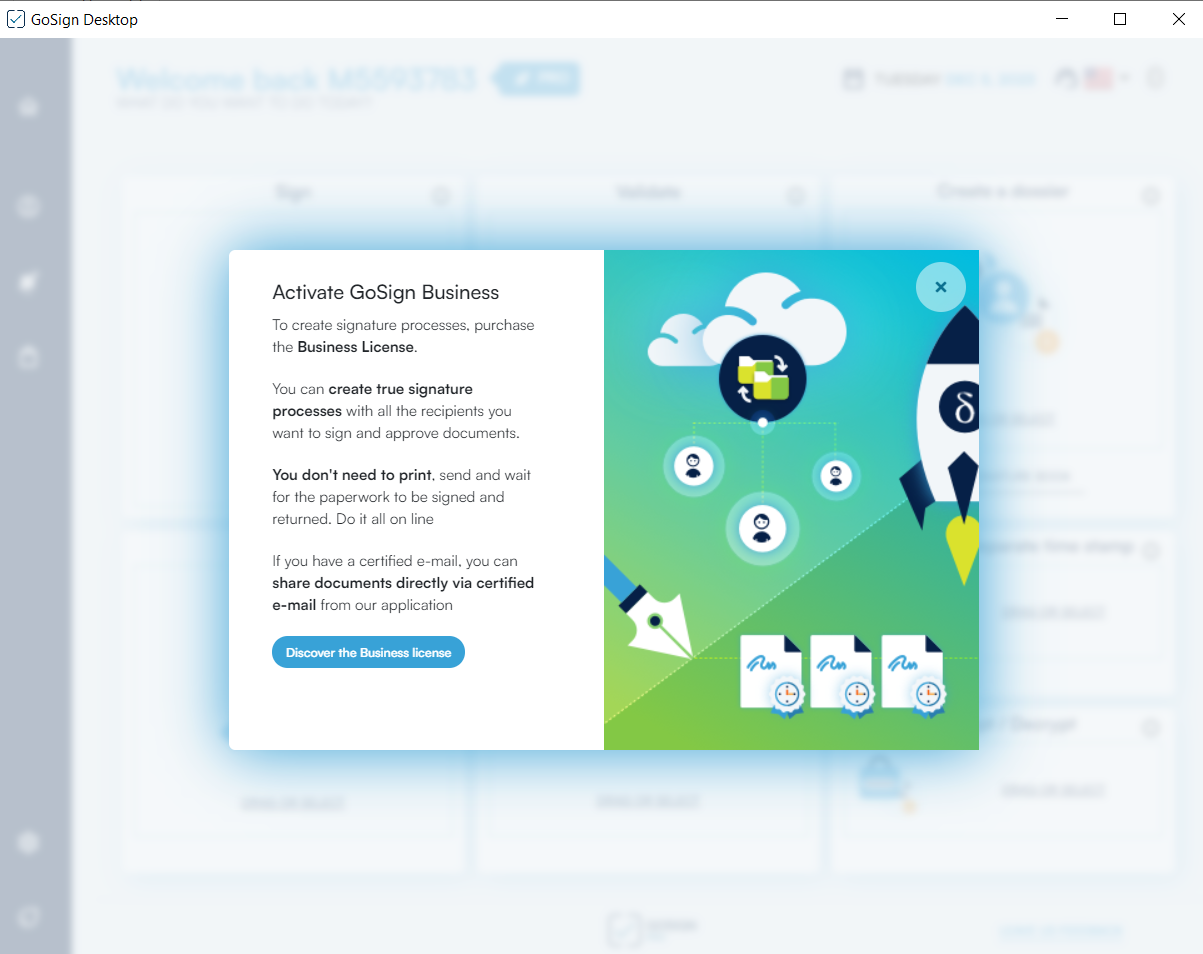
If you have already logged in to GoSign Web in the Free version, it is not possible to import a document on GoSign Desktop wit the option "Create a Dossier" because this is only allowed to BUSINESS users.
By clicking on the link YOUR SIGNATURE BOOK, you will be redirected to GoSign Web where you will be able to use some of the functions offered.
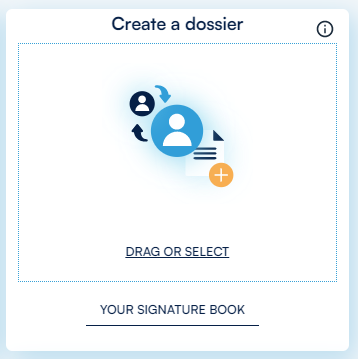
By clicking on the link YOUR SIGNATURE BOOK or on the link YOUR DOSSIERS you will be redirected to GoSign Web where you will be able to use all the functions offered.
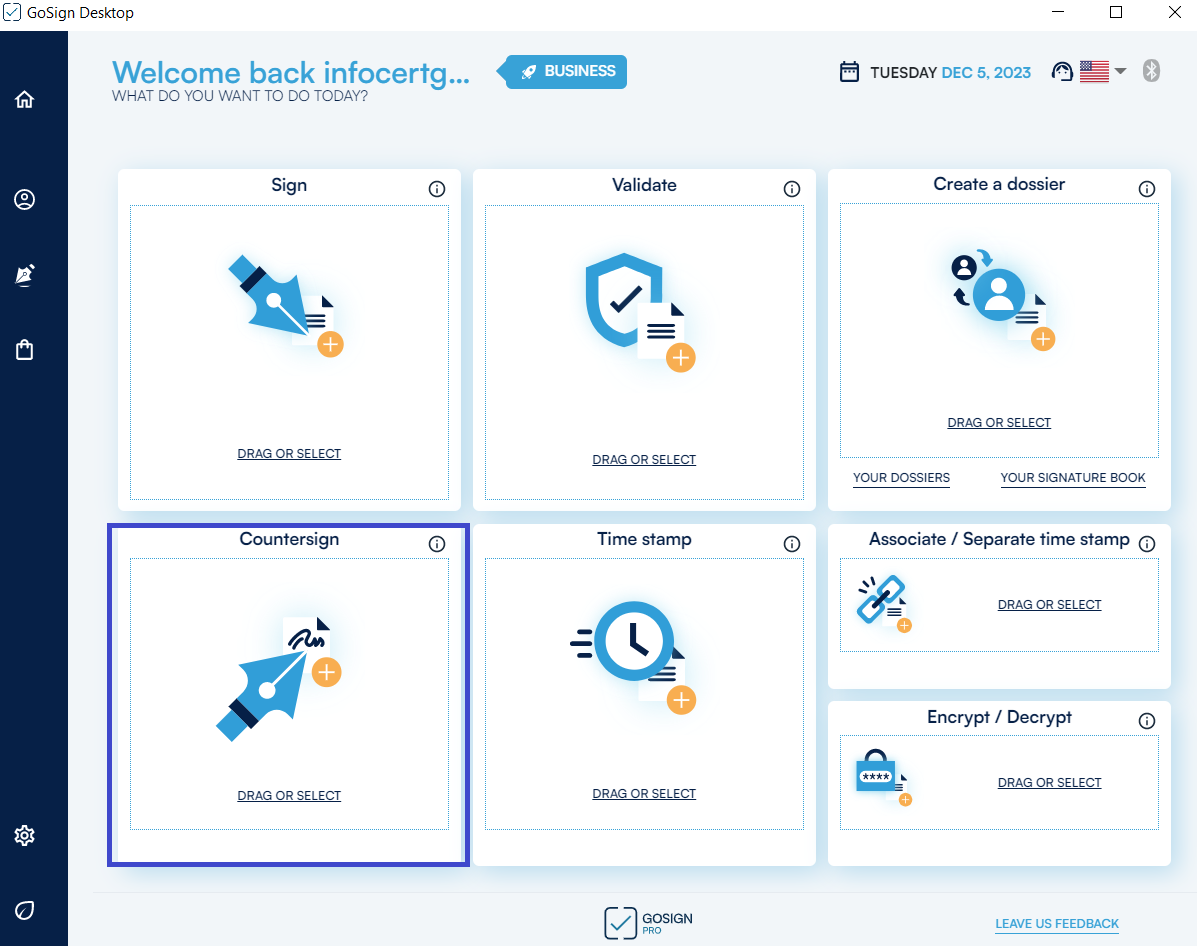
The Countersign function (available in the PRO license) allows you to create a series of digital signatures linked to a document.
It allows you to select one or more documents to sign and recall them within the software by clicking on the section of the home page dedicated to the Countersign function.
The user who receives a digitally signed contract can countersign it, in order to keep track of the sequence and hierarchy of signatures affixed.
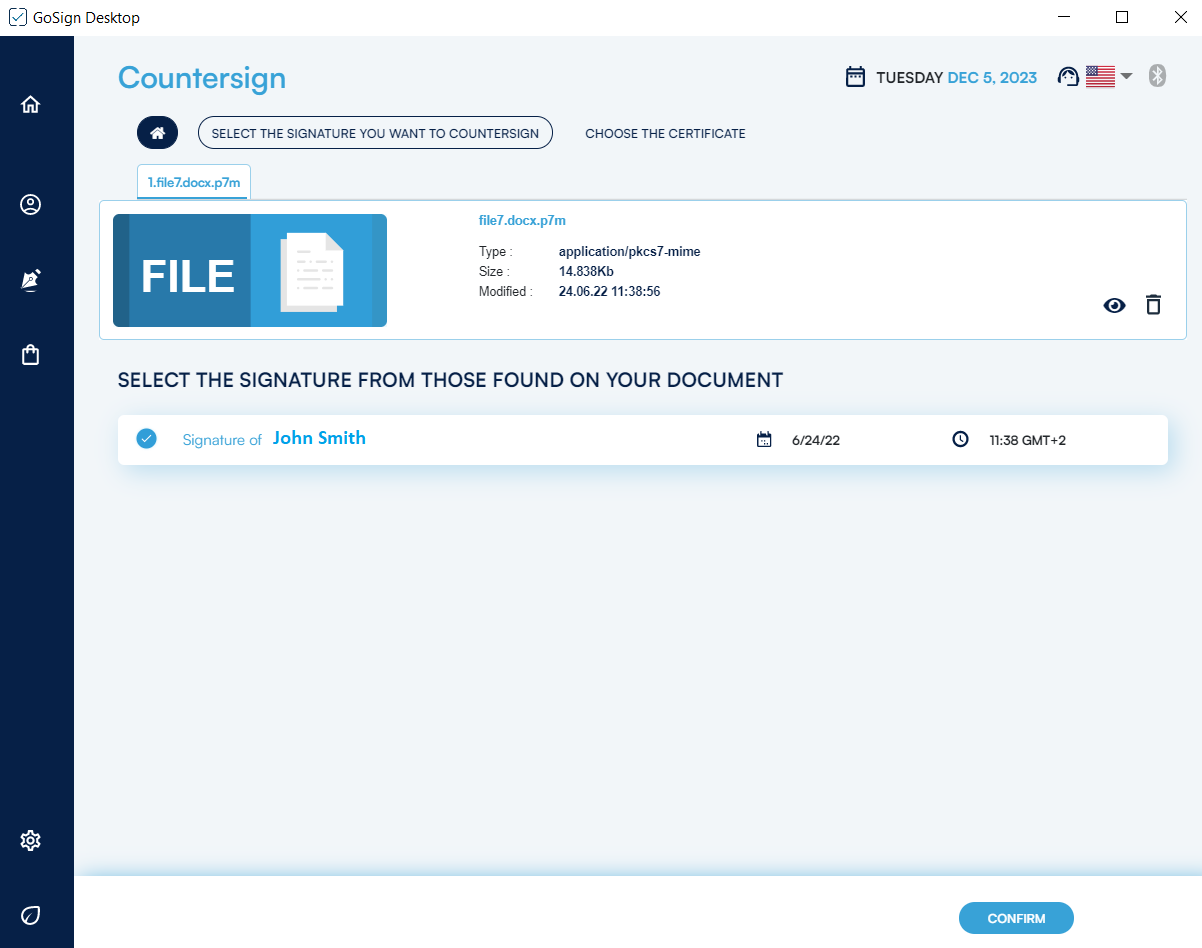
Subsequently, GoSign Desktop presents the details of the document (type, size, etc.) and, if necessary, the Open Document button (indicated by the eye icon) is available to display it as the Delete function (indicated by the trash can icon).
The list of all the signatures in the document is shown and gives the possibility to select the signatures that you want to countersign. Once selected, you can continue by clicking on the CONFIRM button.
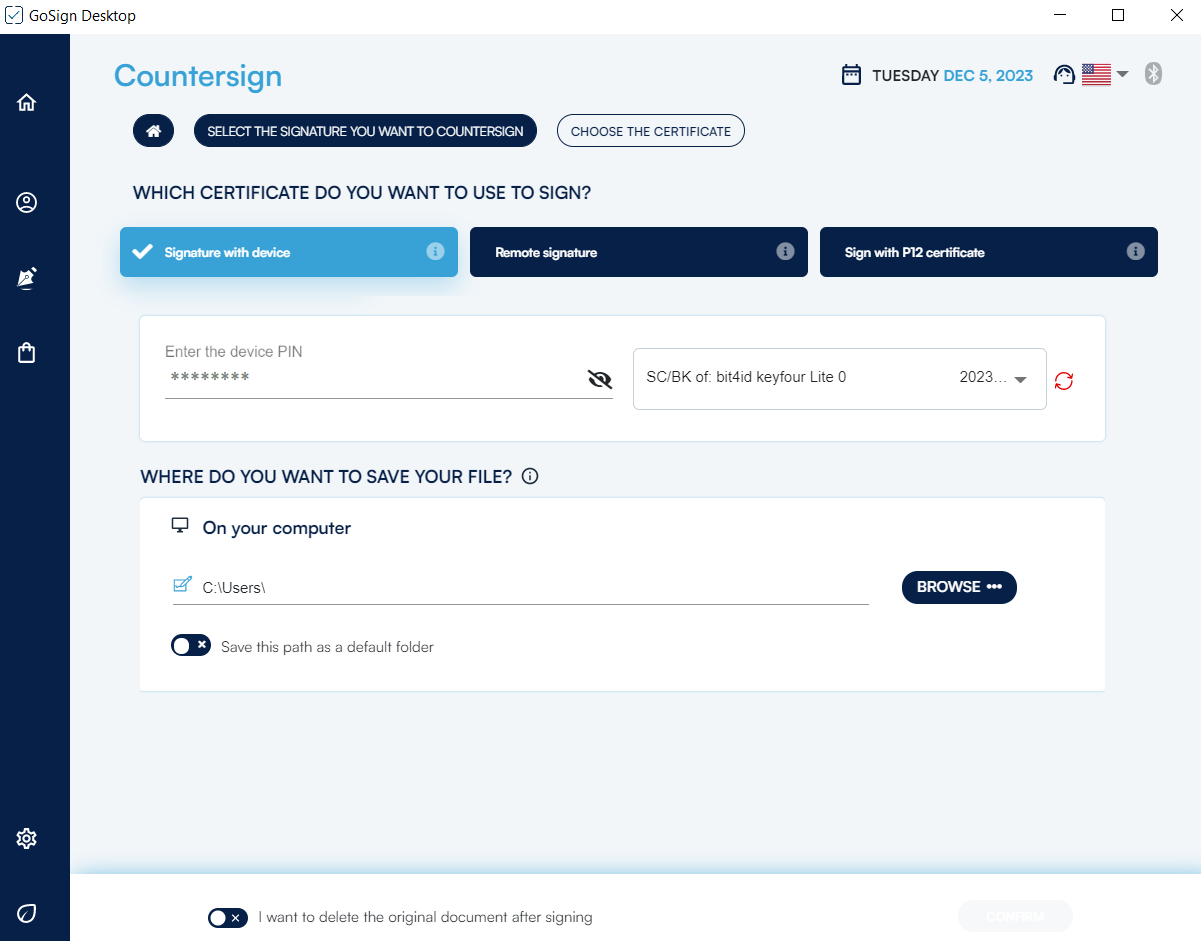
After selecting the signature with device option (Smart Card or a BusinessKey), you can proceed with the countersigning of the document.
Enter the security PIN of the physical device in the field Enter the device PIN and select the device through the drop-down menu. If no device is detected, by clicking on the refresh icon, a signature device connected to the PC will be searched again and if the result is positive the name will be displayed in the menu.
By default, GoSign Desktop PRO proposes, the overwriting of the original file, thus being replaced by the signed document. If you choose to overwrite the original document, you will be asked to confirm the operation. Otherwise, through the Browse button, it will be possible to change the destination of the signed document with the possibility of renaming it.
Once the destination of the document has been chosen by clicking on the OK button, the document overwriting process will be completed.
Countersign with a remote certificate
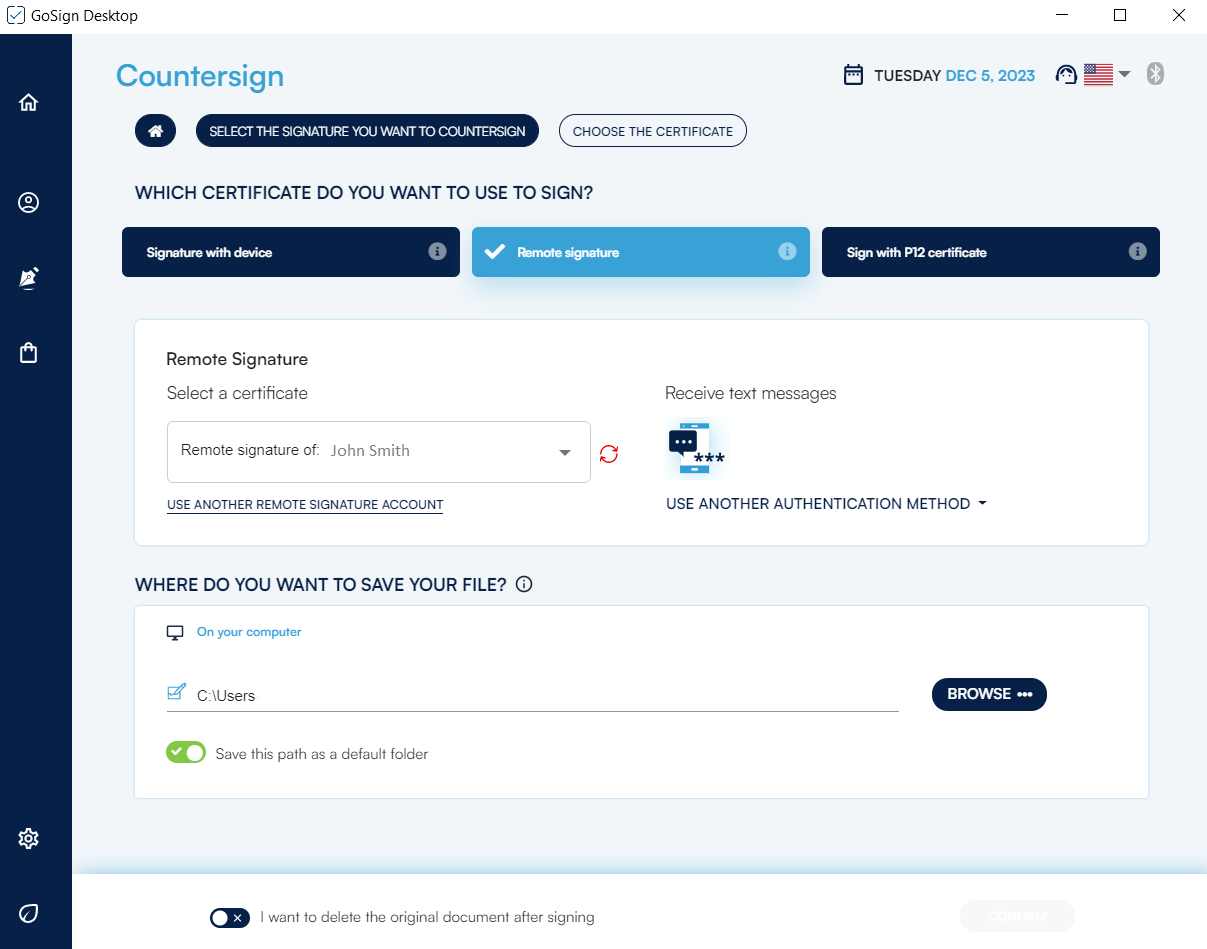
After selecting the remote signature option, you can proceed with the countersigning of the document by choosing the signature account and typing the PIN, the OTP and confirming the operation.
From the drop-down menu on the left, you can select the account you want to use for the remote signature. In the drop-down menu on the right, however, the authentication method must be chosen, the options are:
Receive SMS --> this method is possible when your mobile number is associated at the time of issuing the remote signature certificate, an OTP code will be sent via SMS which will be requested after the remote signature PIN has been entered.
Notification in the App- -> a notification will be sent to the app, once the app is clicked, the PIN relating to the app will be requested and the remote signature PIN is requested to confirm the signing process
Scan QR Code --> a QR Code is shown on the screen that must be scanned via the App, and its correct detection authorizes the signature
Generate OTP--> The screen asks you to enter the remote signature PIN. Then go to the OTP section of the app, enter the PIN relating to the app, an OTP code will be displayed.
The authentication methods are possible through MyInfoCert smartphone app, which will be configured with the credentials related to the remote signature.
Countersignature with Qualified Electronic Seal
If you want to use a Qualified Electronic Seal to carry out the countersignature, after selecting the remote signature certificate option you can proceed with the countersignature of the document by choosing the qualified Electronic Seal account with which to sign.
Like the other modes, GoSign Desktop proposes a possible path in the save target field, which coincides with the overwriting of the original document thus being replaced by the signed document. Clicking on Confirm will prompt you, through a popup window, for the password for the certificate.
Countersign with a software certificate
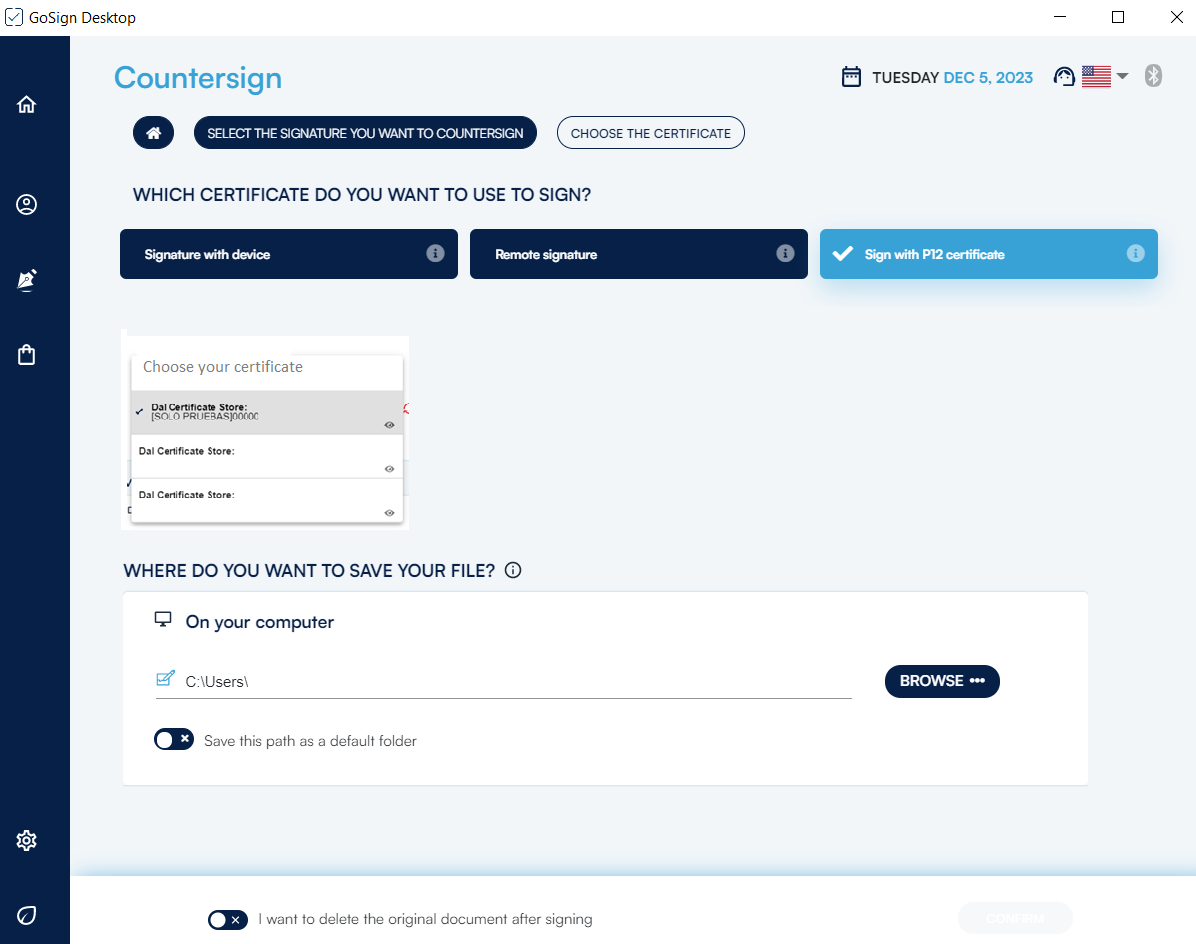
After selecting the software certificate option, you can proceed with the countersigning of the document.
After the drop-down menu, you will choose the P12 certificate (if not already configured) by clicking on the Signatures and Certificates section and there you can add a software signature certificate you want to use for signing the document.
Like the other modalities, GoSign Desktop proposes as default the overwriting of the original document, thus being replaced by the signed document. By clicking on Confirm, the password related to the certificate will be requested via a popup window.
Confirmation of the counter-signature
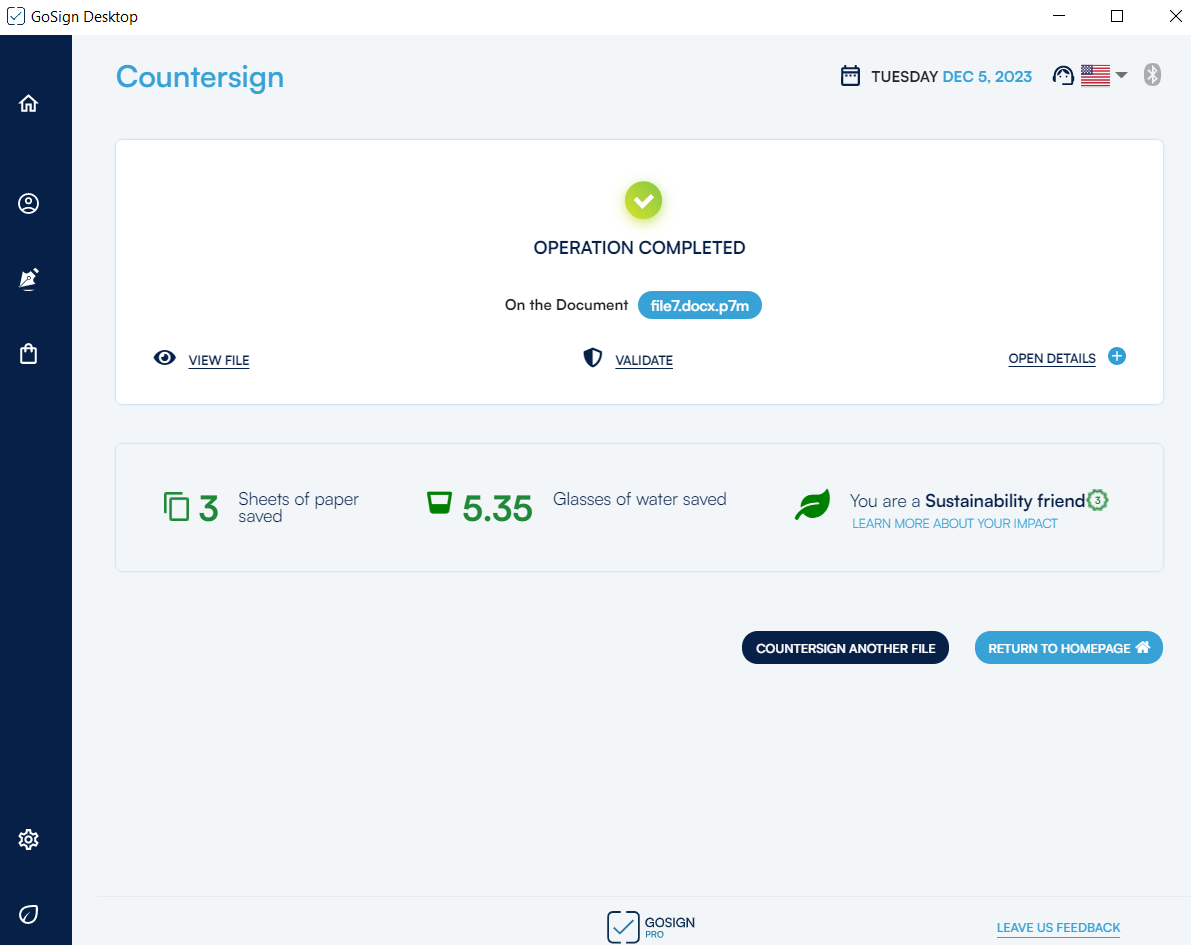
GoSign Desktop will confirm the successful completion of the countersigning process on the last screen. You can view the type of signature and which certificate was used. If necessary, through the view file function, you can open the signed document.
ASSOCIATE/SEPARATE is a function provided by GoSign Desktop Pro version and allows both to associate a timestamp previously produced in detached mode to the loaded document, and to separate a timestamp from the document it is associated with.
Upload document
By clicking on the Associate/Separate function, available on the home page, allows you to select the document from which you want to extract the time stamp or apply one.
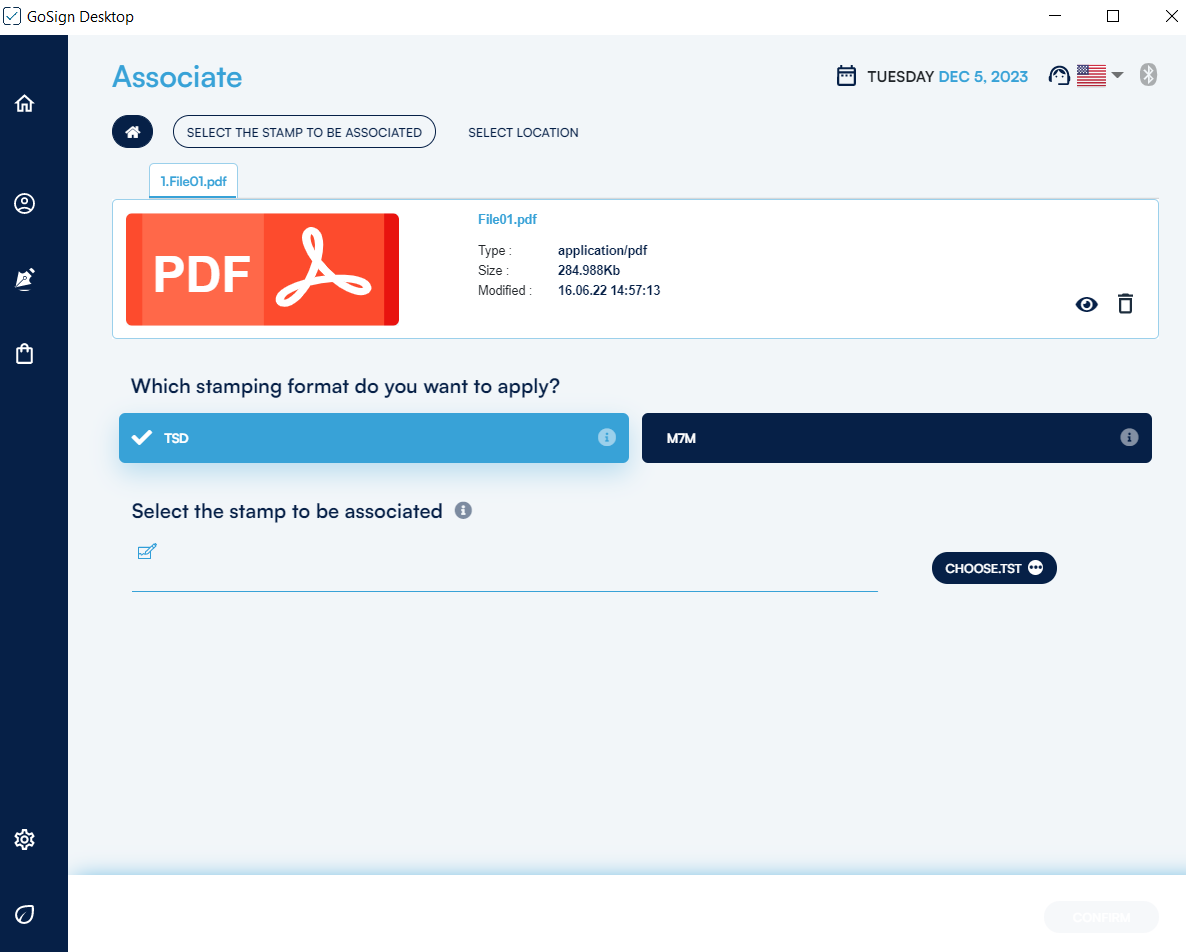
Once the document has been loaded, the details of the document (type, size, etc.) are visible and if necessary, you can Open the document by clicking on the eye icon and the Delete it, by clicking on the trash icon.
By choosing Associate timestamp (available with the PRO license), it is possible to associate a timestamp to a digitally signed file at a different time, still obtaining a single file that can have different file formats depending on the needs.
If a document to which no brand is associated is loaded, in addition to displaying all the information relating to the document, the time stamps formats are visible at the bottom of the screen:
.Tsd format. With this format, pressing the select TSD button will allow you to search in the files on the device only the time stamps with that extension.
Format .m7m. With this format, pressing the select M7M button will allow you to search in the files on the device only the time stamps with that extension.
Once chosen, by clicking on the CONFIRM button, you will be redirected to the final page of the association process where you will need to set where to save the time-stamped document, as always by default the folder in which the original document is present is set and based on the type of time stamp selected will return a document with the extension .m7m or .tsd.
The Separate Time Stamp function, on the other hand, allows you to separate, starting from a file in .tsd or .m7m format (available with PRO license), the original time stamp file.
In this case, a folder is generated that contains:
The original document with its original extension, where the time stamp was applied;
The timestamp in .m7m or .tsd format;
The virtual envelope (if the file is signed).
By default, the user folder is set as the destination, but using the Browse button you can decide on any other folder.
If the operation is successful, a message indicating the successful association will be displayed on the final screen. You can also view the newly generated document.
If you need to create documents that are accessible only through specific authorizations or to read documents that are encrypted by the recipients, GoSign Desktop provides the user with the ENCRYPT/DECRYPT function. Use encryption to perform a digital signature ensuring the confidentiality, authenticity and non-repudiation of your documents.
Through encryption you can protect your files with an access password, being able to choose different types of "keys" to encrypt your document.
With the PRO license, you can also use more complex encryption and protection algorithms:
Symmetric encryption/decryption through an editable algorithm, in AES-3DES-BF format
Asymmetric encryption / decryption using certificates on your device
Asymmetric encryption / decryption with software encryption from .p12 files
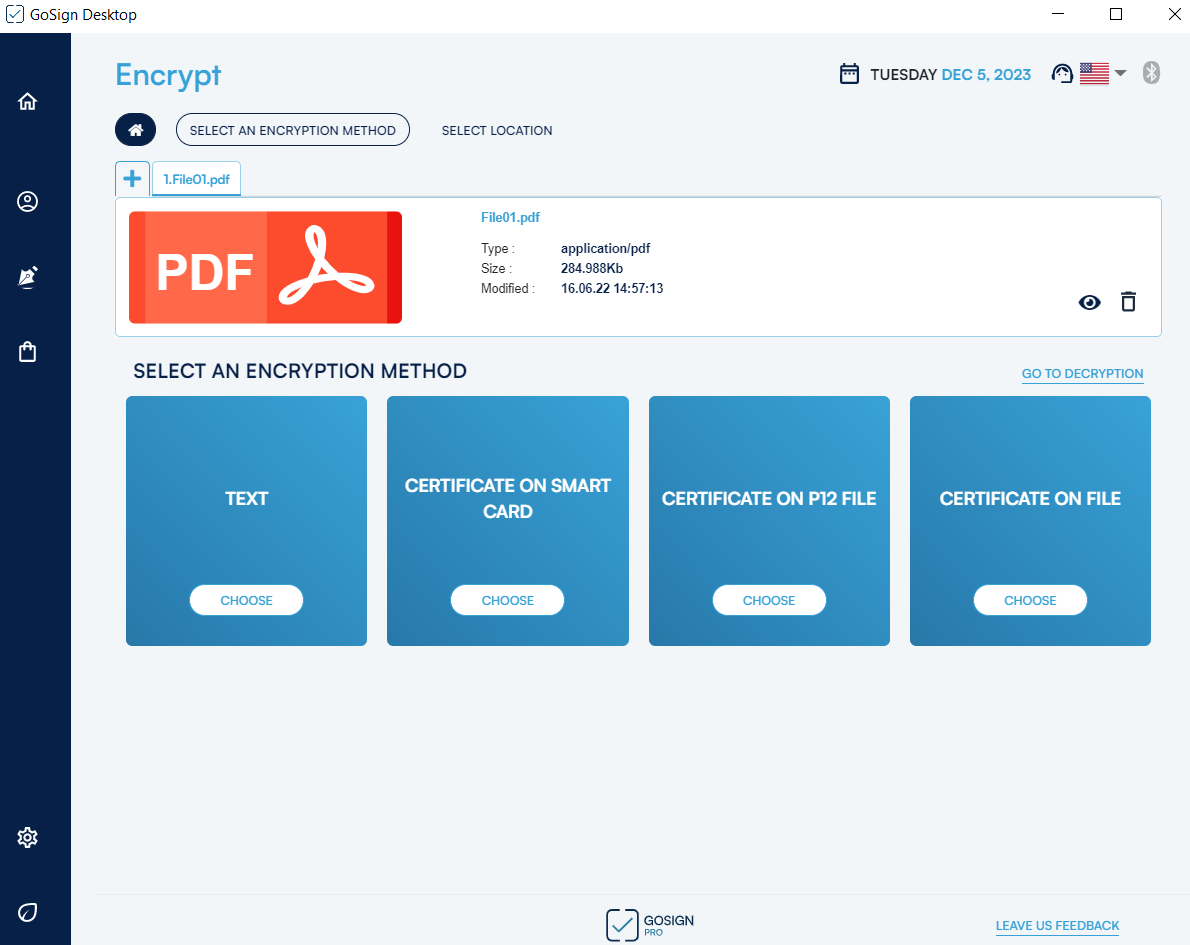
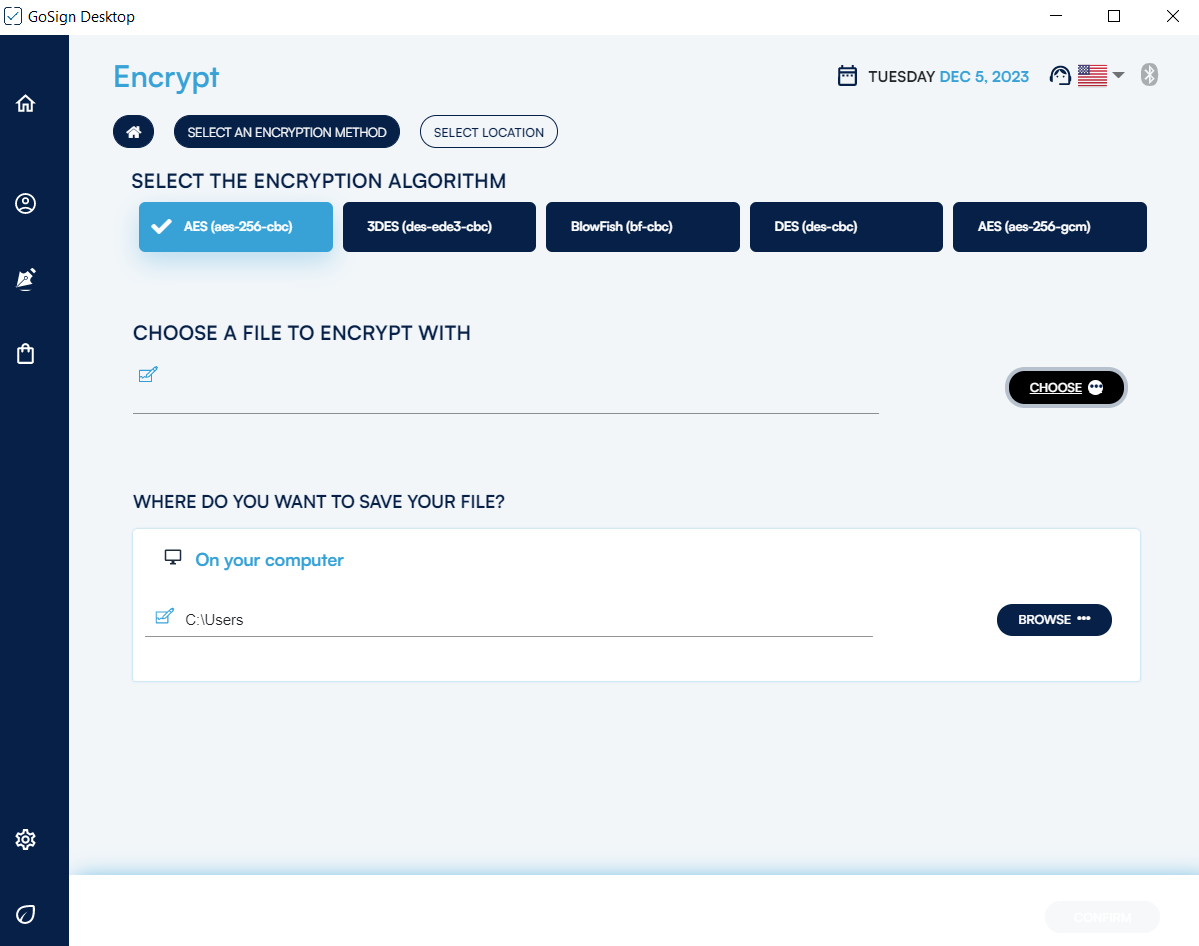
The Encrypt/Decrypt function allows you to select one or more documents (the ability to sign multiple documents at the same time is only possible in the PRO version) to be signed and recalled within the software by clicking on the section of the home page dedicated to the Encrypt/Decrypt function. GoSign Desktop, once the document has been loaded, presents the details of the document (type, size, etc.); you can Open the document through the eye icon and the Delete it through the trash icon.
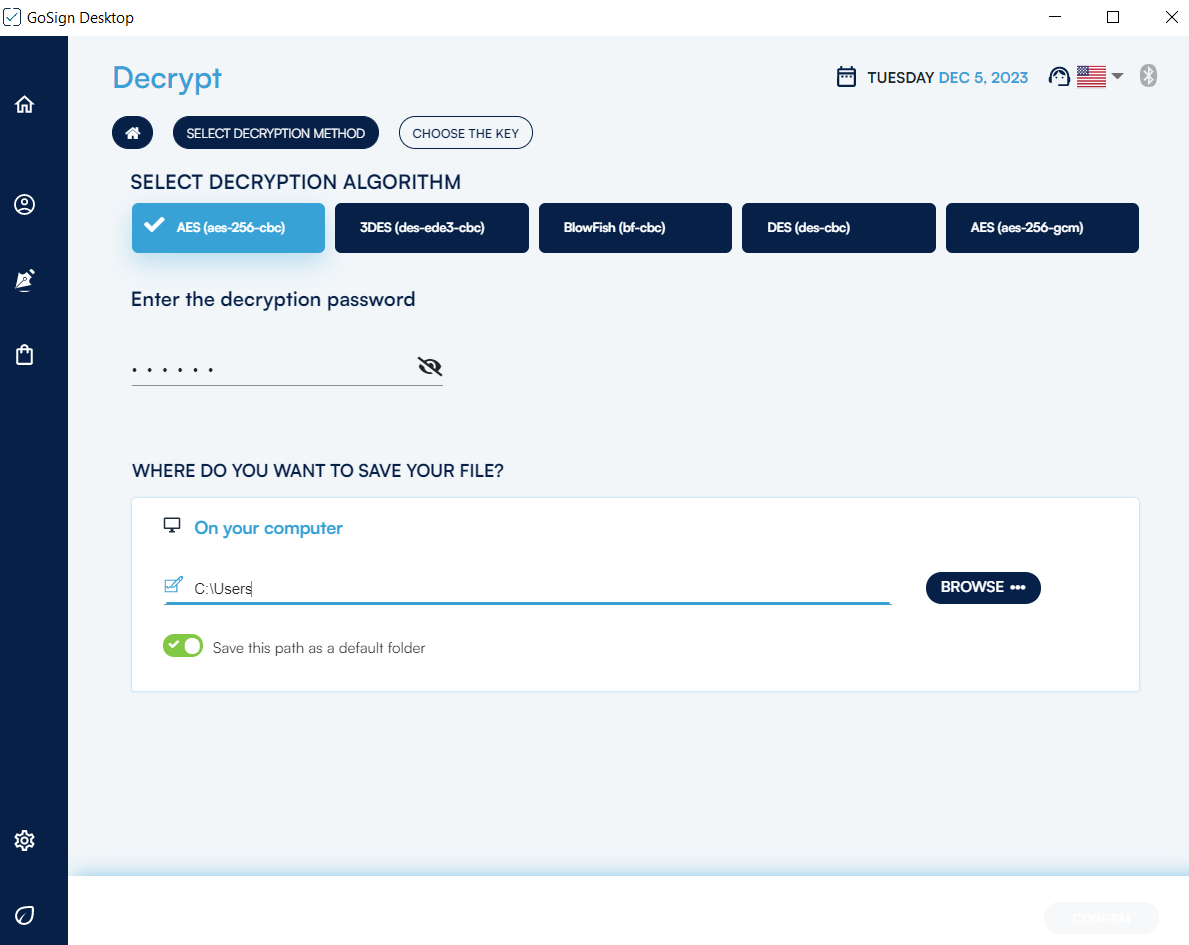
In the lower part of the screen, all the document encryption methods are listed. You can choose between:
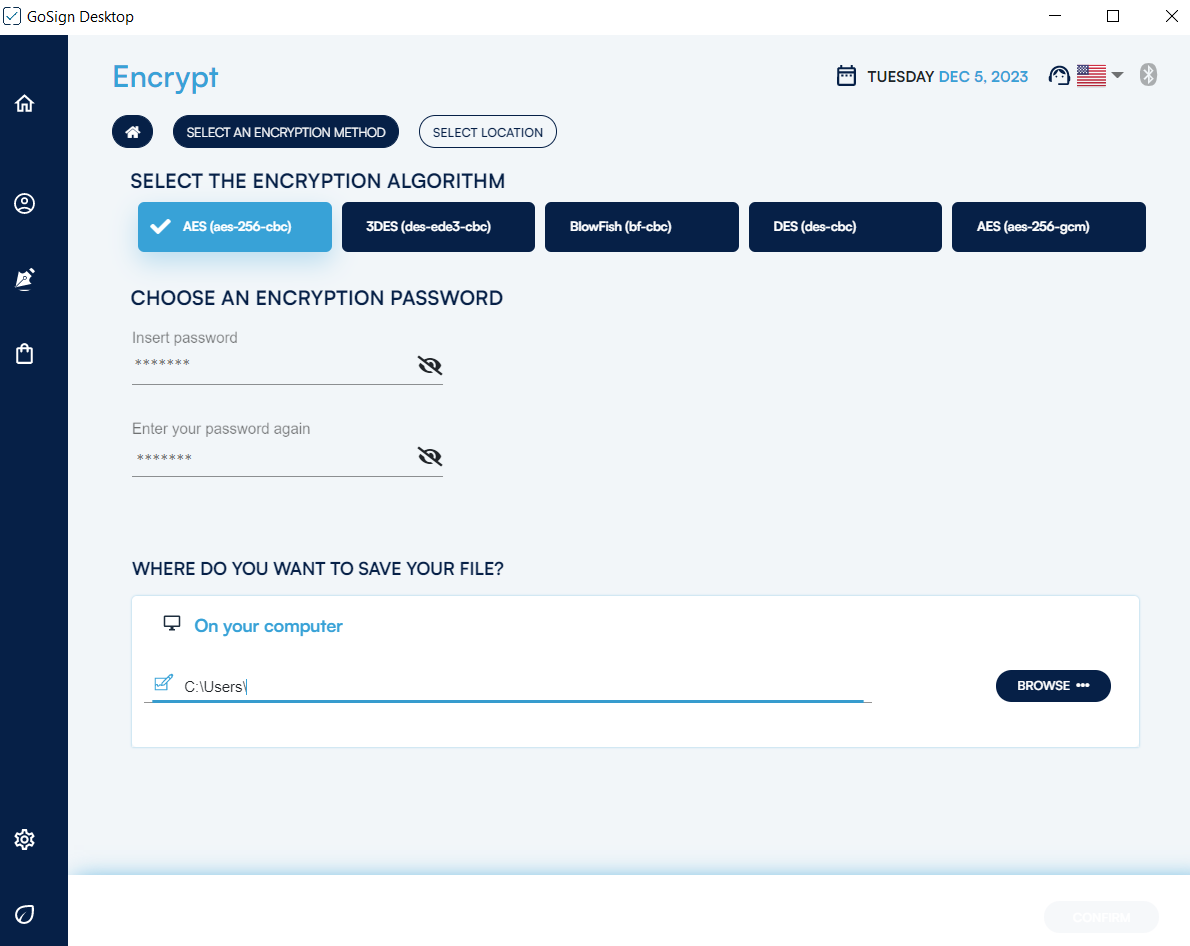
No minimum criteria are imposed on the choice of the password (neither as regards the number of characters, nor the presence of numbers or special symbols). Once the password has been decided, click on the CONFIRM button to continue with the function.
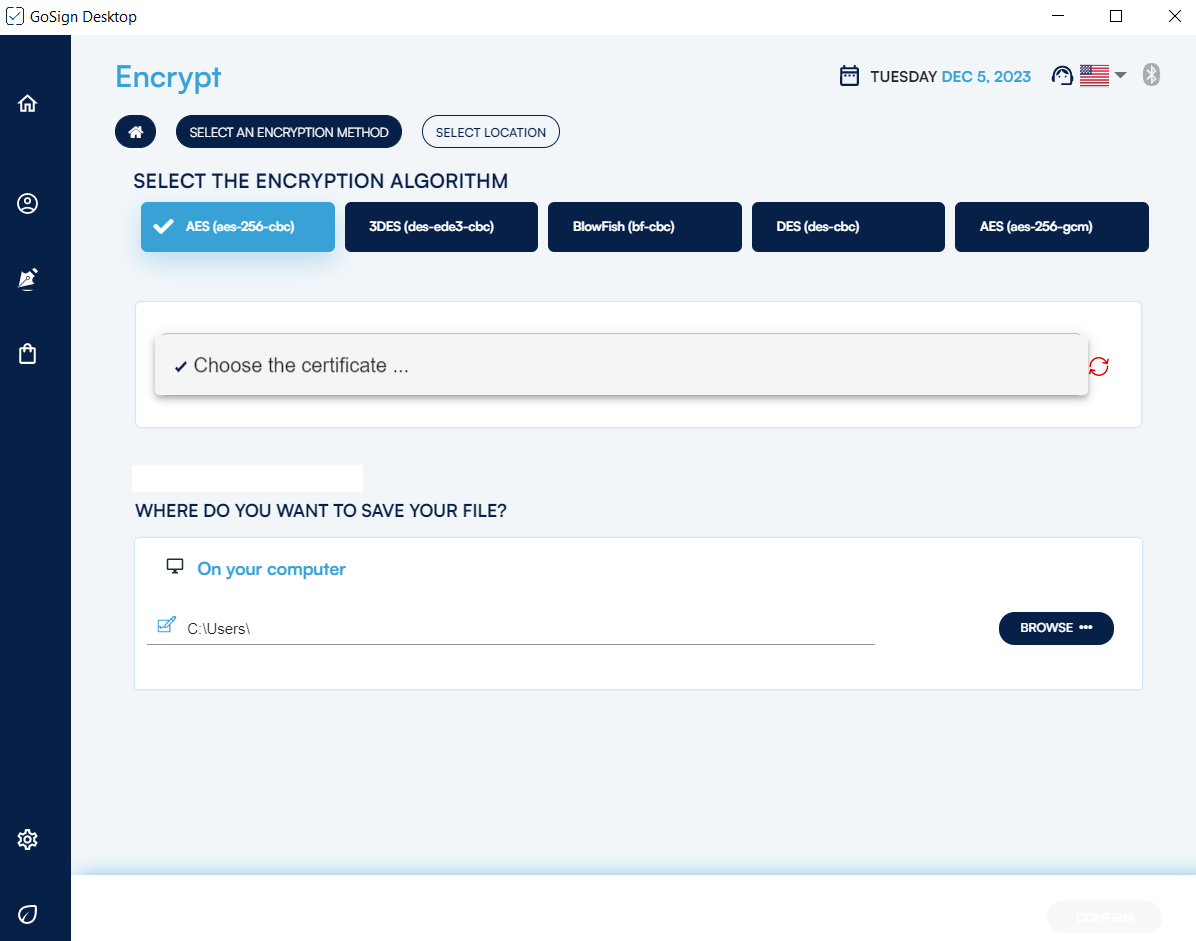
Once the smart card has been detected, to complete the process it is necessary to choose the certificate, enter the device PIN and click on the CONFIRM button.
It is possible to choose the encryption algorithm among those present (respectively AES, 3DES, BlowFish, DES, AES_GCM).
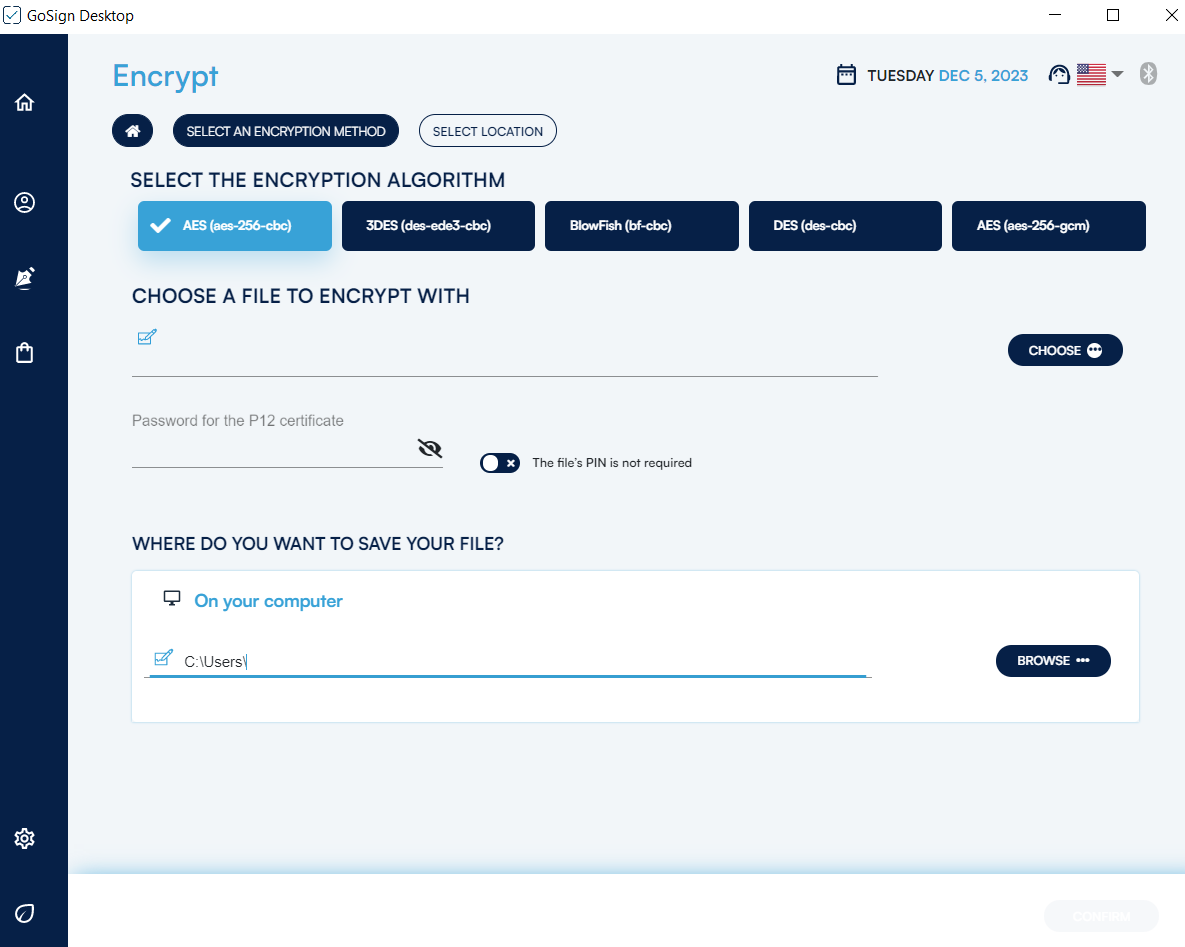
By clicking on the BROWSE button it will be possible to load the .p12 files. Once uploaded, the certificate password will be requested, and then just click on the CONFIRM button to continue.
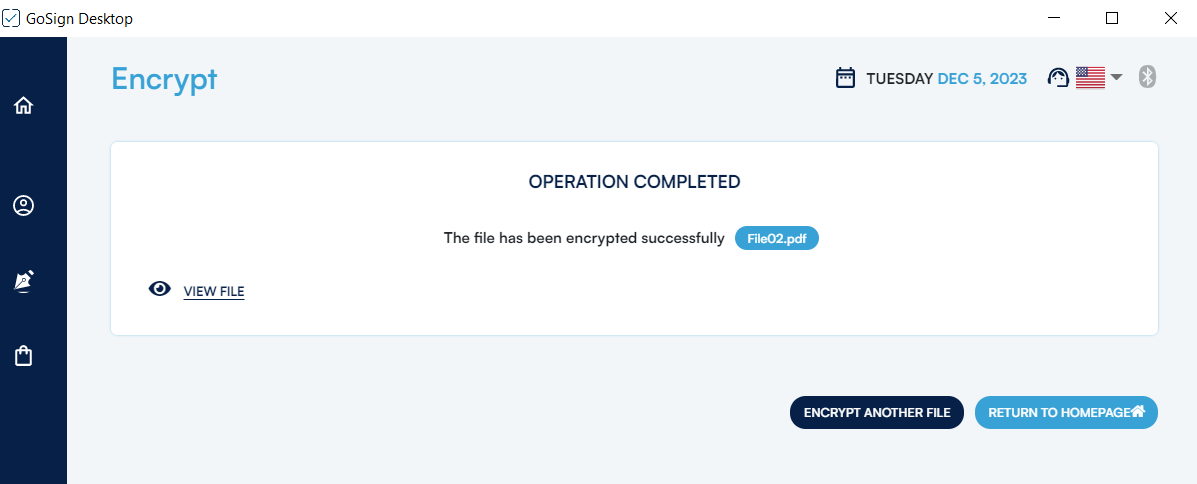
Once you have clicked on the CONFIRM button, GoSign Desktop PRO will show on the screen whether the process was successful or not.
Once the document encrypted with one of the technologies supported by GoSign Desktop has been imported, it will be possible to decrypt it by entering the correct password.